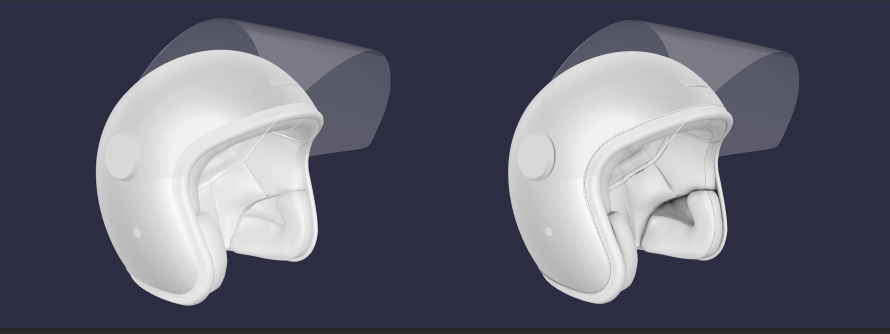
Ambient Occlusion(AO), or Ambient Shadowing, is a type of texture and rendering technique used to create more realistic 3D models. Essentially, ambient shadows are added between close objects or geometry within each 3D model to add a subtle yet important amount of detail to them. Without Ambient Occlusion, your models may appear flat and feel somewhat empty or fake. See below. Though Ambient Occlusion is often generated automatically in 3D toolsets or even in some game development platforms, understanding how to create your own static AO textures will give you the added advantage of fine-tuning exactly how your models look. Not only that, but you can drastically improve the performance of your platform by using static over generated AO.
Baking Ambient Occlusion Textures in Blender
Creating ambient occlusion textures in Blender manually, compared to platforms like Substance Painter at least, can be time-consuming although relatively straightforward. Let’s begin by setting up our ‘bake’ object and materials. Select the 3D object that you want to add AO to, and clone it with SHIFT+D. Hide the original version with the eye icon in the outliner, as well as the camera icon to disable it from rendering, then rename your new object “Bake”.

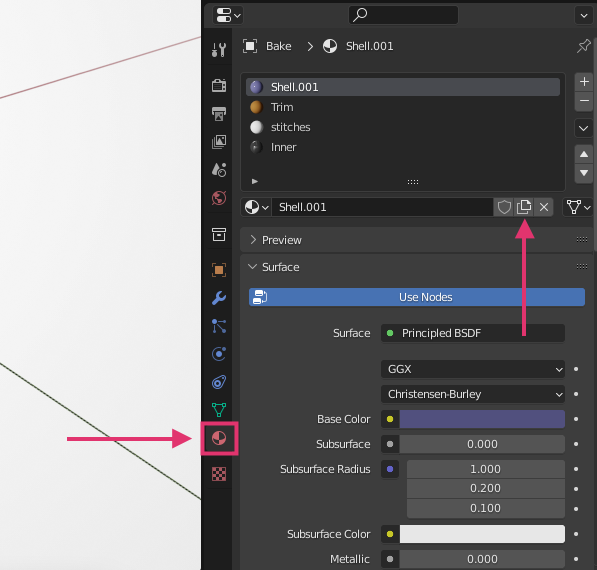
With your new object selected, you can access its materials through the properties panel. From here, you can create a new clone of each material with the copy icon seen below. This isn’t entirely necessary but it helps to keep your original materials clean. Use the textbox next to this copy icon to enter a new name for each, or leave it as “.001”. We’ll name ours “MaterialName_Bake”, so “Shell_Bake” for example.
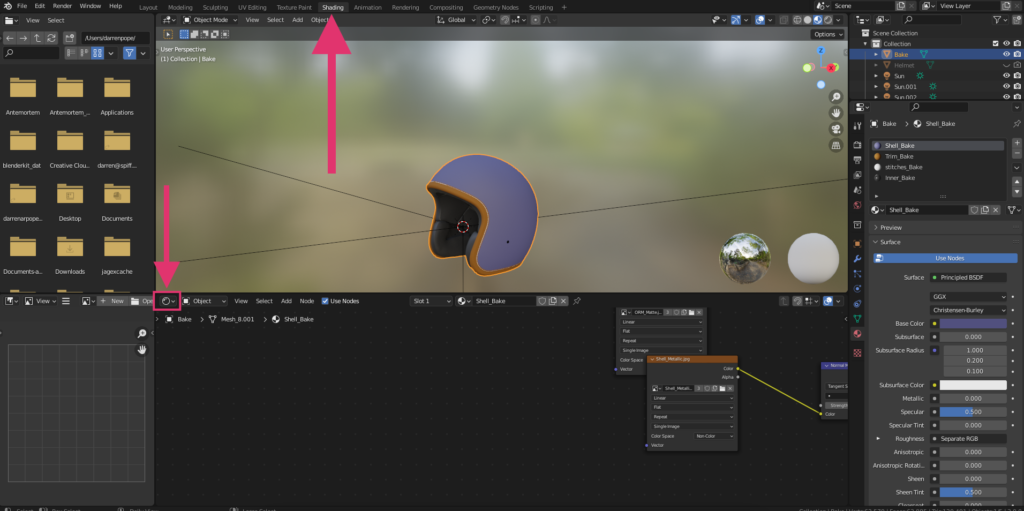
Now that you have cloned your materials (if applicable), access the “Shader Editor” panel. This can be done by either changing the panel type in the top right of any section, or you can switch your workspace to “Shading”, with the top bar. Reselect your model and access the materials panel again if switching workspace.
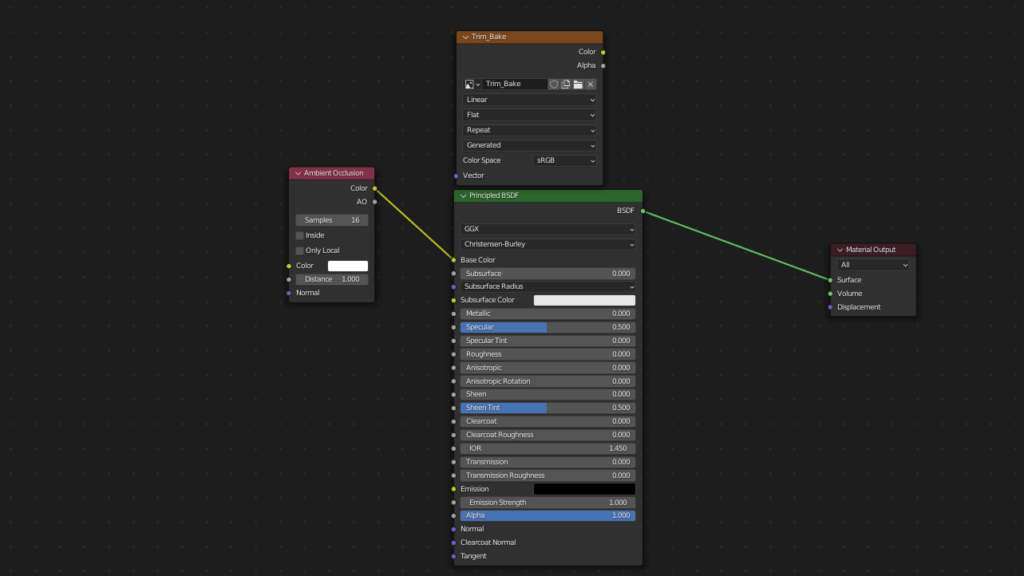
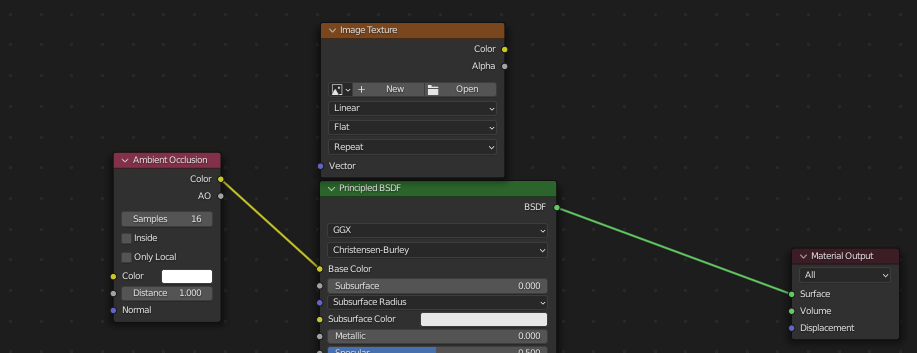
Next, we will build our bake materials. With your model’s first material, in our case “Shell_Bake”, use the Shader editor and use the SPACE bar key to bring up the node search tool. From here, use the search function and look for “Ambient Occlusion”. Once you’ve found it, simply click it to create it in your material. You will see it appear with a “Color” and “AO” output.
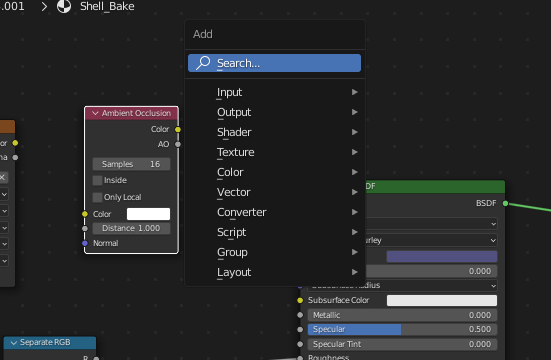
Connect either of the outputs of the AO node to your main “Principled BSDF” node’s Base Color channel.
From here, use the spacebar again and search for “Image Texture”, add this new node somewhere easy to find, we put ours directly above our BSDF node. This will serve as our new AO texture once baked.
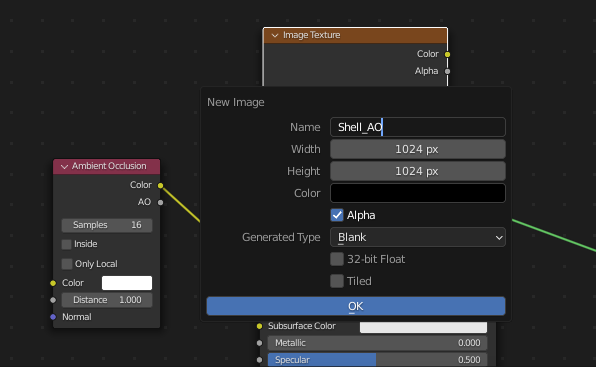
Click the “+. NEW” button within your image texture and name it something simple, in our case we called it “Shell_AO” and kept it simple with a basic 1024×1024 resolution.
Since we cloned our materials, they are separate from the original ones, while still being applied to the same areas of the 3D model that they originally were. As this is the case, we can delete all of the unnecessary nodes from each and only keep the ones we need. From here, you can select all with the “A” key, copy the node setup from this material, and then paste it into your other bake materials. Simply create a new Image texture on each and keep it. See below.