An ORM texture, otherwise known as an MRAO texture, is essentially an RGB image built to contain your ‘Roughness’, ‘Metallic’, and ‘Ambient Occlusion’ textures all in a single image file. This not only improves the organisation of your texture files by reducing the amount of loose individual files but also serves as a way to drastically reduce file size since all three of these texture channels will be in a single controllable and compressible file. While ORM textures are most commonly used in web and mobile applications, the format is quickly becoming the universal standard for finished 3D models.
Building an ORM texture is made simple with the use of programs like Photoshop or Substance painter, though any platform that allows you to edit individual colour channels in your images will suffice.
Resources
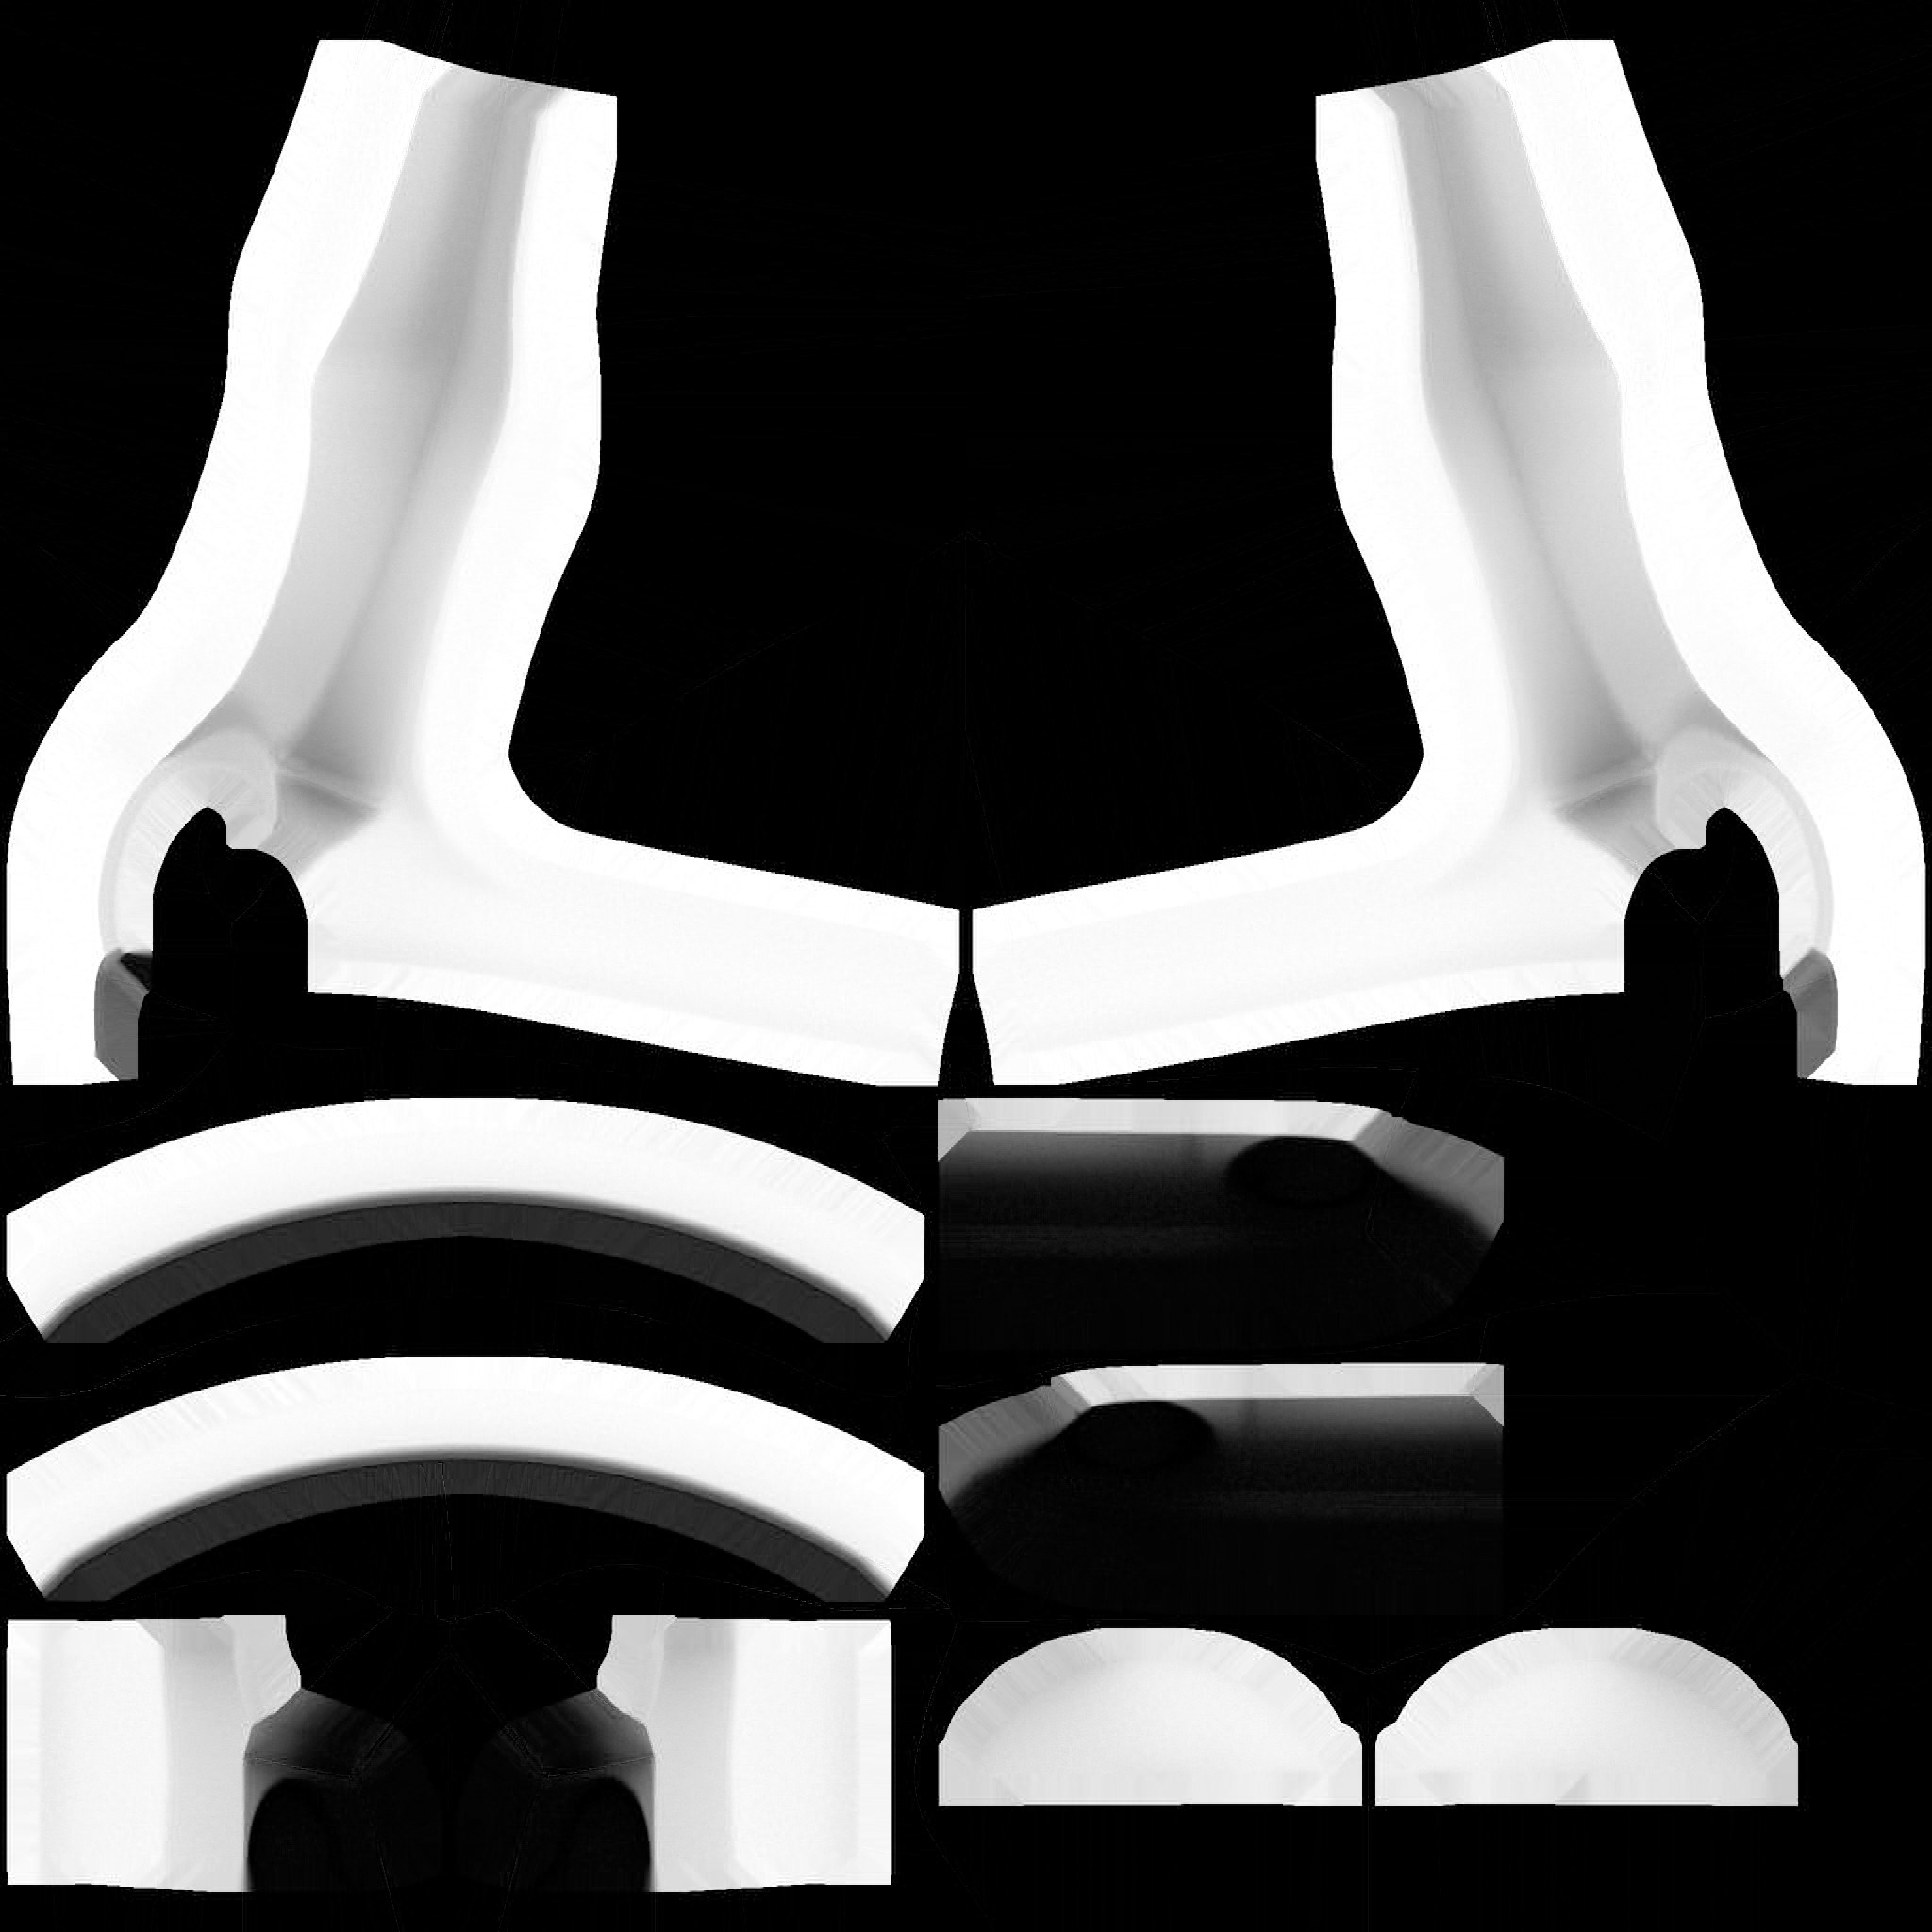
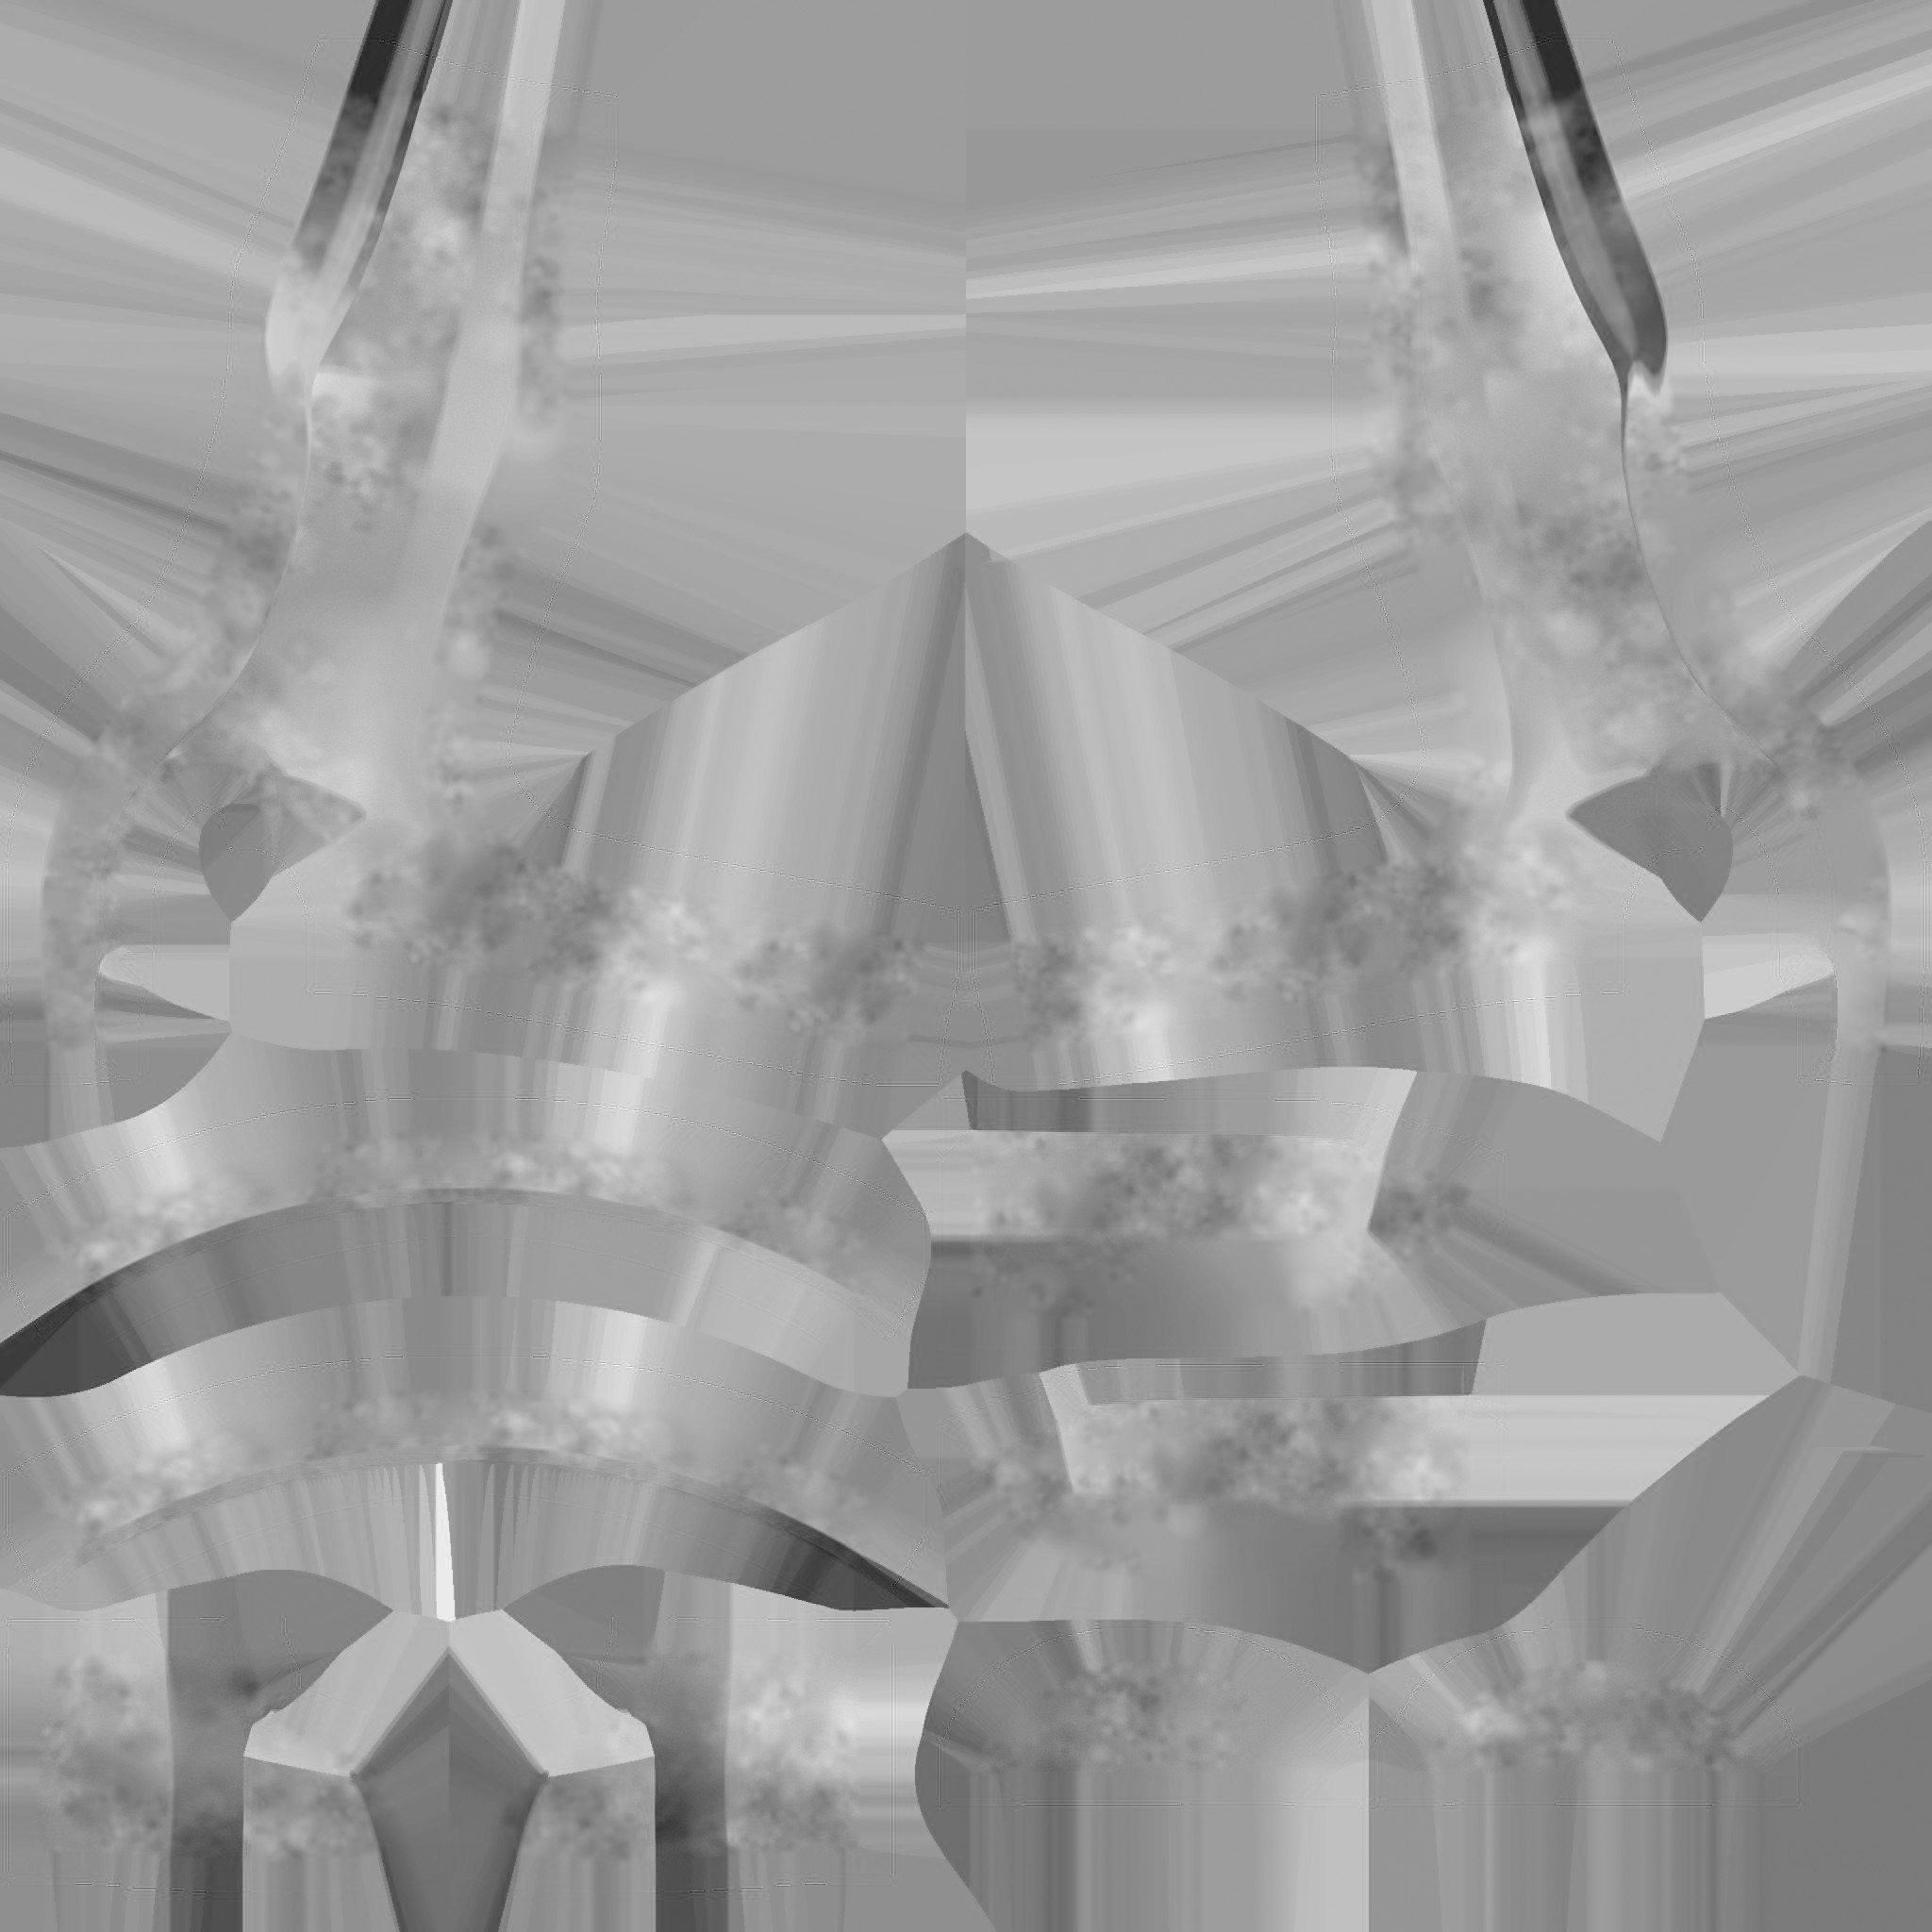
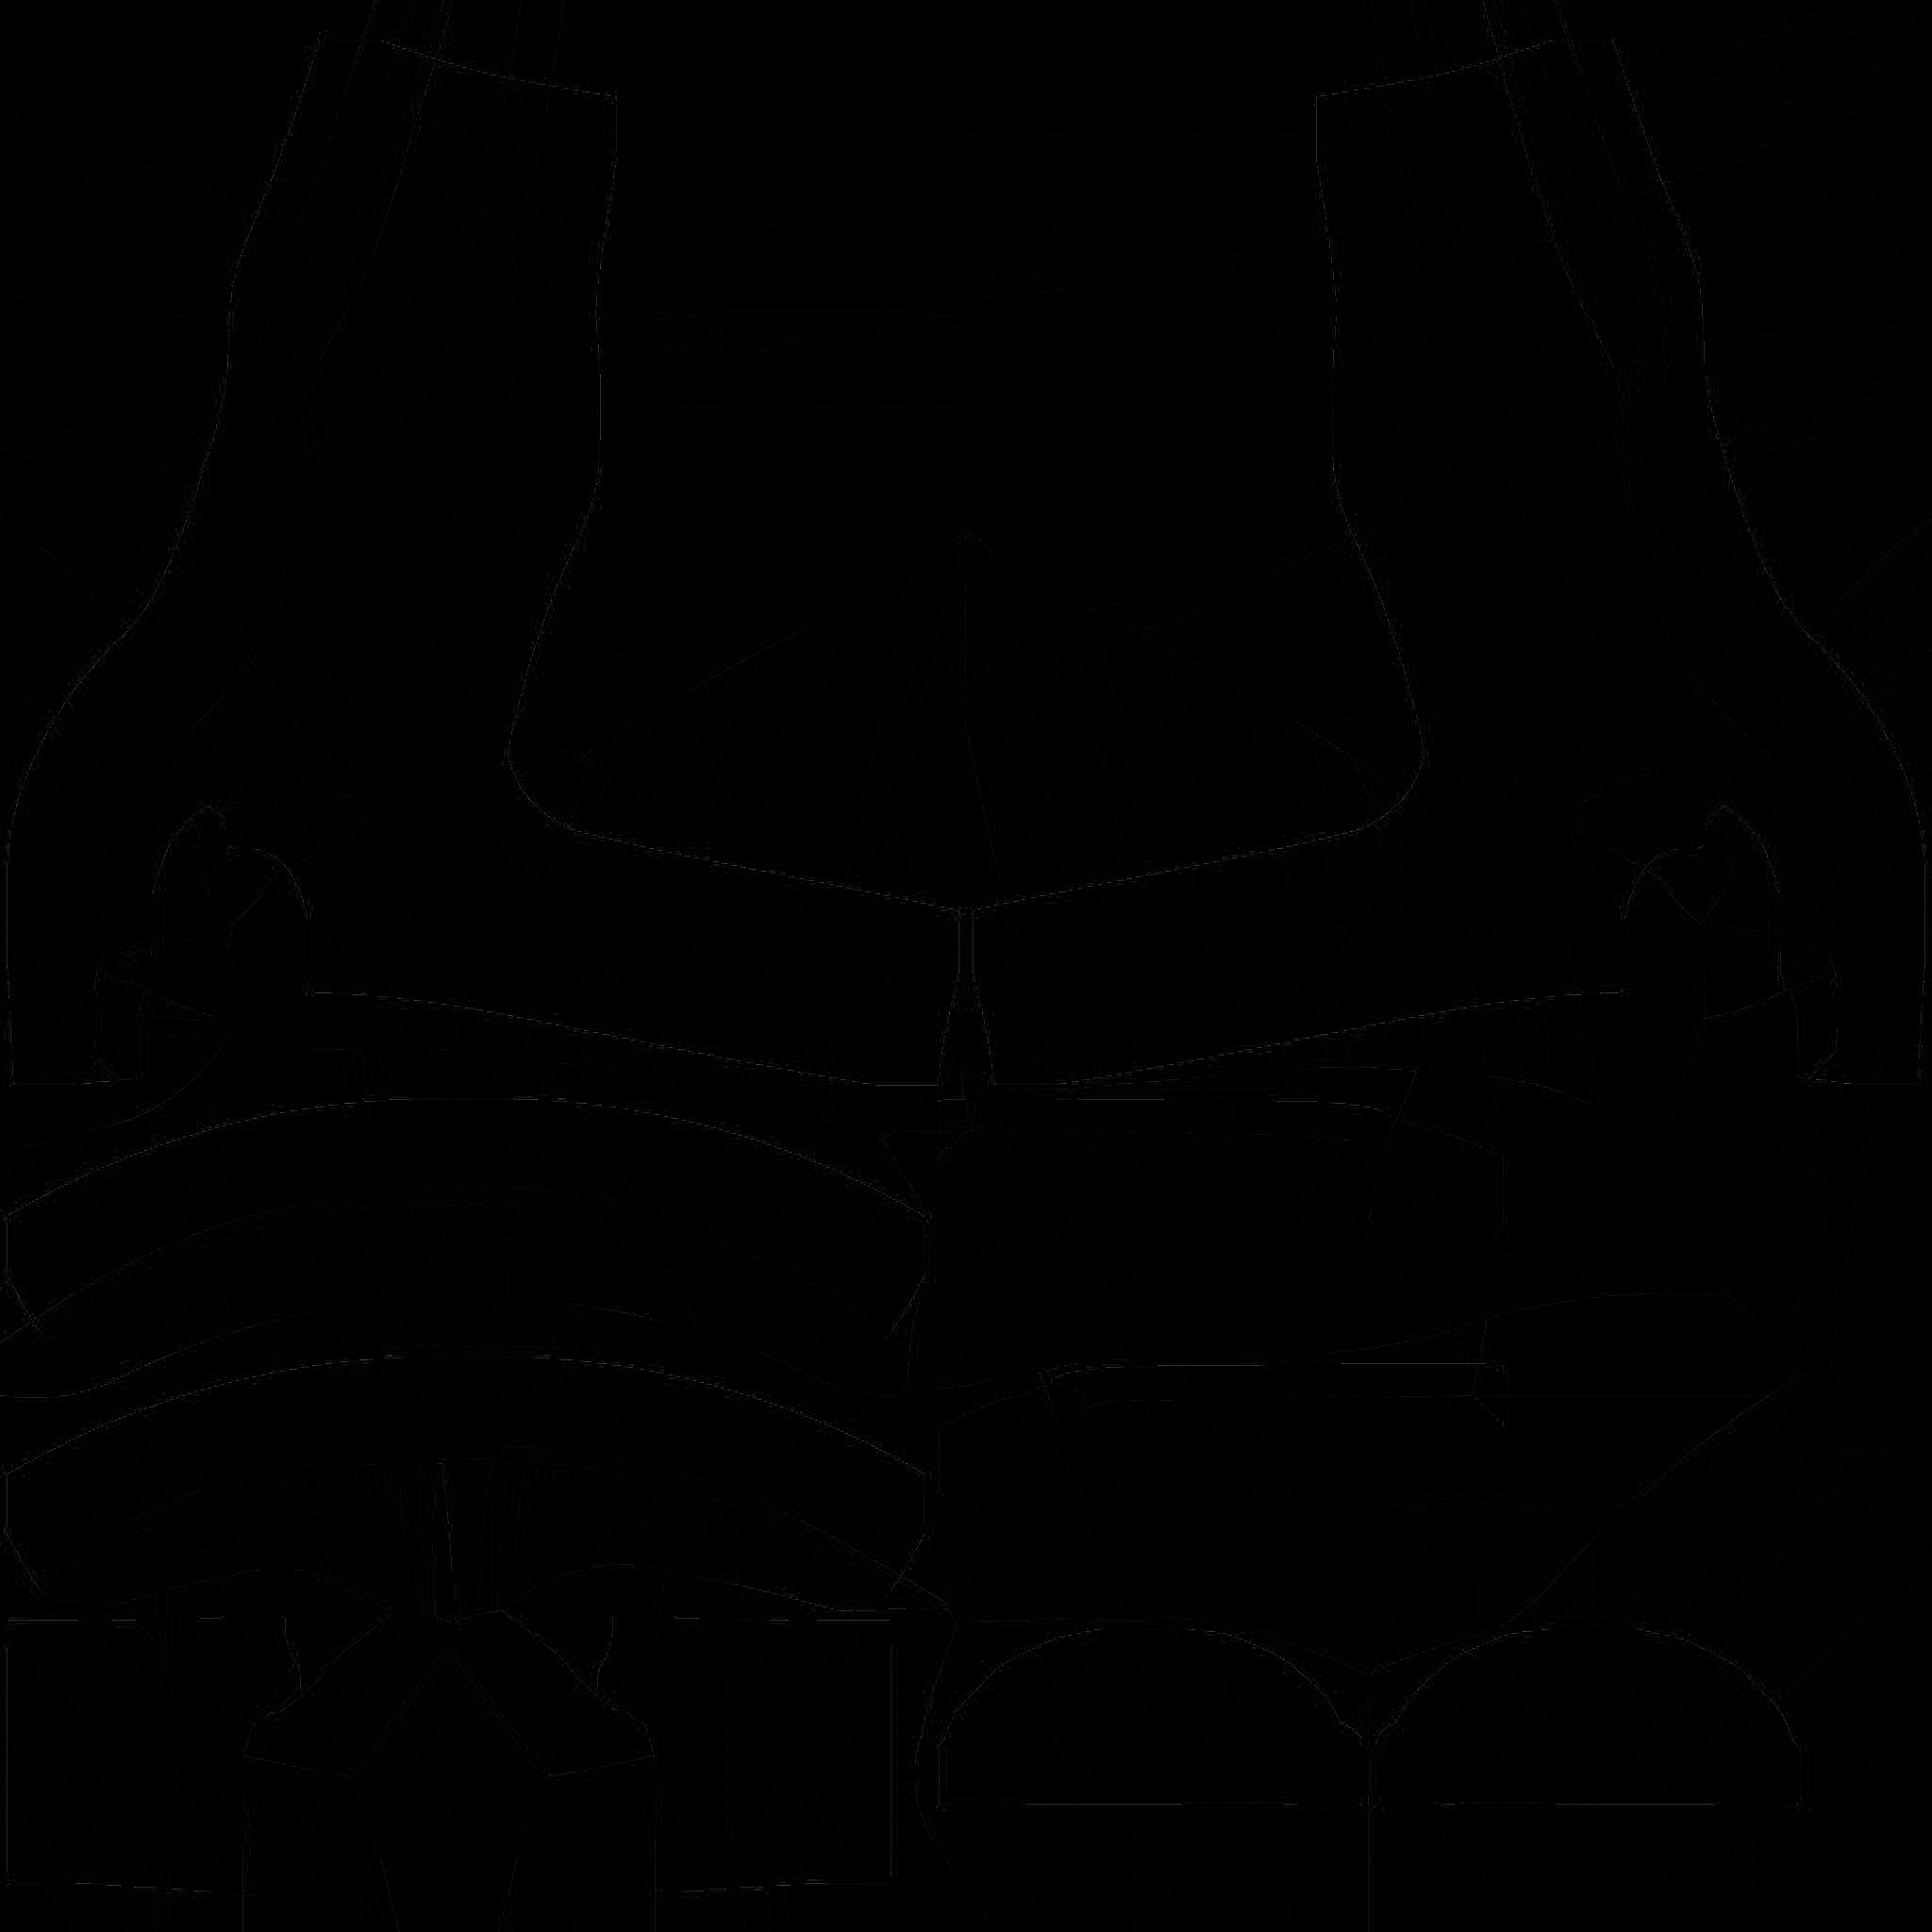
Attached below are three example textures from the lid of a bottle. Create your own ORM texture with your own textures or use the ones below to try it out first. If you only have two textures, you can use a filled black or white image to account for the other channel depending on which it is. For example, if you only have Metallic and Roughness, use a 100% white Ambient Occlusion(AO) texture in the red channel. Or if you are missing Metallic, use a 100% black image for the blue channel, since black is 0% metallic and white is 0% Ambient Occlusion(Shadowing)
Creating ORM Textures with Photoshop
First, you will need your source textures, your Ambient Occlusion (AO) map, Roughness, and metallic maps.
Once you have your textures ready, simply drop one into photoshop to open it up. Once this is done, drag and drop your other two textures over the same page you are editing to import them as layers.
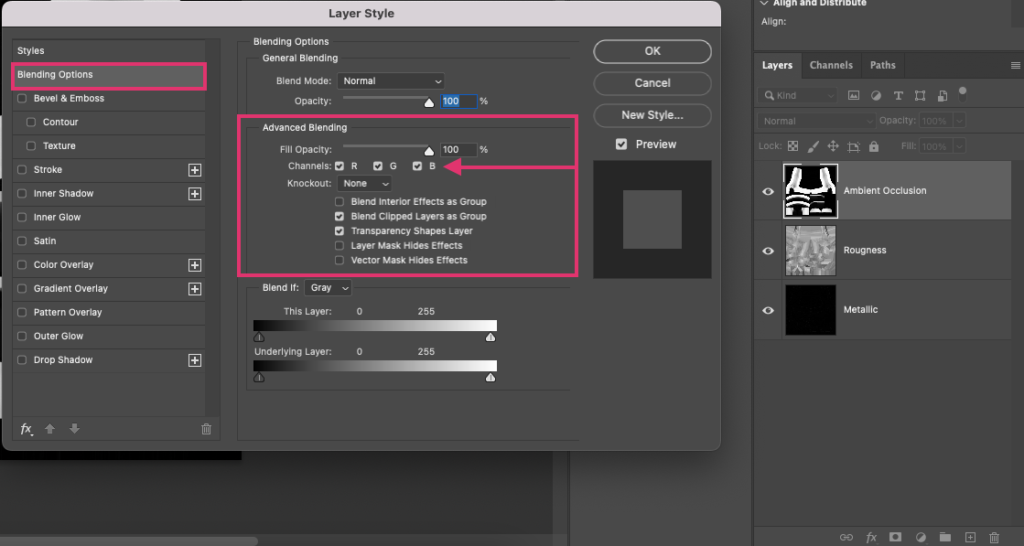
Next, double-click or right-click on one of your layers/textures listed to access the ‘Blending Options’ panel.
We will begin with our Ambient Occlusion (AO) texture.
From this panel, in the blending options tab itself, you can access the “Advanced Blending Options” section.
This is what we will use to convert our three individual grayscale textures into our final single RGB image.
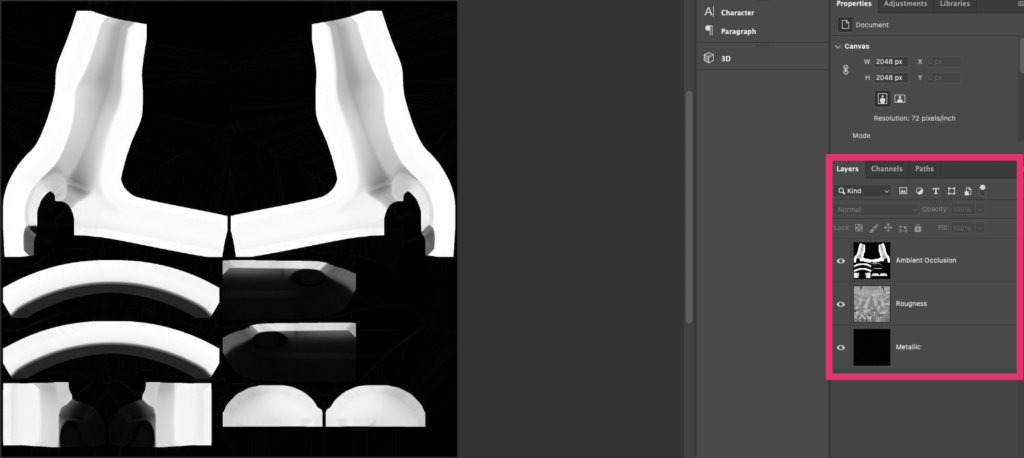
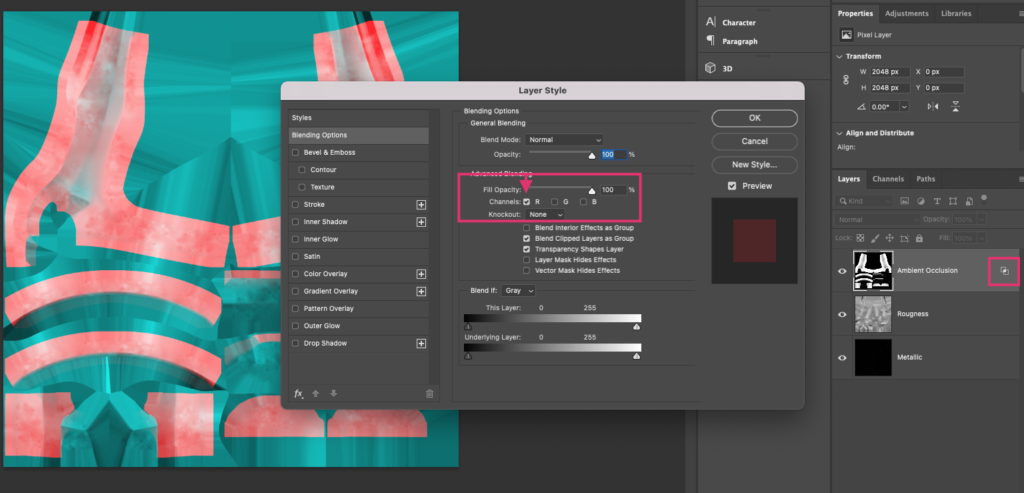
First, we will uncheck and disable the Green (G) and Blue (B) channels from our Ambient Occlusion (AO) texture/layer and hit “OK” to finalise. This will force our AO texture to only present itself in the red channel of our image. You will notice your overall image displayed in the canvas will change after this, this is an indication that we are correctly building our ORM texture.
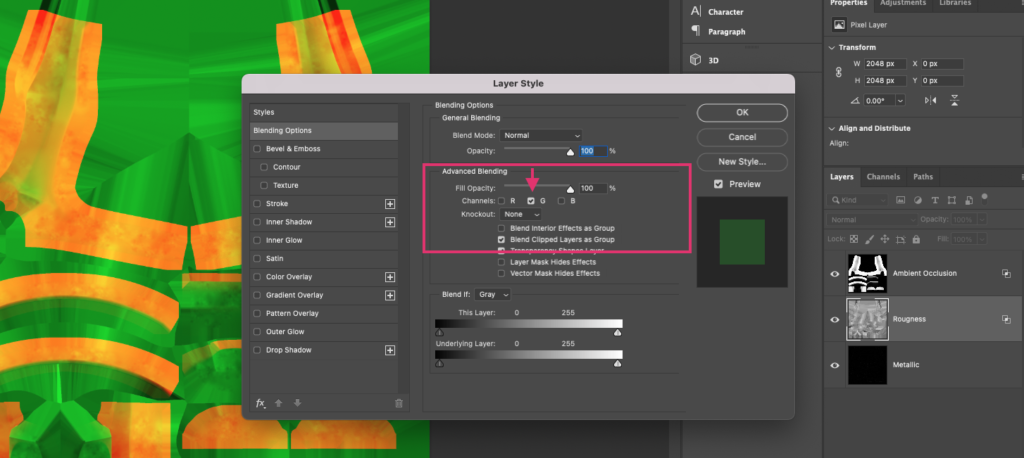
Next, we will repeat the process for our Roughness texture. Access the Blending Options panel once again by double-clicking or right-clicking your Roughness texture’s listed layer. This time, we will disable every channel besides the Green (G) channel. You should once again notice in your main canvas the image will appear different.
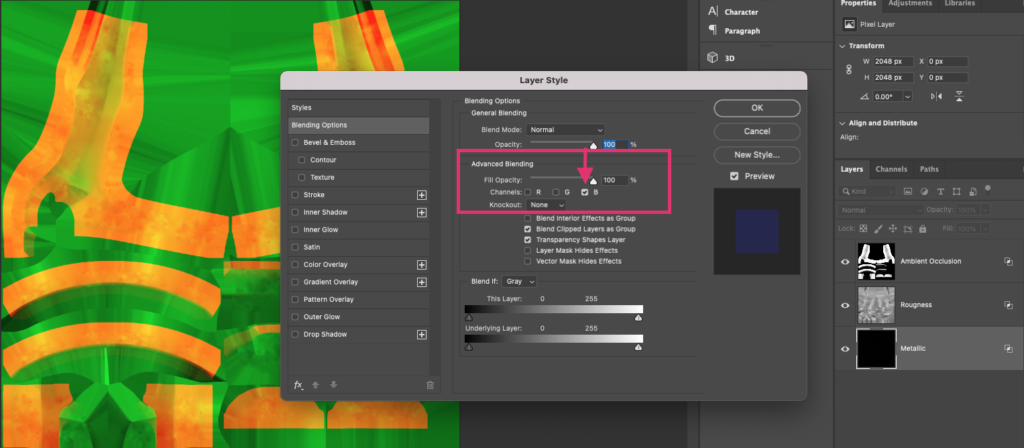
To complete your ORM texture, you will now once again access the Blending Options panel, but for your Metallic texture. Repeat the same steps as above but leave only the Blue (B) channel checked. In our example, we use a 100% black metallic texture, since we do not want any metalness to appear on our 3D model. The colour of the image in our canvas won’t change after applying the final channel setting to it. For you, this setting may change the look once again if your metallic image contains any data, this is a good sign.
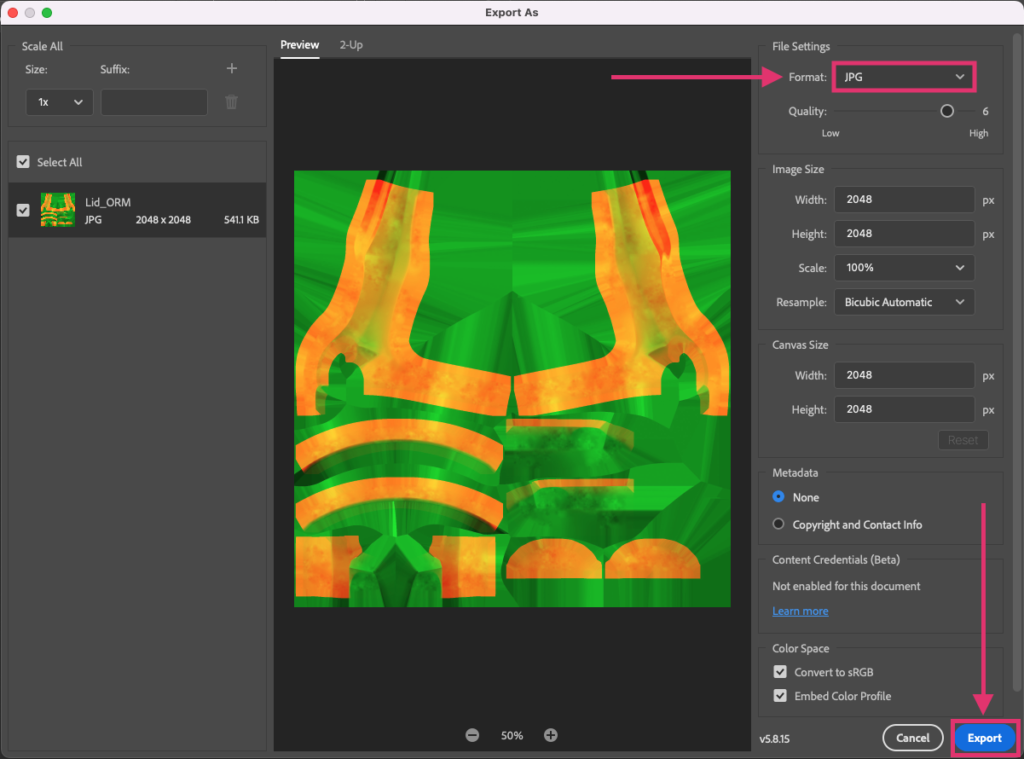
To finish up, simply navigate to File>Export>Export As, and access the export screen. We recommend using the JPG image format since it usually results in smaller file sizes. Once you are happy with your settings and file size (Seen in the left list area), simply hit export and choose where to save your file. With this done your new ORM texture is now ready to use.
Creating ORM textures with Substance Painter
With Substance painter, you can automatically export ORM/MRAO textures instantly by building them into your overall export images. This will save you a massive amount of time and improve your overall 3D texturing experience. We recommend this method over manually creating ORM textures, though understandably, not everyone has access to Substance Painter.
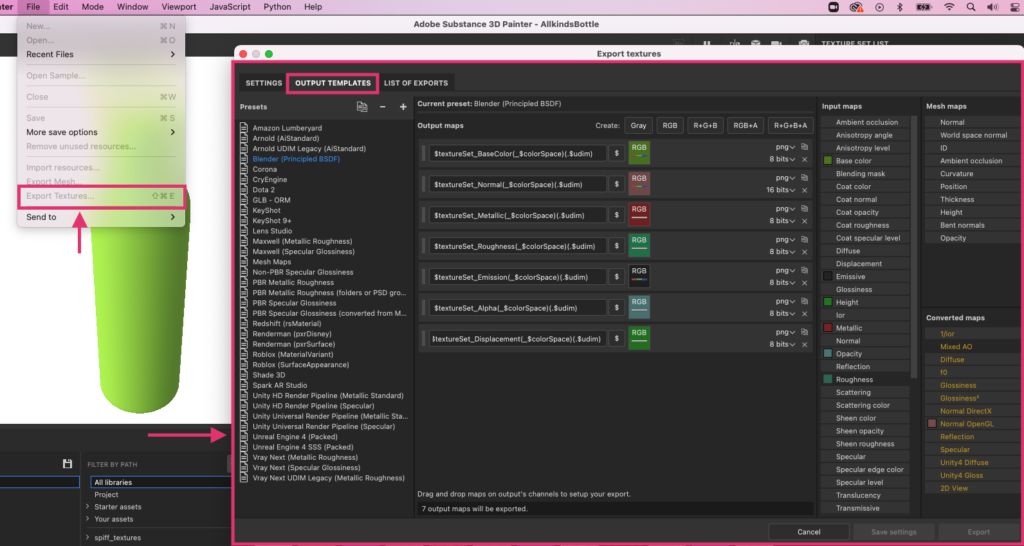
Once you have baked all of your source maps and finished texturing your model, navigate to the texture export page via File>Export Textures. Once you have accessed the export page, navigate to “Output templates”. This is where we will build our template.
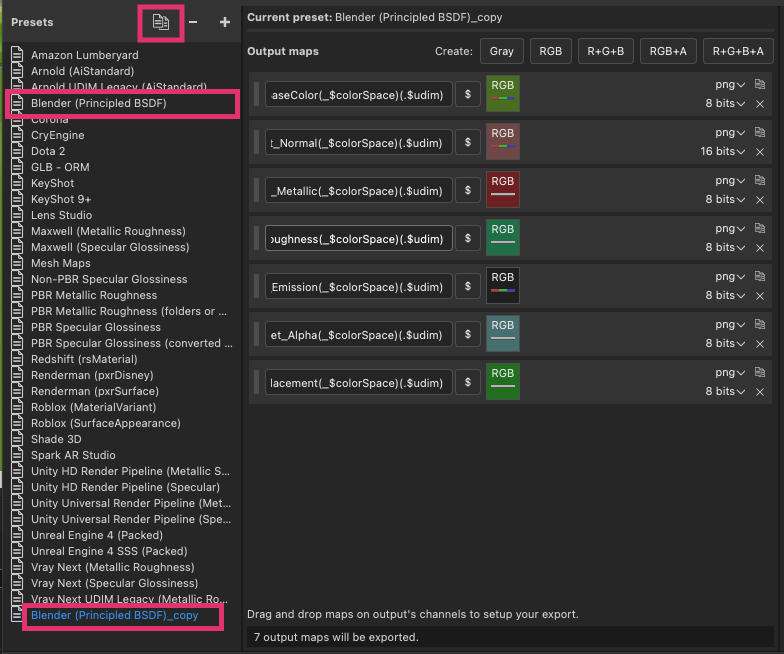
Next, we will clone an existing template. In our case, we cloned the “Blender” template by clicking on it and using the copy tool listed next to the “Presets” title. See Below. Since this template includes our basic channels already like the BaseColor and Normal Map channels, we went with this one.
For our new export template, we will remove everything besides BaseColor and Normal, since we won’t be using anything else long-term, your template may look different if you regularly need other texture channels. To rename your new template, simply double-click on its name in the ‘Presets’ sidebar and enter your new template name.
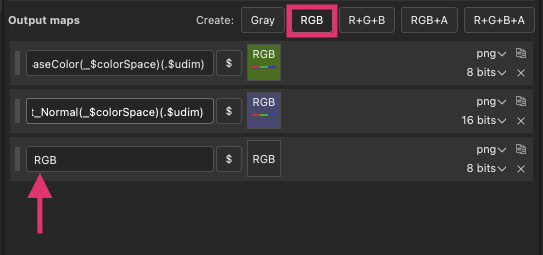
Now we will begin creating our ORM texture template. Use the “Create: – [RGB] – – -” button to add your new channel. To remove channels, simply hit the ‘X’ button listed on the right of the applicable channel.
We want our ORM texture to be exported with its name already listed. To avoid having to rename your files after export, you can create a dynamic name for them with the functions available in Substance. In the name section for our new channel, we named it “$textureSet_ORM(_$colorSpace)(.$udim)”. Once exported, our file would now be automatically named “Bottle_ORM.jpg” if exported as a jpg, for example.
Once we have set up the name, we can split the RGB channel into three separate inputs. See below.

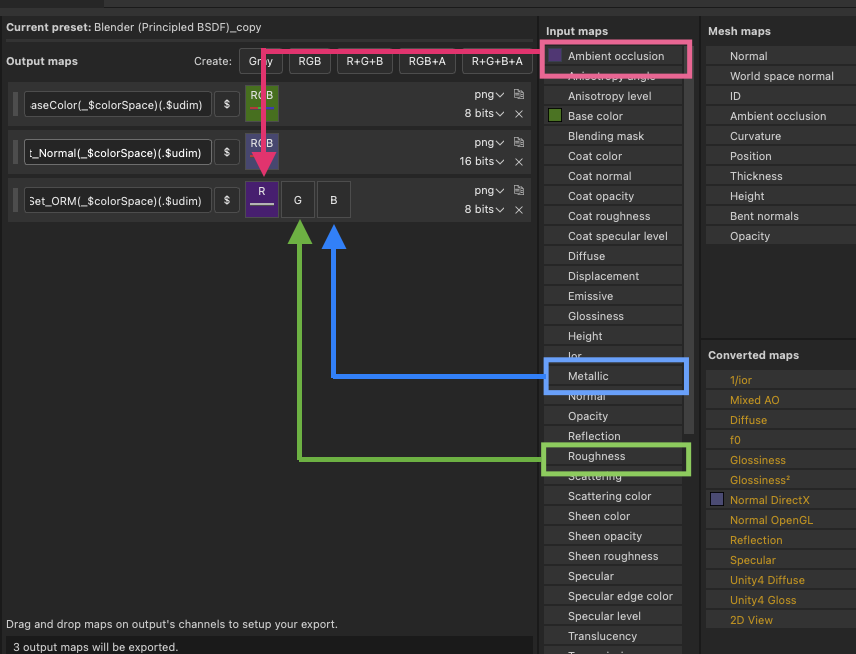
Once you have split the RGB channels for your new texture, use the “Input Maps” sidebar to begin building your ORM texture. Simply click and hold on each Input map to drag it into the appropriate channel. The Ambient Occlusion listed at the top will be dragged into the ‘R’ (Red) colour channel, Metallic will be dragged into the ‘B’ (Blue) channel, and Roughness will be dragged into the ‘G’ (Green) channel. Make sure to select the “Gray Channel” option when dragging over each input map.
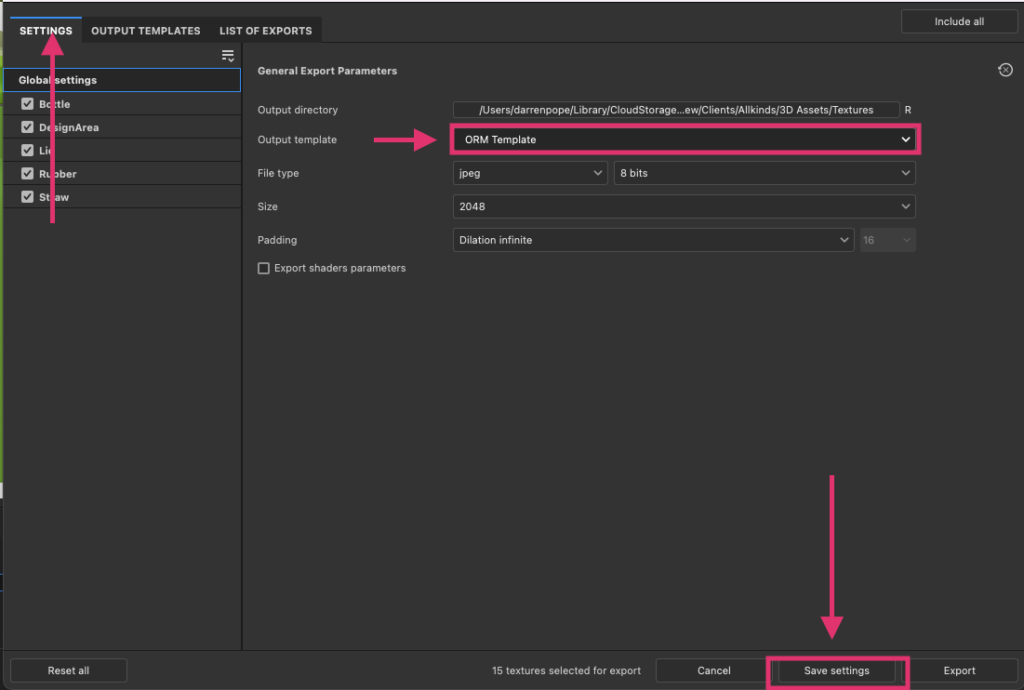
With these steps complete, you can now navigate back to ‘Settings’ in your export window. From here, select your output template with the dropdown, and finally, “Save Settings” at the bottom.
All done! When exporting from Substance now with this template, you will now receive your compiled ORM textures, rather than separate Ambient, Roughness and Metallic maps. See below for an example of our exports folder after using the new template.
