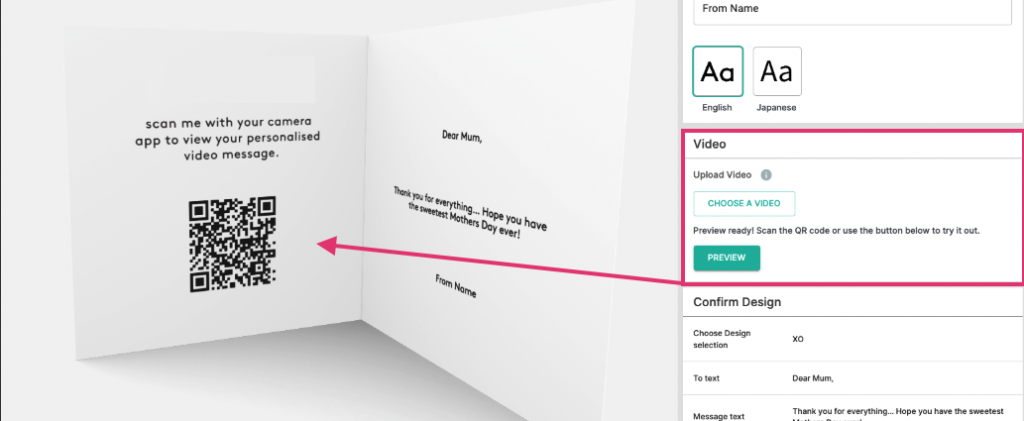
The Digital Content Step expands the layers of personalisation even further in your customer experiences by allowing them to upload video content to their new products. When uploading their content a QR code is automatically generated, completely dynamically. Mostly used for gifting, this step creates a powerful and extremely valuable connection between you as the merchant, your customers, and the recipients.
First steps for the Digital Content Step
In order to allow your customers to upload their digital content and trigger the QR Code generator, we first need to either create or link an existing web page that will act as a hosting page for their content. This is the webpage that will be accessed by the customers or recipients when scanning their QR code; where they will view the uploaded videos or other digital assets etc.
Creating the Webpage
First, let’s prepare the web page that will host the embedded videos or other digital content.
HTML
On the HTML side of things, you only need to add a video tag with the id ‘spiffEmbeddedVideo’. In our example, we add a small message for browsers that don’t support this feature. Almost all browsers support this, though there are much older mobiles and devices that may not be updated, so to cover all bases we add this tag/message.
<video controls id="spiffEmbeddedVideo" >
  Sorry, your browser doesn't support embedded videos.
</video>
JavaScript
The last thing to do is add our JavaScript snippet either to the page or as a reference JS file. The tidiest, and recommended approach is to create a new JavaScript file, name it something that makes sense for you, and paste the code snippet below into it. Let’s say we call it spiffEmbeddedVideo.js, for example.
window.addEventListener('load', (event) => {
  const urlParams = new URLSearchParams(window.location.search);
  const myParam = urlParams.get('video');

  const decoded = atob(myParam);

  const video = document.getElementById("spiffEmbeddedVideo");

  try{
    new URL(decoded);
    video.src = decoded;
  } catch (_) {
    const links = JSON.parse(decoded);
    links.forEach(function (item){

      const source = document.createElement('source');
      source.src = item.href;

      video.appendChild(source)
    })
  }

  video.onended = function() {
    if (document['exitFullscreen']) {
      document['exitFullscreen']();
    } else if (document['webkitExitFullscreen']) {
      document['webkitExitFullscreen']();
    } else if (document['mozCancelFullScreen']) {
      document['mozCancelFullScreen']();
    } else if (document['msExitFullscreen']) {
      document['msExitFullscreen']();
    }
    document.getElementById("overlay").style.zIndex = "2";
  }
});

function replaySpiffEmbeddedVideo(){
  document.getElementById("overlay").style.zIndex = "-1";
  document.getElementById("video").play();
}
To finish things off, we simply now need to reference our new JavaScript file. See below.
<!doctype html>
<html lang="en">
<head>
    <meta charset="utf-8">
    <meta name="viewport" content="width=device-width, initial-scale=1.0">
    <meta name="description" content="">
    <script type="text/javascript" src="spiffEmbeddedVideo.js"></script>
</head>
<body>

    <video controls id="spiffEmbeddedVideo" >
        Sorry, your browser doesn't support embedded videos.
    </video>

</body>
</html>
Once this is done and saved, the connection is made and the Digital Content hosting page is completed. Creating a presentable host page will be ideal, and feel much more professional, but at its core, this is all that needs to be done.
Adding the Digital Content Step
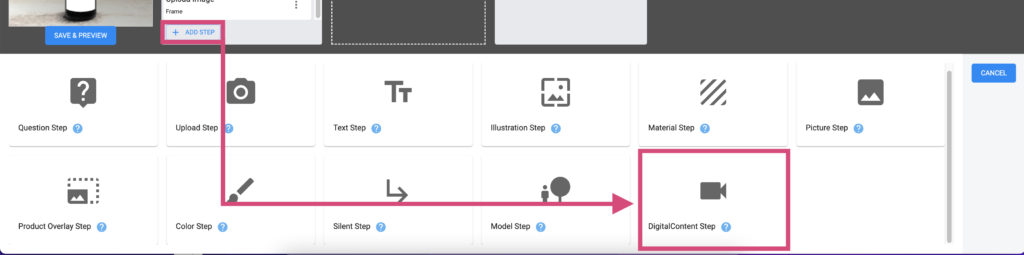
Let’s start by adding our new step. Navigate to your workflow and add a “Digital Content Step” via the +ADDSTEP button within one of your workflow’s scenes. See below.
Digital Content Step Config
The Digital Content Step is unique in that it has only one config setting. The “Base URL” is used to connect the step to your host page, as mentioned above. Simply enter your host page URL and save your step.

Regions for the Product Overlay Step
As explained in the Regions and Panels documentation, your region will determine where your Step Assets will appear. Access this via your step’s “Regions” tab. Since the Digital Content Step generates a QR Code, we recommend simply building this region in a square format, where the width and height are the same.

Accessing Digital Content After Purchase
After everything is set up and configured, your customers or their recipients simply just scan the QR code and their personalised digital content will appear via your host page!