A Material acts as a container or combination of image assets that are connected to the various available texture channels within the 3D model. Depending on the type of material available in the 3D platform you use, your materials may have more or less available texture channels. In Spiff, we use the PBR material type (Physically Based Rendering), which has powerful advantages over standard non-PBR materials.
For your customer’s experience, you may want to sell custom leather shoes, for example, but you offer different kinds of leather for each section of the shoe’s body. With materials, you could create a variant for Snakeskin leather, Alligator leather, cowhide and more. Another use is for fabrics in clothing or furniture; you could switch between velvet or cotton, even canvas if you wanted. It’s all possible with materials.
Create a Material
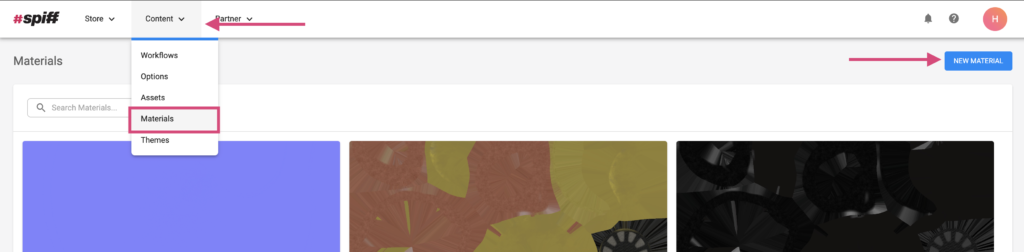
In order to create a Material for Material Steps in your Spiff workflow, navigate through Content>Materials on the Spiff Hub to find the Material list page. Simply hit the ‘New Material’ button in the top right to begin.
In the Material creation page, you will see a variety of different sections to upload various assets. First, add a name to your material, “Linen” for example, and save your material. Continue below for information on the various channels.

Texture Channels in Materials
In materials, we have access to a variety of texture channels, let’s go through them all.
Base Color textures
First, let’s explore the “Albedo”, otherwise known as the “Base Color” channel. The base colour textures that you use contribute to the literal colour value of the 3D Models surface. This gives you the opportunity to achieve some very realistic results.
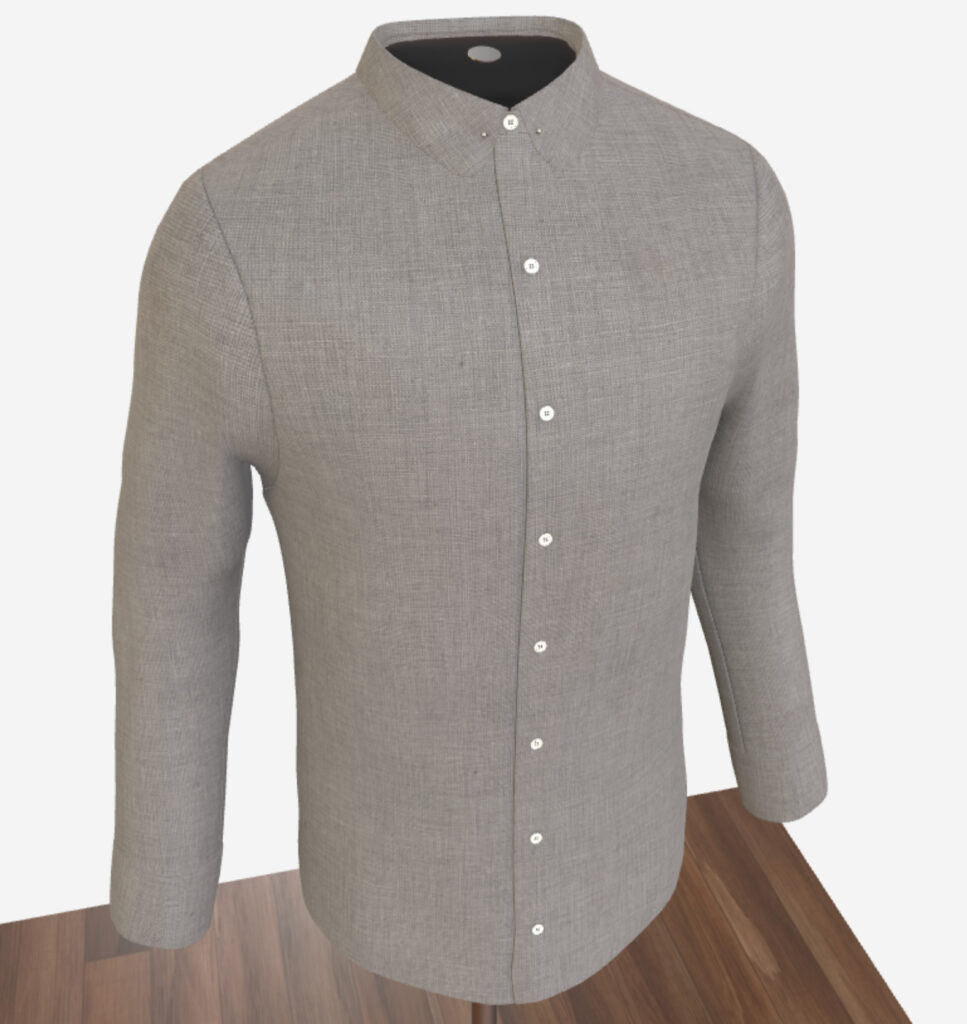
Though the base colour does not actually add any bumps or roughness/metalness to the surface, you can apply base colour textures that have complex details regardless, which will present nicely to your customers. See below, a 3D model that only has a base colour texture. The base colour texture presents like a linen fabric, all without the other texture maps. Sometimes keeping things simple with one texture can make for a smooth experience in online applications since it’s loading less data. Although technically, it’s not as realistic with just one texture map.
Alpha Textures
Alpha textures, or “Alpha Cutout” textures act as a way to make parts of your 3D model more or less transparent (See-through). This is helpful in cases where your model may feature mesh (the fabric) components, or if you have components of your 3D model that shouldn’t show at all.
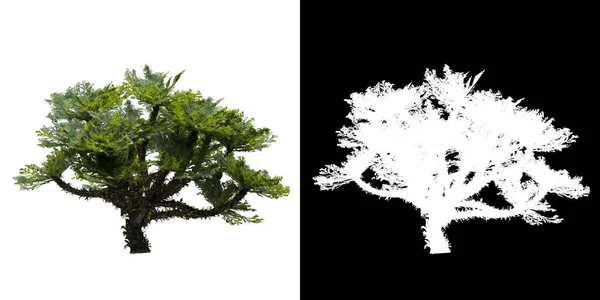
An example of this is a flat square 3D model plane that is meant to look like a group of branches or leaves, this is easily done with a combination of a Base Color and Alpha cutout texture since only the branch sections will appear, and the rest of the plane will be invisible.
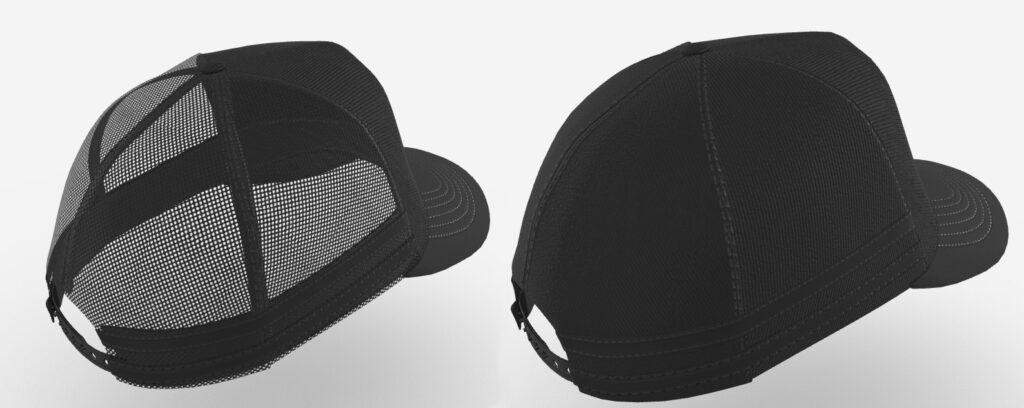
Traditionally the Alpha Cutout textures must be black and white, not a png with a transparent background. Where 100% black will equal transparency, and white, opaque (solid).
See below for the branch example showing its Base Colour and alpha texture alongside it.
Ambient Occlusion Textures
Next, let’s cover the ‘Ambient’ texture channel, also known as ‘Ambient Occlusion’, or just ‘Occlusion’.
The baked ambient occlusion map will add shadow details to your model, making it much more realistic at a relatively cheap load cost (relating to file size). Like the Alpha texture maps, Ambient maps are also a combination of black and white, where black adds shadows and white reduces shadows. See below, a model with and without an ambient map.
Emission textures
Next up is the ‘Emission’ texture channel. Emission maps act similarly to light sources in the 3D space, literally emitting light but from the values created via its texture. Within the platform we use for the web/online applications, emission textures won’t apply light to surrounding objects, though the object itself will appear lit. Spiff also enables the ‘Glow’ function from Babylon.js, adding a faded glowing effect to emission-enabled objects/models. See below.
Metallic and Roughness Texture
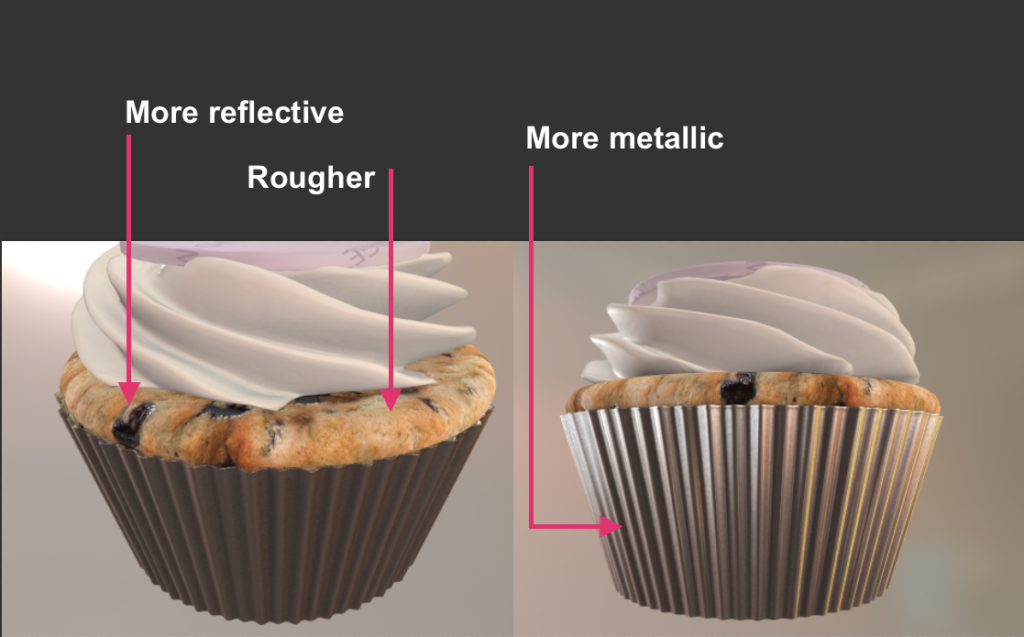
The ‘Metallic’ Texture channel in Spiff is a combination of both ‘Roughness’ and Metallic. Being a combined texture channel, you need to create a metalness ‘ORM’ image texture. (Occlusion, Roughness, Metallic). The ORM texture essentially controls how reflective the model’s surface is, and how metallic it appears. This can be used for complex texturing with varying levels of reflectiveness (Roughness). See the surface of the cupcake below, the fruit portions of it have less of a roughness value, and the dough itself is rougher, and therefore, less reflective.
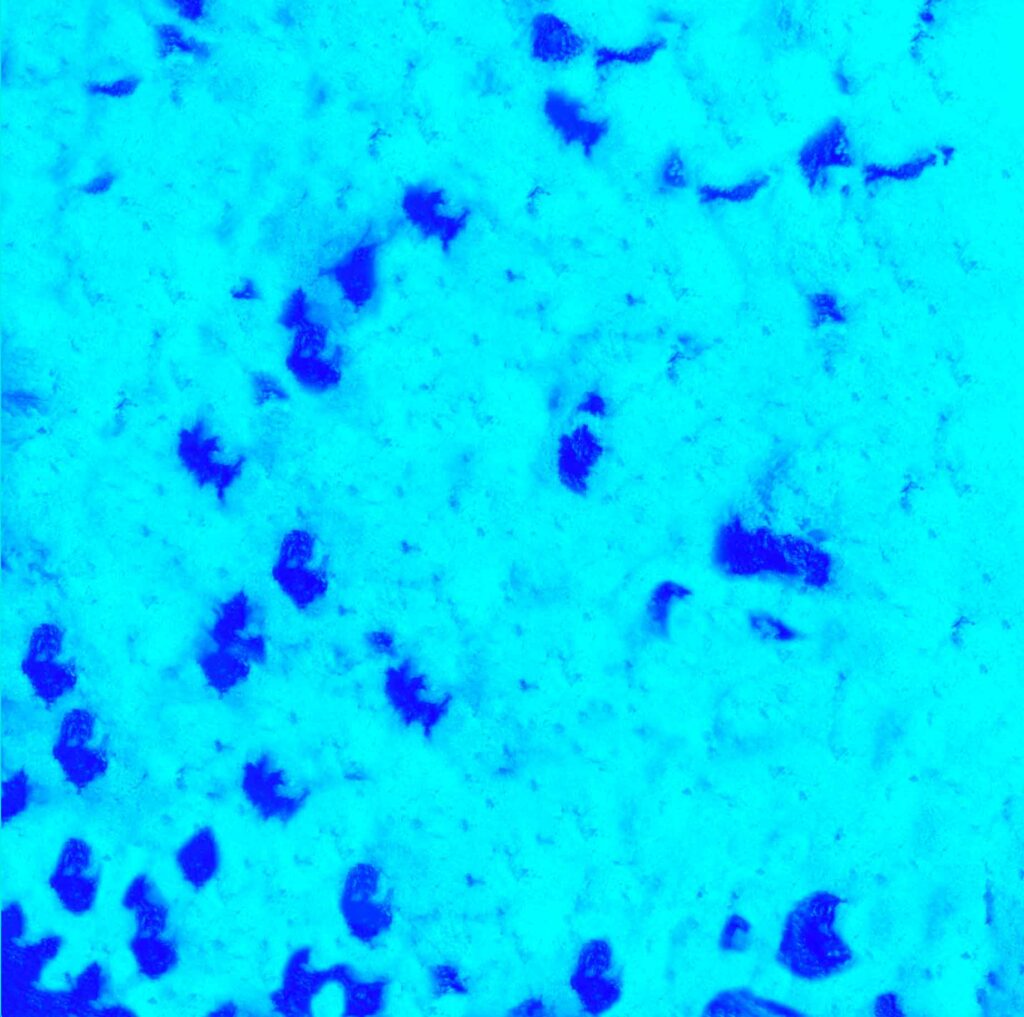
Here’s the texture used for the Metallic-Roughness map of this cupcake’s dough, without Occlusion added.
The darker spots act more reflective, while the brighter spots are rougher, the combined metallic map and roughness map are created in black and white and assigned to the Green and Blue channels of this RGB image.
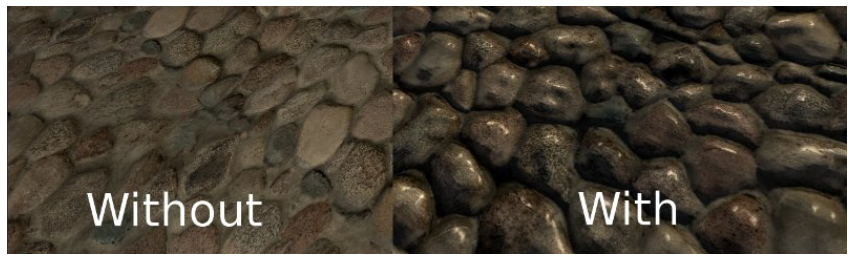
Normal Map Textures
The Normal Map texture is an essential texture for most 3D applications where realism is key. The normal map will affect how light reacts with the surface of the model, making its surface look bumpier, smoother, and textured, depending on what you are trying to achieve. If your model is lit by any light sources and you want it to appear that it has bumps or depth, this map is essential. Without this, it will always appear completely smooth and flat. See below, without and with. You can see how light bends around each stone as if it’s a physical part of the model.
Refraction Map
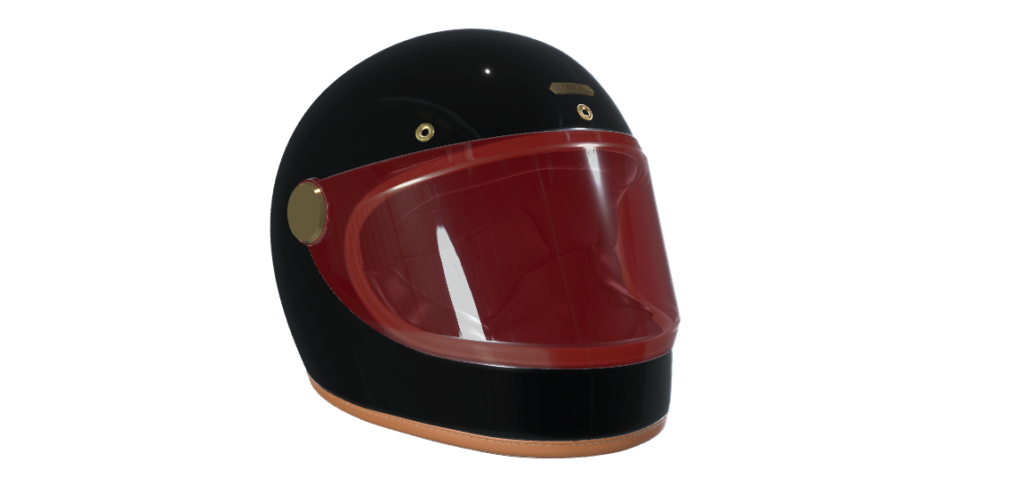
Usually locked to the Skybox/HDRI map added into the scene of the workflow (Seen in the product illumination section of Experience Config), Spiff users can apply their own texture to this channel in order to achieve very specific looks on some models. Refraction warps the reflections of the scene around the model to make it appear as if you’re seeing it through the surface of the model. A great example is looking through an aquarium, with water inside, objects appear bigger or smaller depending on where they are, as the water refracts light differently to the glass, while if it was empty, there may be no effect.
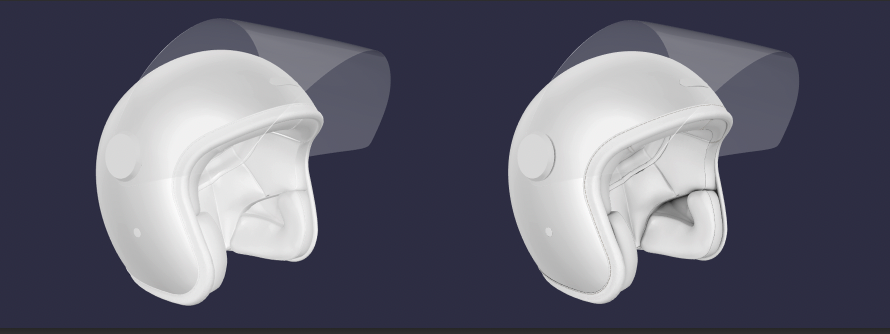
In some niche cases, you can use a single-colour image or any other image to completely adjust the refraction of the object, though this is not recommended. See below, the visor of the helmet needs to appear in a very specific way to try and replicate the real thing, so the merchant uses refraction maps to control its refraction, forcing it to appear the way they want, and keeping the colour consistent over the whole visor.
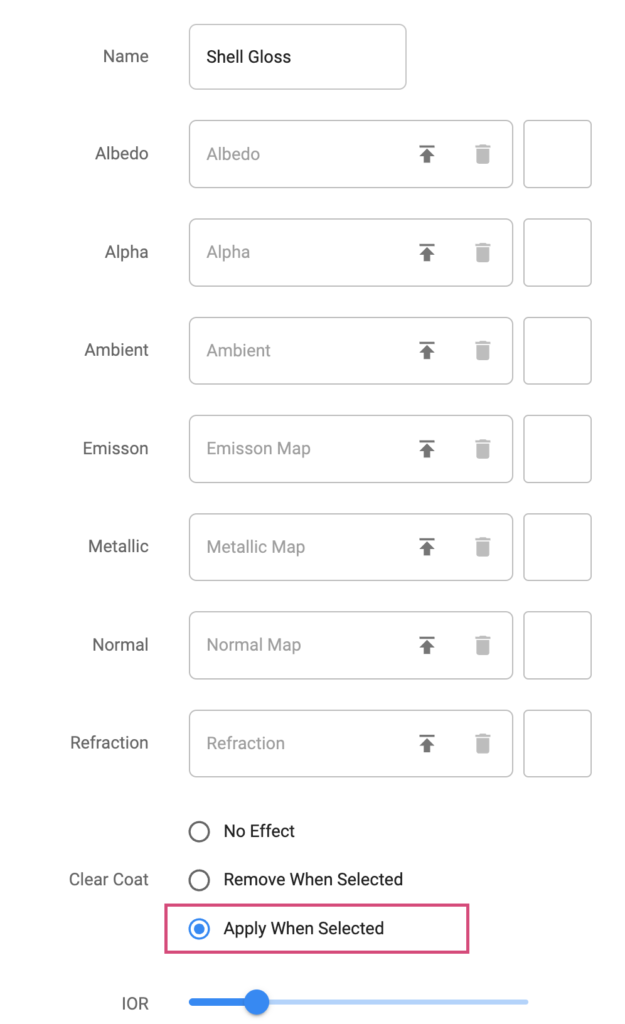
Clear Coat
A clear coat adds a coating to the 3D model, that makes it appear as if a real-world clear coat has been applied, a transparent paint type commonly used on vehicles to make the paint shine permanently. Similar to most of the other channels in Spiff Materials, Clear coat is created as an additive process, allowing you to further create extremely powerful workflow experiences, usually only achieved by programming.
Here’s an example of another motorcycle helmet. The ‘Substance’ of the paint on the helmet’s shell changes, making it foil-like, automotive-like with metallic speckles, or standard as a smooth paint finish. This is all done in one material step. The second step is Paint “Finish” allowing the customer to choose between a matte or gloss finish. This step includes two material variants, one with a material that adds a clear coat, and one that removes it. All other materials used in the workflow use the ‘No effect’ option, which will not adjust any clearcoat value, keeping it isolated to the Finish step.
IOR, or Index of Refraction, relates directly to the clear coat applied with your material, and works like refraction mentioned above, but is instead a value allowing less or more refraction on the clear coat. This is helpful for complex paint finishes