Creating Your First Workflow
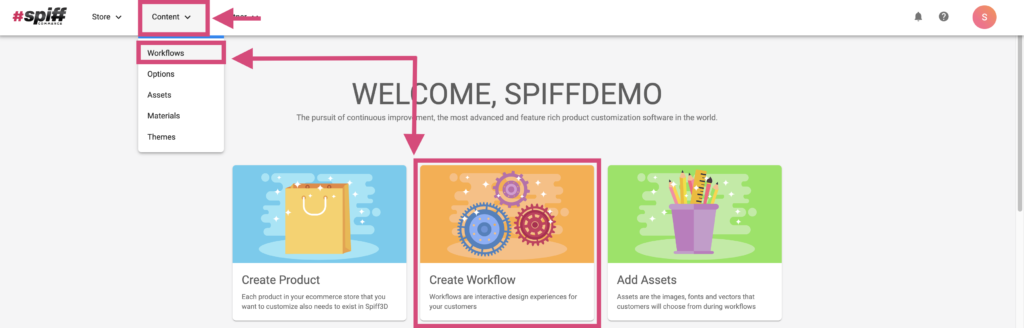
First, we start by navigating through the Spiff Hub to the “Workflows” list page. This is where we will create our first workflow. Access this via Content>Workflows, or skip this step via the “Create Workflow” button found on your Spiff Dashboard.
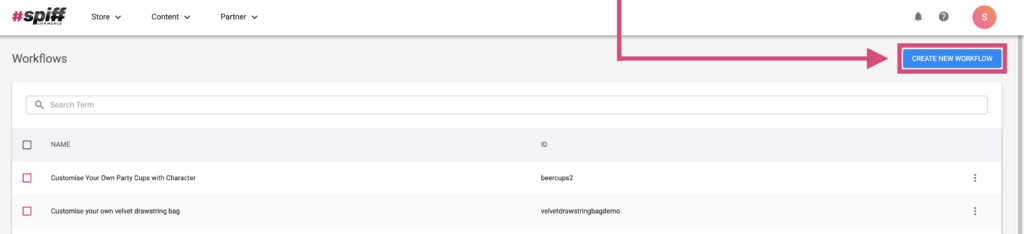
Once we are on the workflow page, we can simply use the “Create Workflow” button on the top right to get things started.
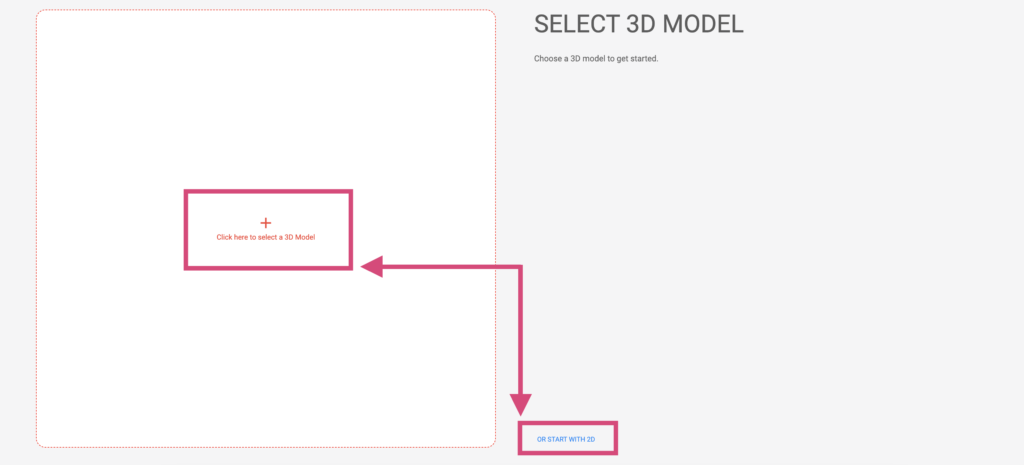
This will bring you to the workflow creation page. If you don’t have a 3D model yet, click the “Continue with 2D Instead” button. See below.
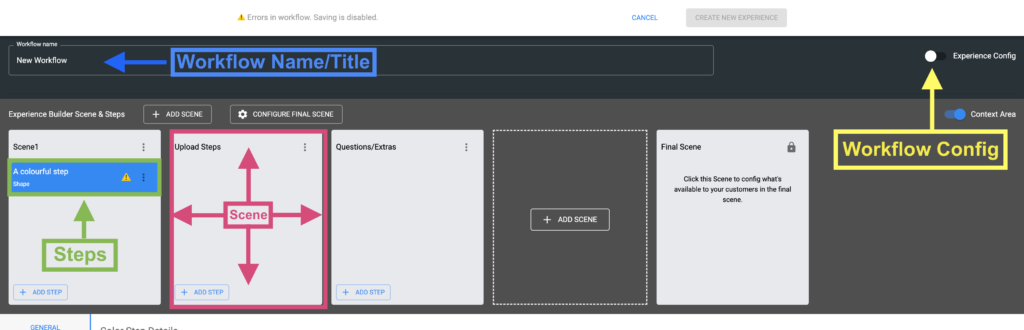
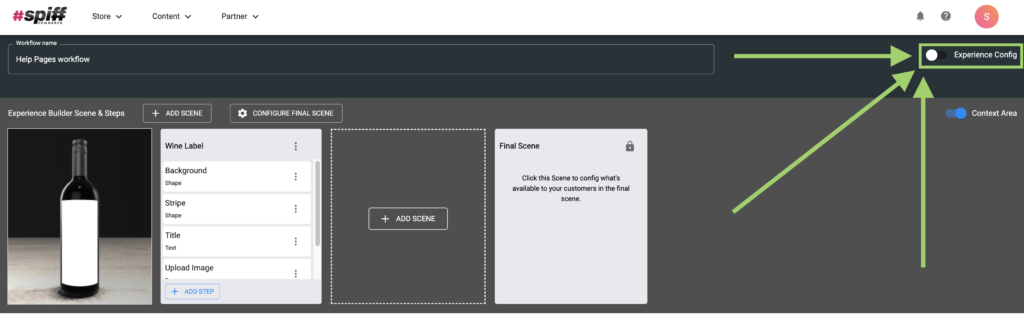
We can now see the workflow editor, we can see our current “Scenes”, and within those, we see our current “Steps”. other basic info like workflow rests name at the top of the editor. Let’s start by adding a name to our workflow. For this example, we’re going to make a wine bottle product with a personalised label. See below where to add a workflow name.
Adding Steps To Your Workflow
Next, we will cover the basics of “Steps”.
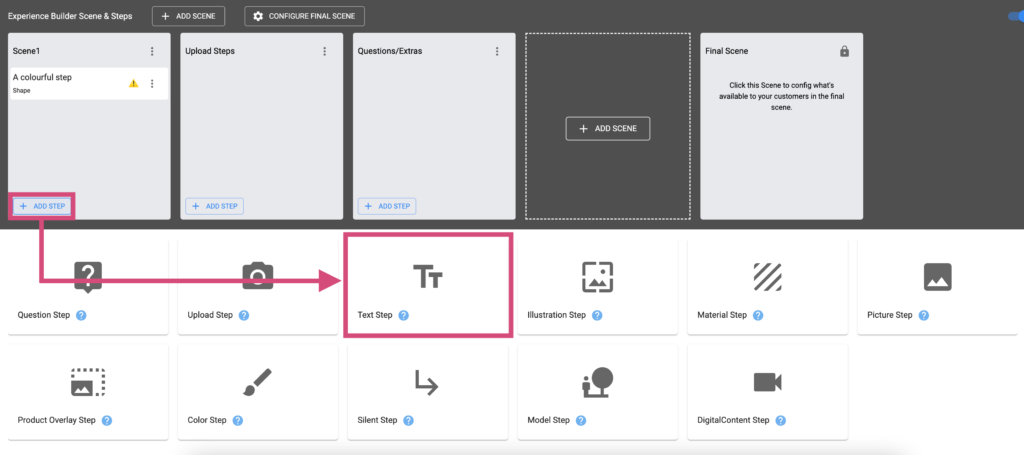
Steps give you complete control of your customer’s personalisation journey. Let’s start simply by adding a new “Text” step. To do this, use the “Add Step” button at the bottom of your first Scene (Or whichever Scene is applicable). Once here, we select the “Step Type” we want from the step type list and add it to the scene. See below.
Each step type has its own unique purpose and behaviour, for adding text to a product we use the “Text Step”, for uploading logos or images, we have the “Upload step”, and so on. Within your scenes, you can see the step type listed just below each step – under its name/title.
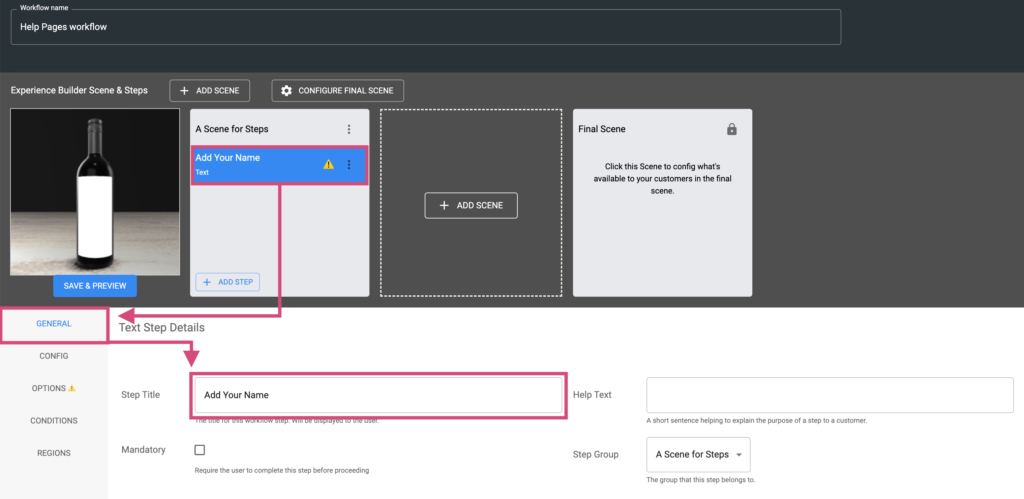
Let’s change the title of our new step. When using the experience, the customer will see this, so let’s go with a name that’s clear and easy to understand. For our example, we’ve called ours “Add your name”, since that is what the customer will be doing with this particular step.
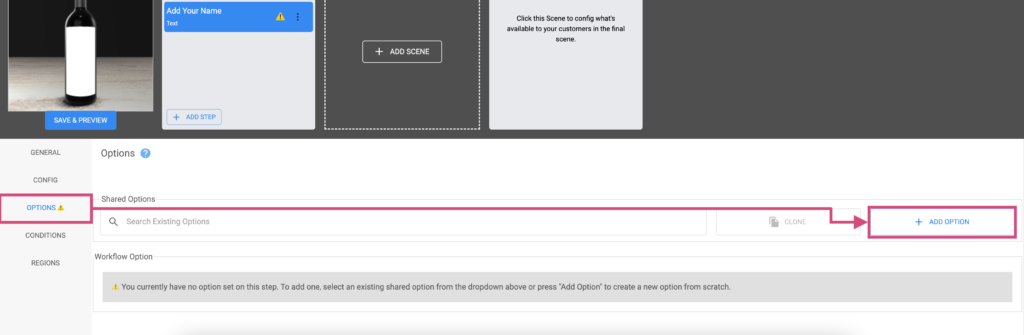
In order to save our workflow with our new step, we need to add some assets to it. Navigate through the step settings and access the “Options” tab. Once there use the “Add Option” button to create a new option. See below.
Now, after adding your option, we can add a name for it to make things more clear for us. We called ours “Text Options” for this example. After this, we click “Add Variant”. You will see a row of items has been added to the option, this is our first variant. Add as many as many variants as you need. You may offer a variety of fonts etc. We’ll start with one font for now.
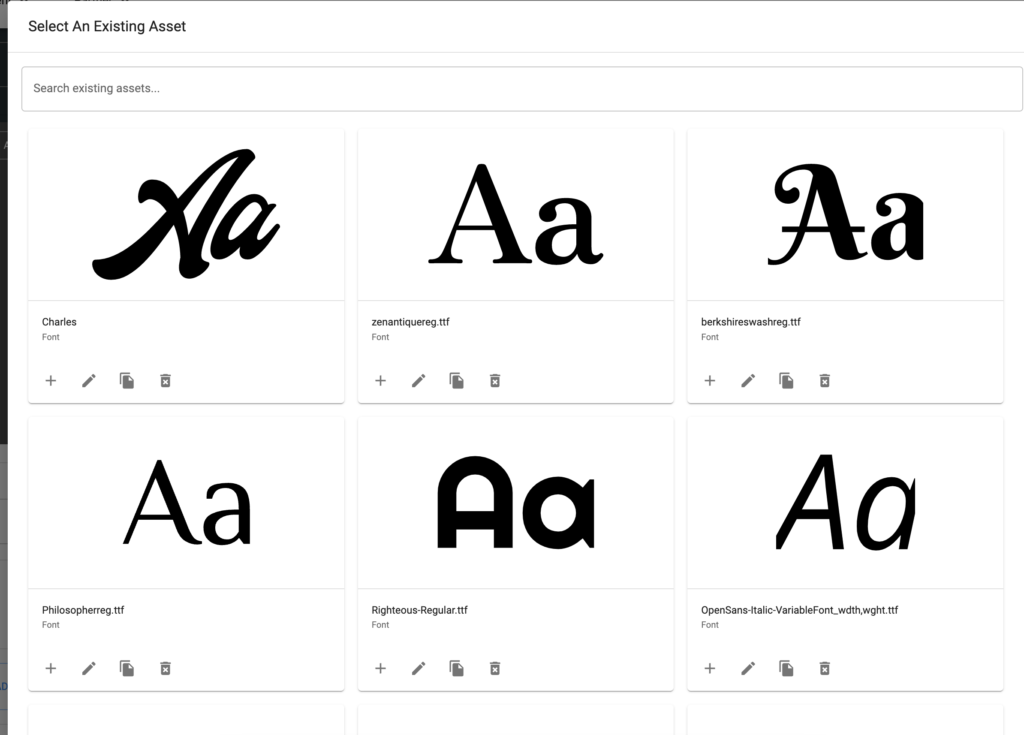
Add a name for the variant in the first section, the price in the second (If applicable), and then using the upload Icon in the third section, choose from the list of available assets for your step, and finally select a default variant, the variant that will be automatically selected for the customer’s experience (So the step is not left blank).

Now that you have added an option and some variants, the errors displayed in the workflow will disappear, and you can now save the workflow! You can explore the other tabs within the step too, for us, we visited the ‘Config” tab and changed the ‘Max Length’ of our text to 100. Depending on your step type, you may also need to add some regions to the step in order to save.
Panels and Regions (Simplified)
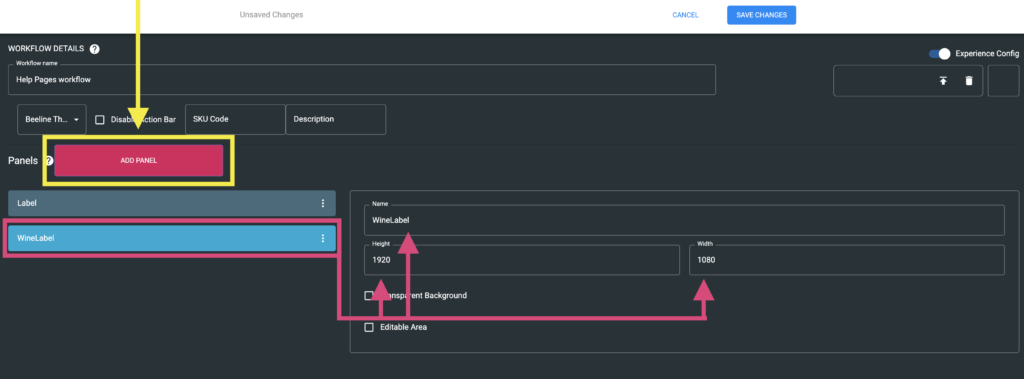
Next will access the “Panels” settings via the “Experience Config” toggle on the top right of the workflow editor. Here you can access the Panels section.
Next, we will add a new panel. To do this, simply click the pink highlighted “Add Panel” button on the left once in the experience config screen. After this, you will see your new panel has been added below in the panel list.
Now we can add our measurements to our panel, this relates to the size of the canvas/design area used for your product. An A4 design (At 72DPI) would be 842 pixels high by 595 wide, for example.
After this, make sure to save, and then we can return to our workflow editing screen by once again using the experience config toggle. For our example, we enter a simple portrait size. See below.
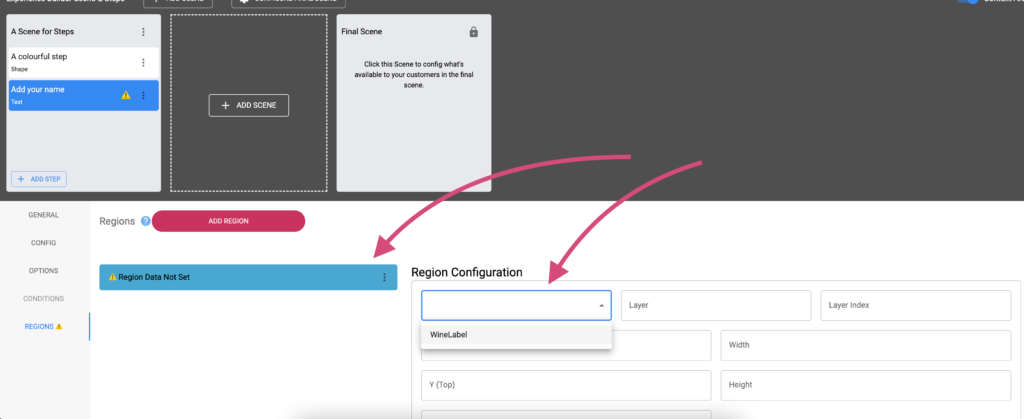
Add/Edit your regions. Next, we will add a region to the step that we made earlier. To do this, click the “Experience Config” toggle once again to go back if you haven’t yet. Simply click the step we wish to add our new regions to. Navigate to the “Regions” tab within our now-selected step. You are able to now see the “Add Region” button, click this and it will add your first region to the step.

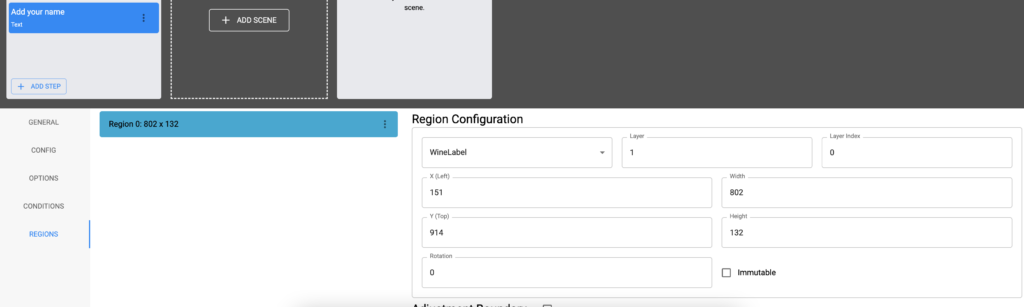
Click on the new region you just added to select it. Now we add all of our “region data” to it.
First, we need to select the panel to draw on with the first drop-down. See below.
Now with our region selected, we want to enter all of our region data. We want our text to appear over everything, so we will add it to layer 2 with a layer index of 0 since the other pre-created step in our workflow will draw to layer 1. Within layers. Now we can save our workflow and try it out on a product!
We used Adobe Illustrator to position a block of text in a canvas the same as our panel size to find our measurements, but you can use any 2d editor to position and scale things to find where you want to place them. Or you can even navigate back to the “Experience Config” settings, enable the “Free Design” editor, save the workflow and test it on a product to add some text or blocks of colour and find the exact positioning information of the design elements you add!
Adding Your Workflow to a Product
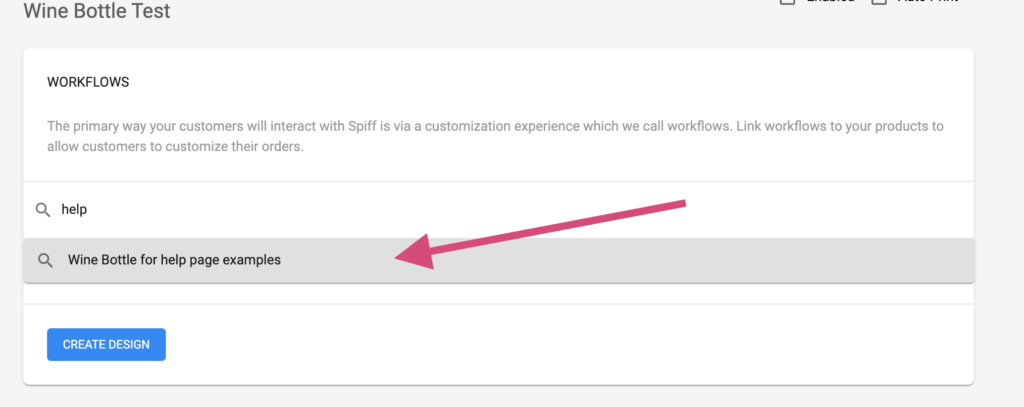
Now that know we’ve added our step, panel, and our region, we can test out our step by adding our workflow to a product. As described in the “Create a Product” documentation, let’s create a product through our product list page and try out our new workflow. Add your workflow to the product via the “Search Available Workflows” box and find your new workflow. Now save and hit Create a design to try out your new step! See the below Images.
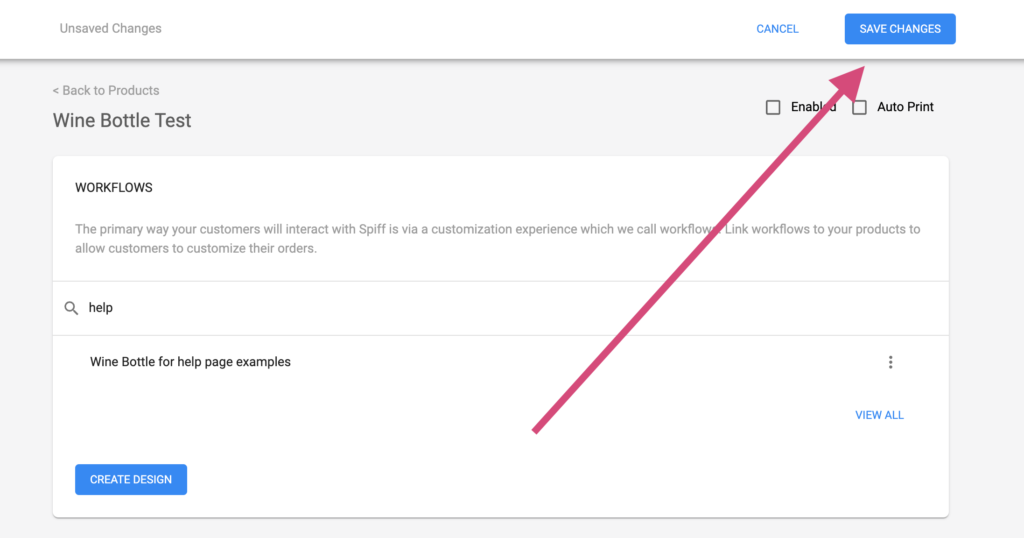
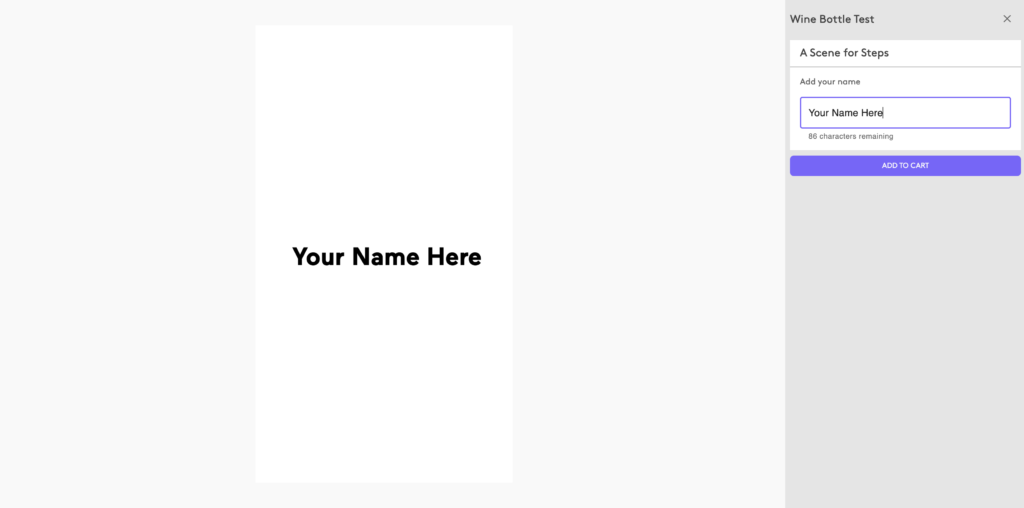
5. Success! Your new workflow is now functional with the new step you added! For more information on specific step types, and more workflow-related topics, refer below