Similar to the internal ‘Options’ found within the ‘Step Settings’ of each Step Type, shared options act as a container for asset types that you specify. Unlike internal step options, external ‘Shared’ options can be built externally to the workflows that you build and can be shared universally where needed. This is helpful if you’re building a variety of different workflows that may all include a certain step that will use the exact same assets. In this case, a shared option can be created, attached to a step, and edited at any time external to the workflows and will then update across all workflows that utilize it.
For example, you may sell a variety of bespoke shirts in different styles, and different shapes, even with different collars and buttons. Though they are physically different, you may have a set selection of colours that are available for all of those products that won’t change. Shared options make this easy. Think of these as a template of variants, you can further ‘Clone’ shared options in the workflow for direct editing, though this will detach it from its shared version.
Creating Options
In order to create a shared option, first navigate through Content>Options on the Spiff Hub.
Once there, simply use the “Create New Option” button in the top right. Now you’ll see the Option creation page.

Now let’s set up our new option. First, name your new option and select the appropriate asset type that you’ll use. Save your option before continuing with the ‘Save’ button in the top right.
In our case, we’ll name ours “Shirt Colors” and choose the “Color” Asset type.
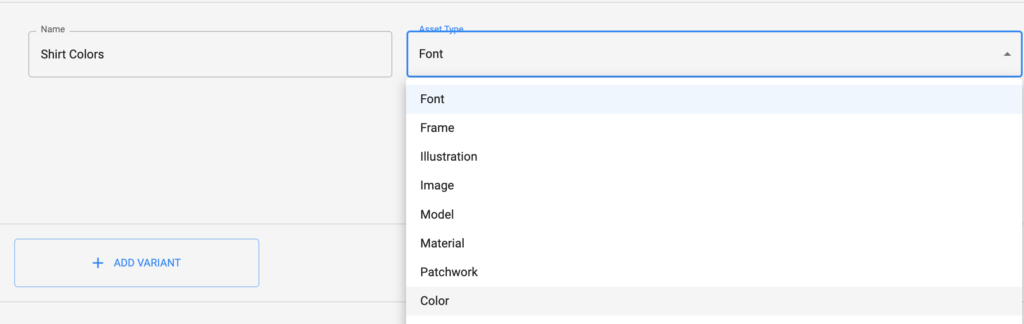
Next, let’s add some variants, use the “Add Variant” button at the bottom.
Add a name for your variants, and then the price (If it adds cost), then add your assets.

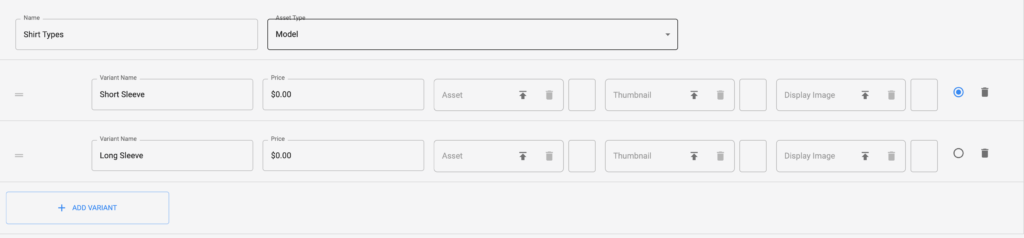
Once you’ve added your assets, you can then upload a ‘Thumbnail’ that will display in the step’s selections area of your customer experiences. And finally, add a ‘Display Image’ if available on the option you are creating. Now simply save, and navigate to the workflow you wish to apply the new option to.
Within the workflow(s) you’re adding the option to, navigate to the appropriate step. Select it, and open the Options tab. Now simply use the “Search Existing Options” search box and enter your new shared option’s name. Click on the option, and you’ll see it’s been added.
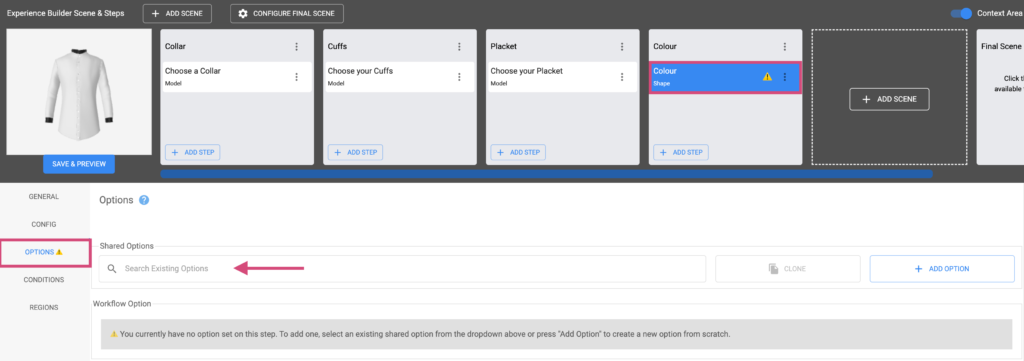
Your shared option has now been added. Any changes you make to it via Content>Options will be reflected in all the workflows and customer experiences that it’s attached to automatically.
