In order to display visually what our steps in our workflows are doing for the customer’s design, we have to set up a “Panel”. Panels act as a canvas and container for all of your design elements, from steps and regions or elements you add yourself in Free Design.
Panels are not only built into the final delivery files (for printing, or fulfilment/manufacturing) but will also be drawn directly onto the 3D models attached to your workflow in real-time, or onto the 2D canvas for ‘Free Design’ workflows. Without panels, you cannot create your design.
Creating Panels
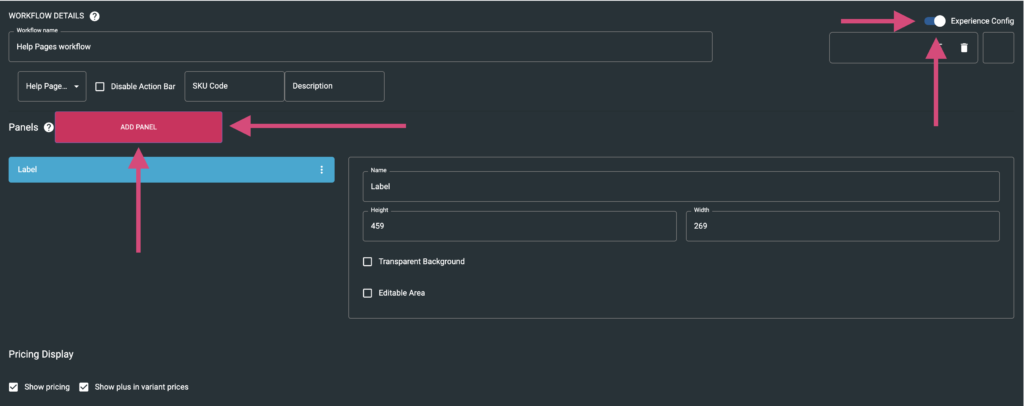
Explained in the Experience Config documentation, adding new panels to your workflow is simple. Accessed via the Experience Config toggle, found within any workflow you are creating, use the highlighted “ADD PANEL” button found in the Panels section.
Transparent Background
By default, the panels that you create will have a solid white background, since most final files/print files will simply feature a white base background. This behaviour can be disabled for each of your individual panels using the “Transparent Background” toggle. With this setting enabled, your panel will be 100% transparent at its base/background. Meaning that only data/design elements added by your steps and regions will be visible in your final PDF/output files.
Below we see a typical output file, a simple PDF (viewed in Illustrator) with the standard white background from a typically configured panel.

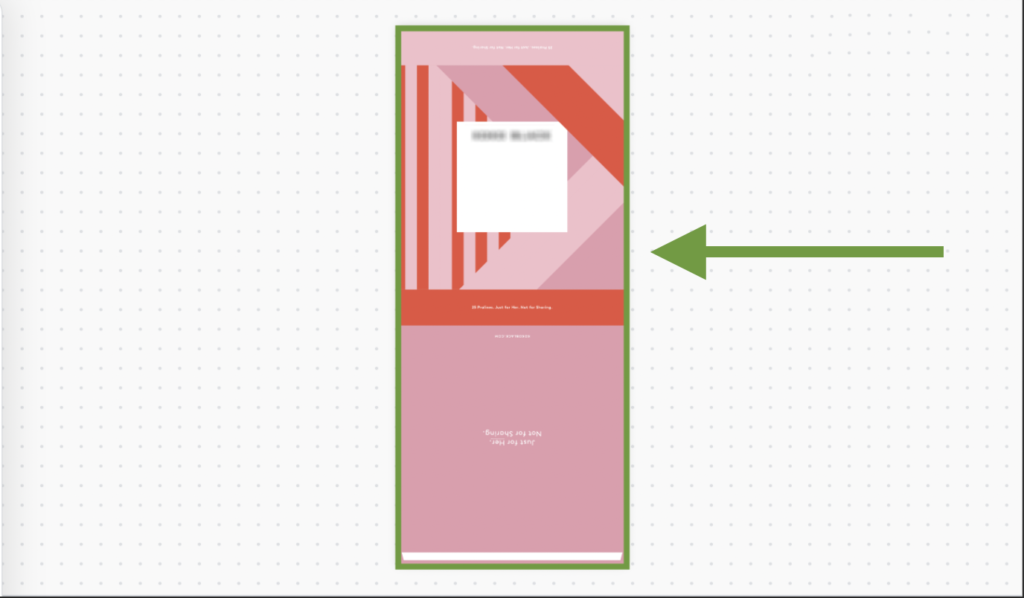
And now, with “Transparent Background” enabled, we see the same output file but featuring the design elements added in the workflow only, in this case, a logo. This feature is especially valuable for merchants that print onto the specific stock and specific stock colours, where they only want the added design elements. (Since the background is already determined by the physical stock.)
Editable Area
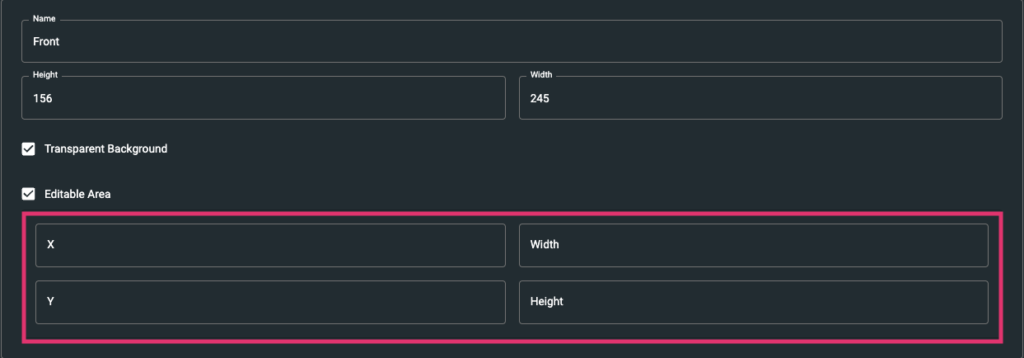
Used in conjunction with the Free Design 2D Editor, the ‘Editable Area’ configuration allows you to define the exact locations to which your customers can add design elements to. Think of the editable area as a bounding box for customer assets, similar to a region. The editable areas of your products are conveniently outlined to convey visually where the design portion is. This outline will be excluded from print/final output files automatically. See below, a simple editable area automatically outlined on a business card. The customer cannot move the design element outside of this area.

Defined in pixels for size and location, and anchored by the top left, the editable area behaves exactly like a region. See the Regions documentation for more information.
Measuring Panels
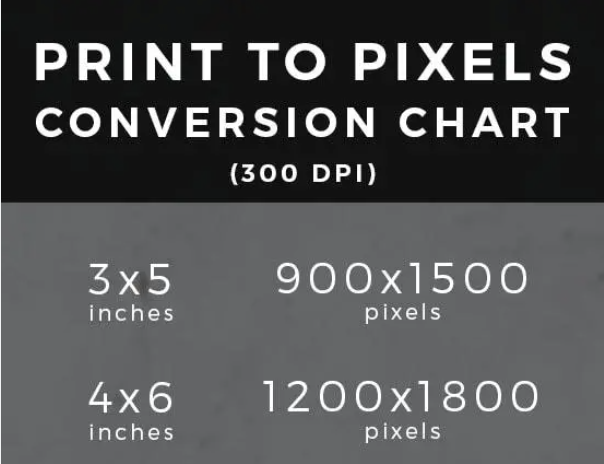
Panels in Spiff are measured in ‘Pixels’. Designs that you want to set up or use, measured in millimetres or inches need to be converted. Using platforms like Adobe Illustrator or Photoshop makes this easy with ruler settings. In illustrator, for example, simply right-click the ruler and choose the pixels setting. We typically use 300DPI images, keep the DPI in mind when converting.
Converting Millimetres or Inches to Pixels in Adobe Illustrator
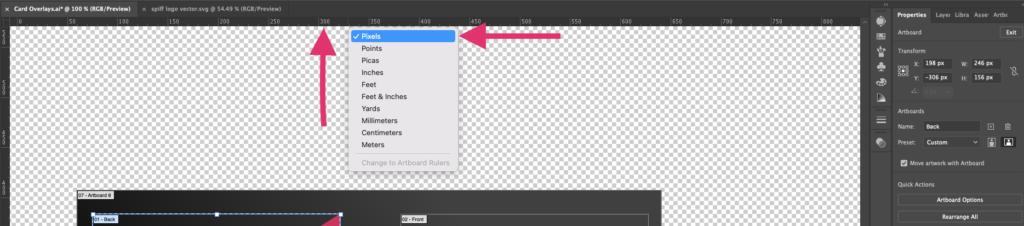
Converting to pixels is made easy with design platforms like Illustrator since they have quick settings changes that automatically convert all measurements in the document. Within Illustrator, simply use the upper ruler, and right-click to select the ‘Pixels’ measurement.
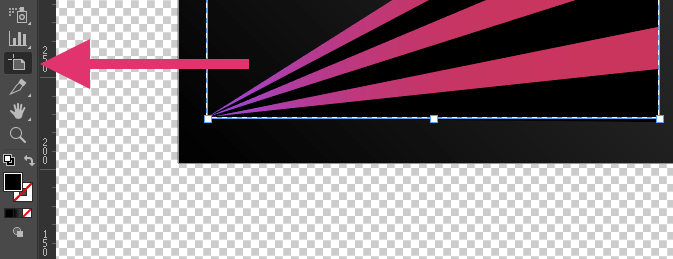
Next, you can use the artboard tool found in the left sidebar, and then select the artboard that you’ve created.
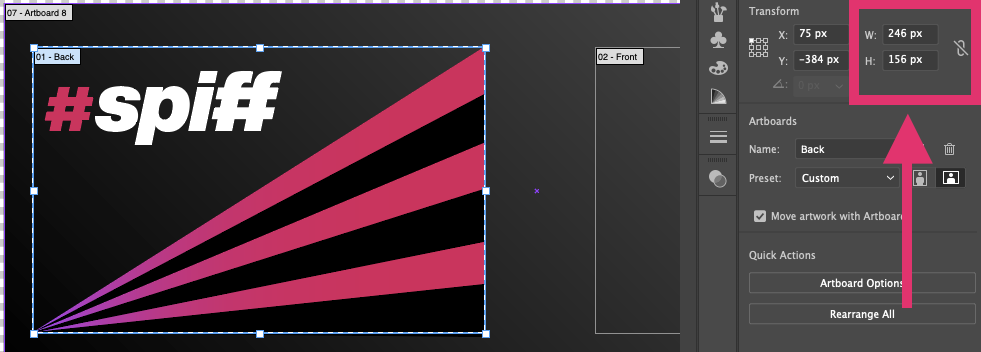
Once this is done, with your artboard still selected, navigate to the ‘Properties’ window and you’ll be able to see the new measurements in pixels.
Panels and 3D Models
For 3D experiences, using 3D models to apply your panels/regions for visualizing what the finished products will look like, you’ll need to make sure that your panel names and the ‘material’ names built into the 3D models match one another in a case-sensitive manner. This allows Spiff to automatically target those materials and apply the design elements to them. For example, a 3D model of an animated greeting card has a “Front” material, applied only to the front of the 3D model, and a “Back” material. We only want to change the front/inside of the card, since the back design won’t change. So we will name our panel “Front”, capitalised exactly the same.

Finding material names for panels with Babylon Sandbox
Babylon sandbox, provided by Babylon.JS, is a free 3D viewer for GLB/GLTF files (used in Spiff). This provides you with an easy method to find material names attached to your 3D model if provided by a 3D artist. With your .glb model files ready, head over to https://sandbox.babylonjs.com/ then drag and drop your model to view it.
In the bottom right corner there are 3 icons, select the scene explorer highlighted on the left below.

Within the scene explorer, navigate to ‘Materials’. Here you can see all of the materials attached to the 3D model. In this example, we are targeting the ‘Label’ material. We can see exactly how it’s written and capitalised, so we’ll create our panel exactly the same.
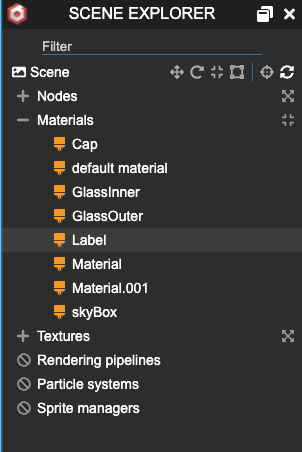
It is important to match the panel names exactly (case sensitive) to the material name on the 3D model. If you don’t do this, the design will not show on your model.
Design Bleed or Overprint
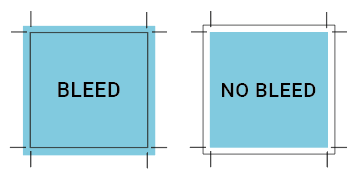
Bleed refers to an extension of your print file that is added to ensure the end product looks right after it’s cut down. Without bleed, some printers may not create a perfect seamless edge on your printed products. Bleed is especially helpful in garments too, where edges of the prints may be lost in areas that get stitched over. Adding bleed gives you some breathing room to play with.