In order to visually show your design or personalisation on your model, it must be “UV Mapped” accordingly.
UV mapping is a technique used in 3D modelling to project a 2D image onto a 3D model’s surface. Essentially you are physically ‘unwrapping’ or unfolding your 3D model’s mesh/object data into a flat lay 2d version that image files can then be applied to while arranging it into an applicable shape that makes sense for the designs you produce/use. Though there are automatic ways to UV unwrap 3D models, artists typically do this manually as it allows complete control over the UV map. In order to use your 3D model and apply your designs to it, there are a few steps to ensure your UV maps are created appropriately.
Resources:
In these examples, we are creating a personalised wine bottle experience as a demo for customers. While there are a variety of materials attached to the 3D model that we are using, we will only focus on the bottle’s label, since that’s what will change within the customer’s personalisation experience. We will use the “UV Editing” workspace in a blender.
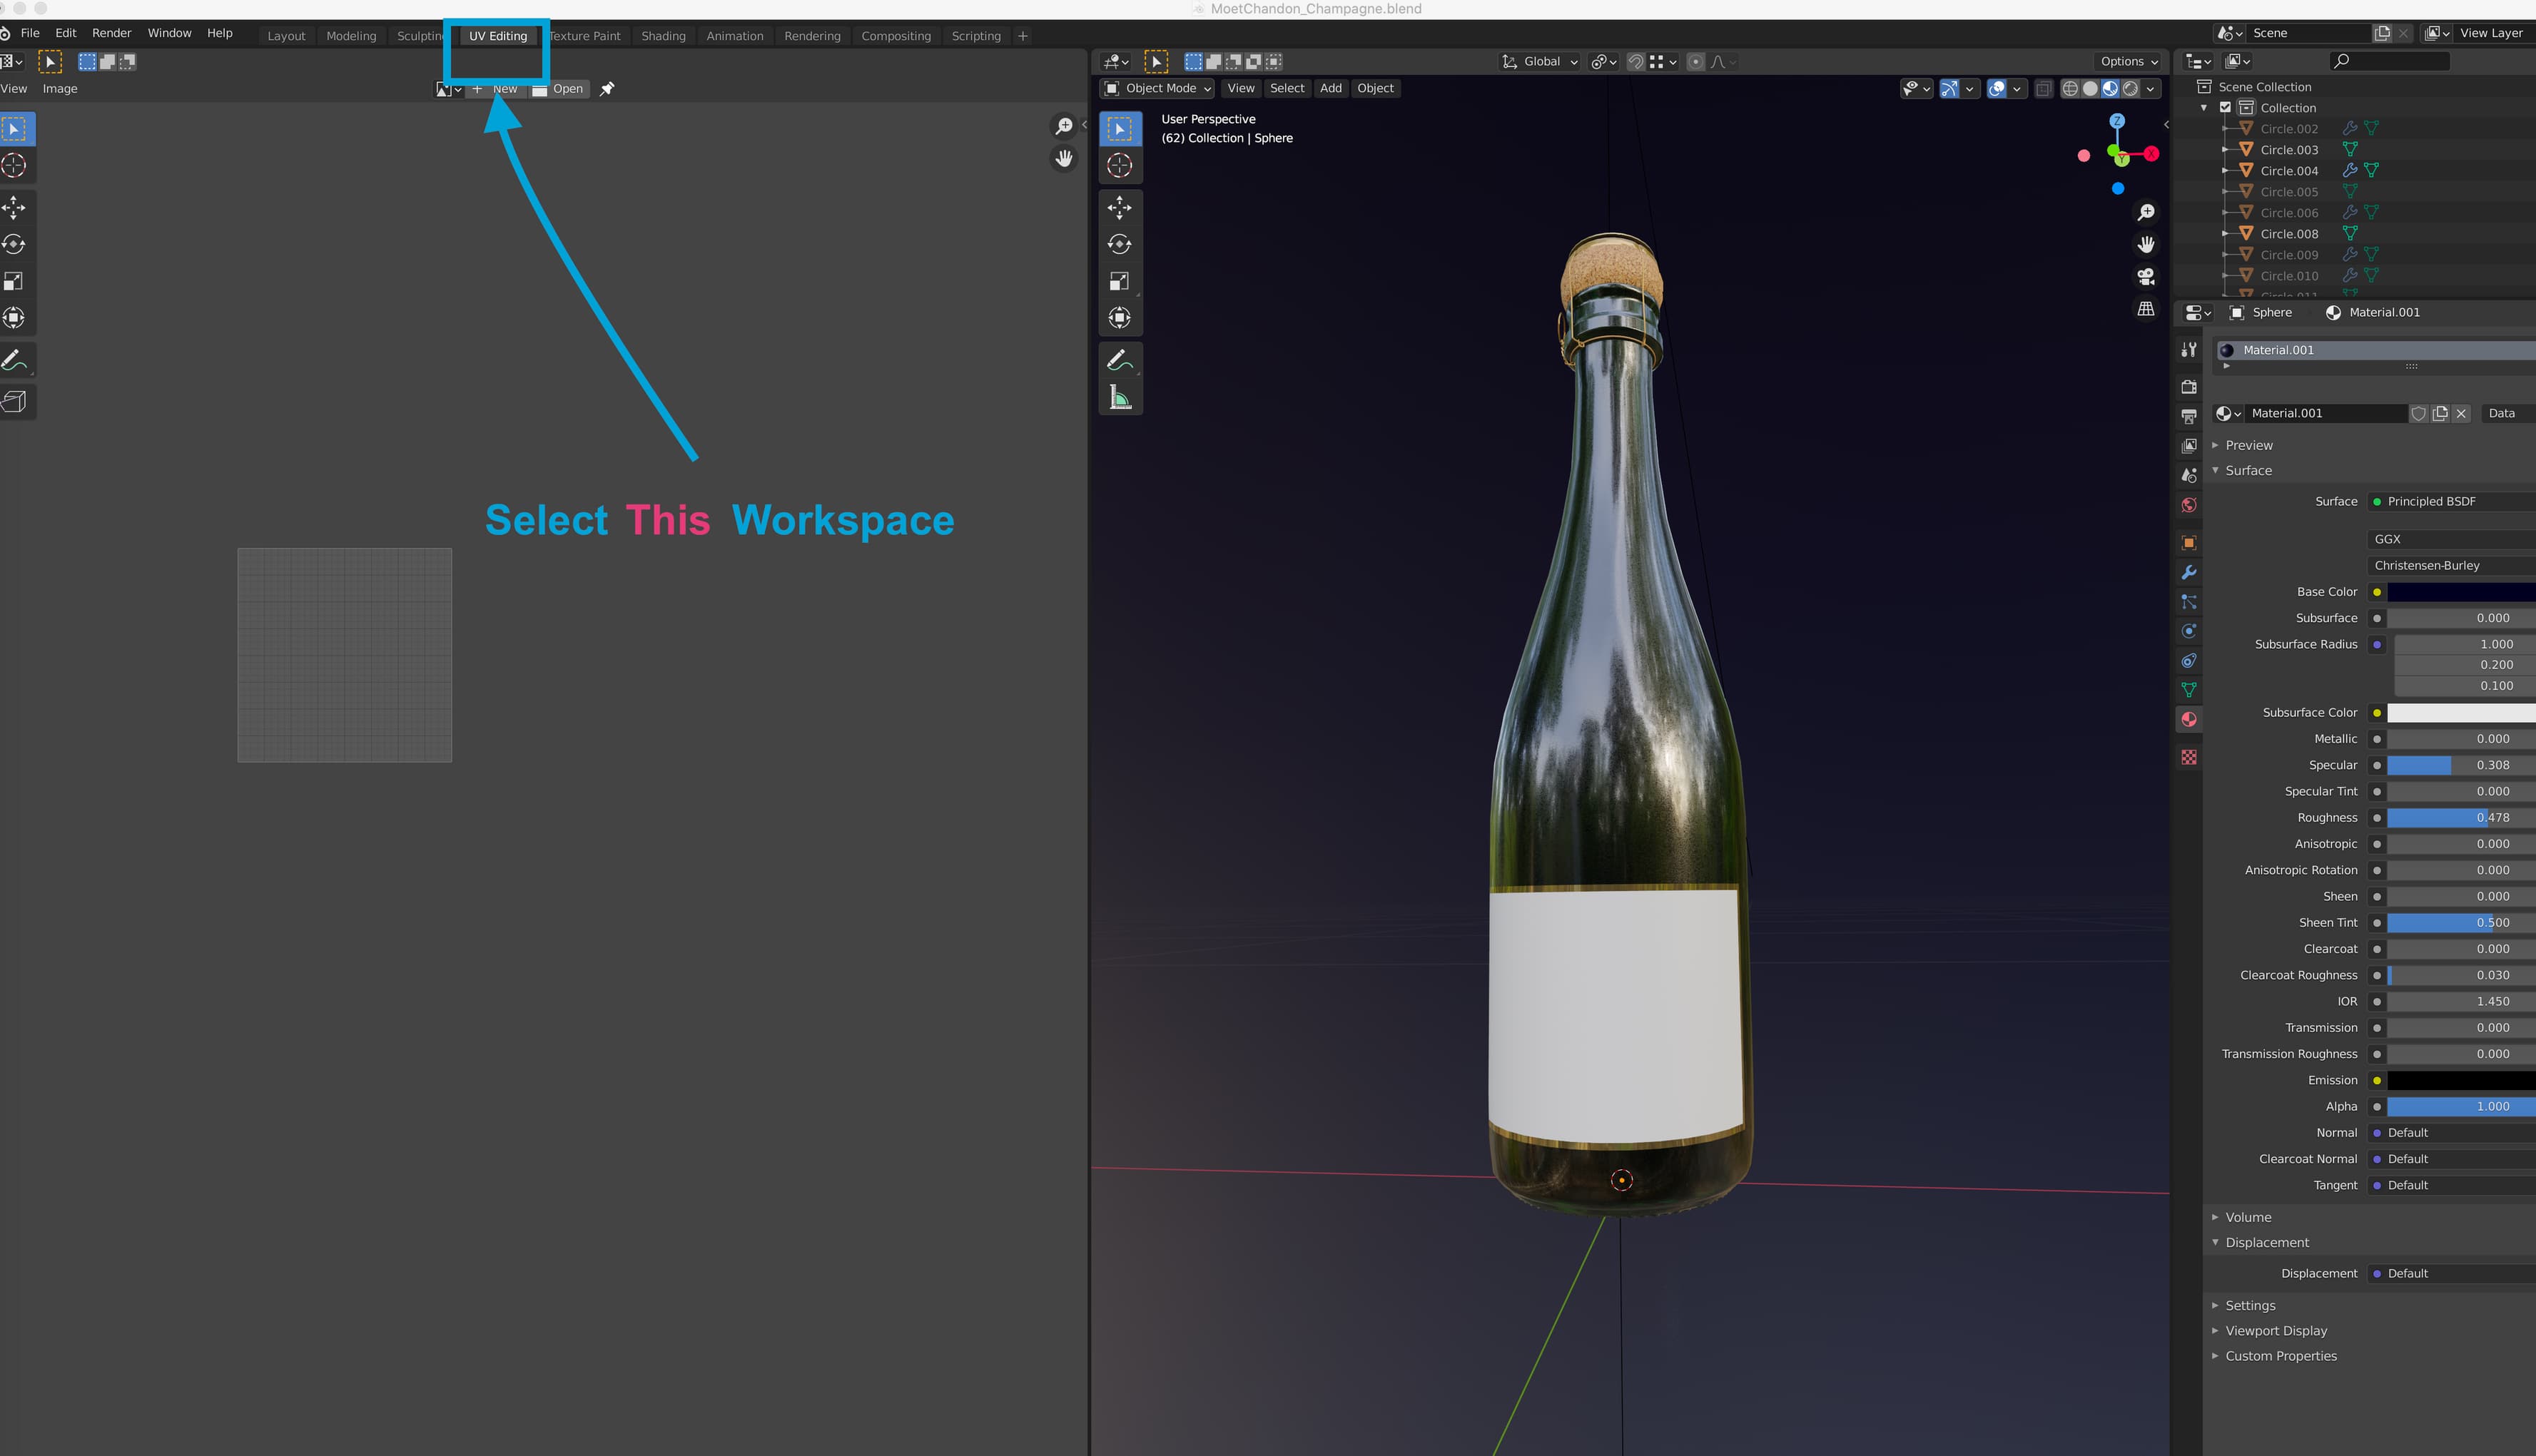
Select your model and access the edit mode
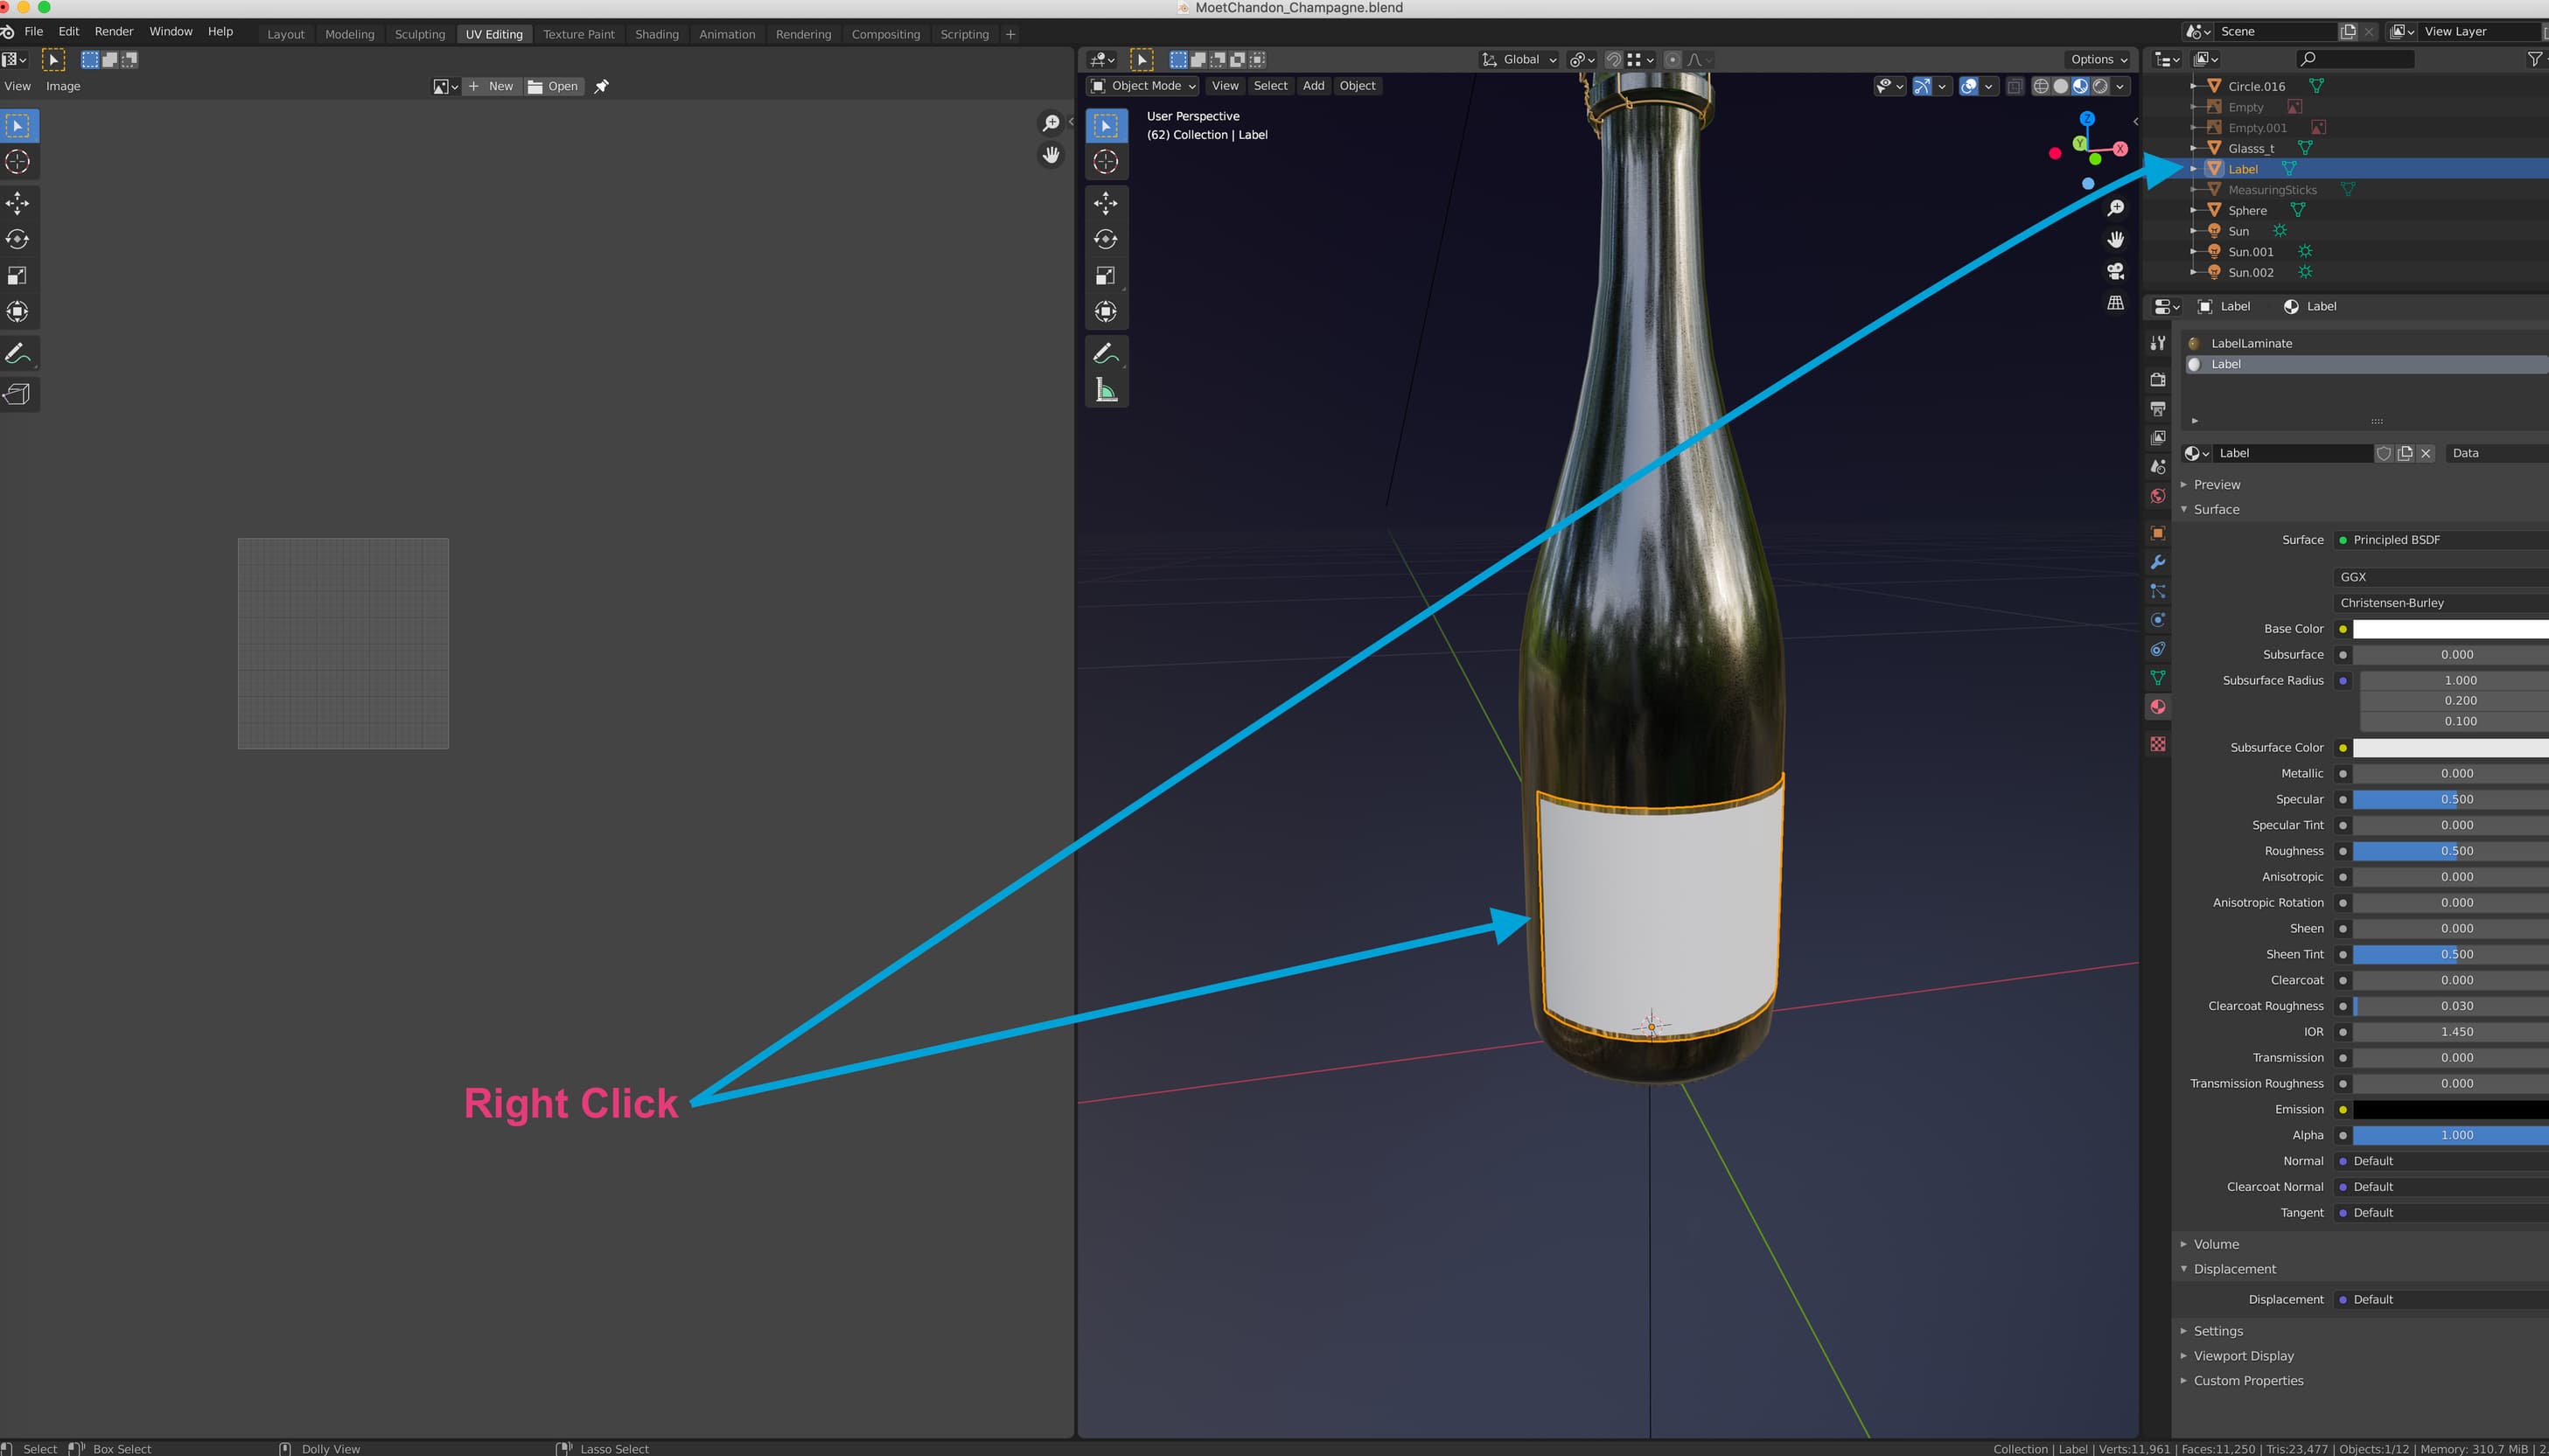
In the right-hand side of the UV Editing workspace, using the 3D Viewport, you can left-click the object you wish to UV Unwrap to select it, and can then verify that it’s selected in the top right corner via the ‘outliner.’ (See below)
Once selected, still hovering above the 3D viewport, you can press the “TAB” key to change the context to ‘Edit Mode’, which will give access to the physical makeup of the 3D model, the ‘mesh’ and its vertices.
Selecting the mesh and unwrapping
Now, within edit mode, you can individually select any vertices that make up the overall object to start unwrapping it. We will select all in this case since we are unwrapping the entire label with the ‘A’ key. Once selected, you can then access the UV unwrapping tools with the ‘U’ key, still in the 3D preview. This will present you with a variety of unwrapping operations that can be used in different circumstances. The most widely used operation is simply the “Unwrap” method which will automatically lay out your selected mesh flat into the UV editor, with its seams, edges and overall applied scale in mind.
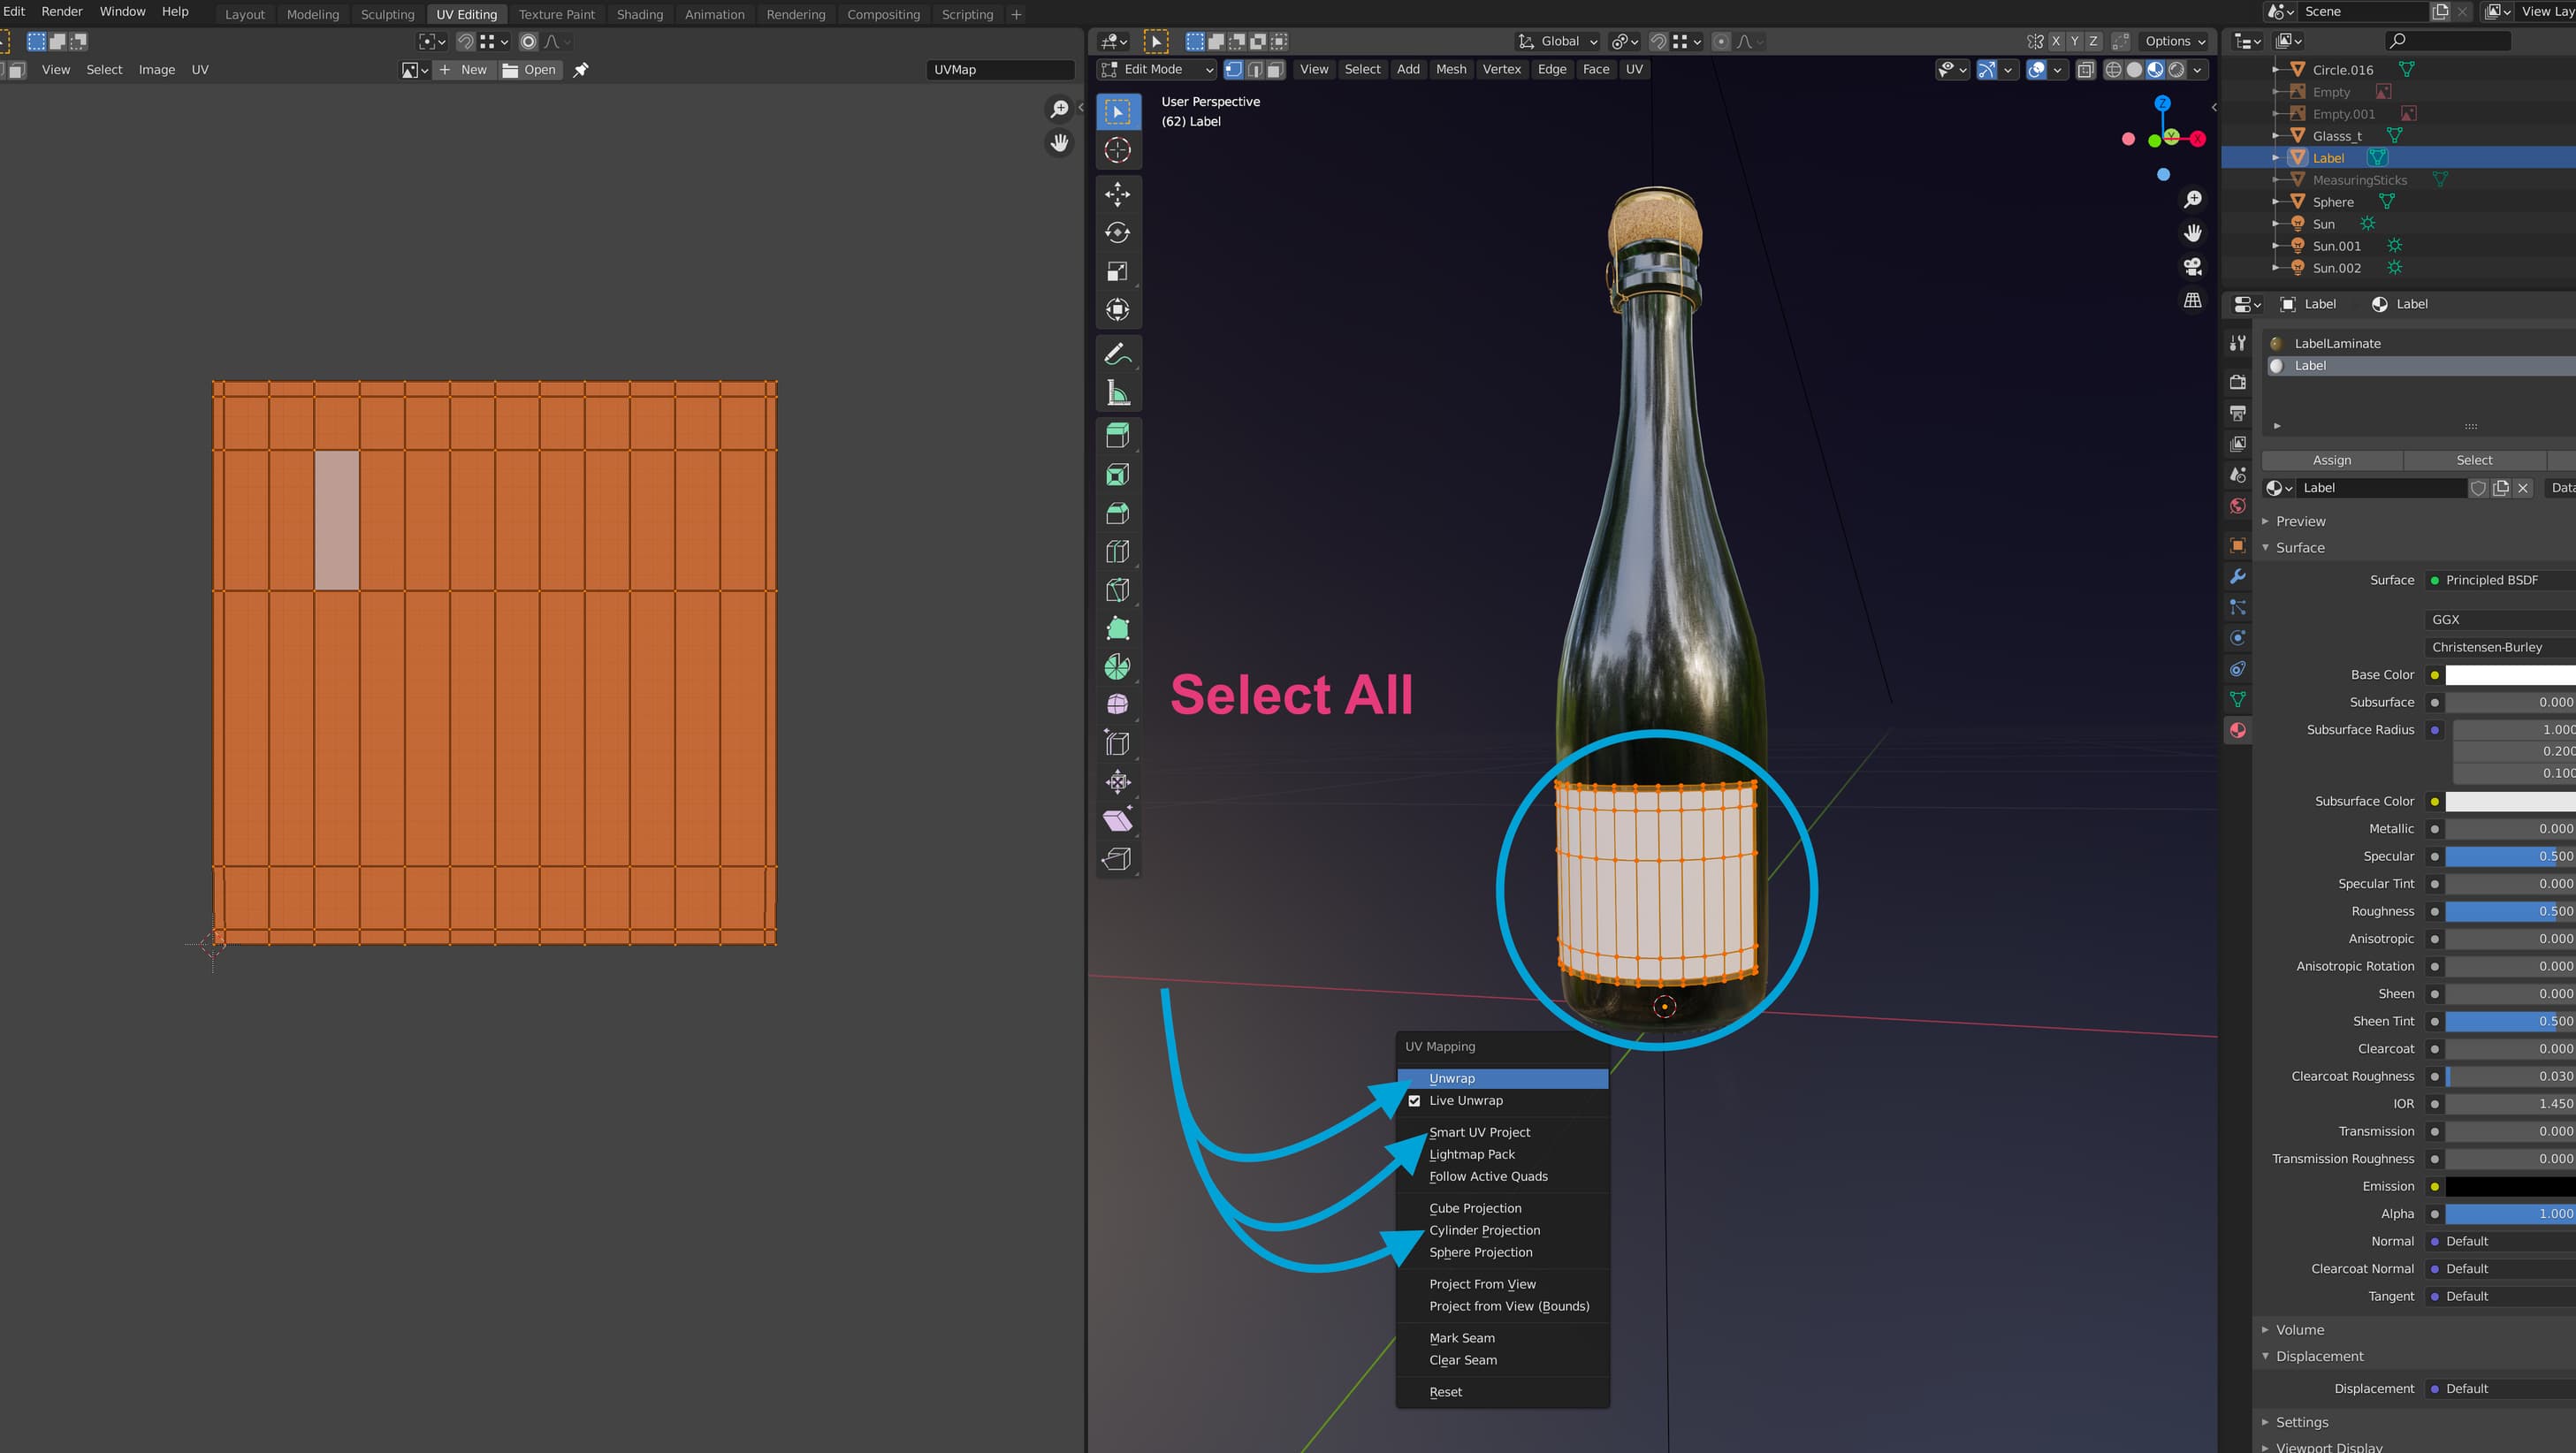
Since the Label that we are unwrapping is a simple flat piece with no extruded faces or complicated mesh, we can simply use the ‘Unwrap’ option, and it will lay our piece flat into the UV Editing canvas.
Adjusting the UV “Shell”
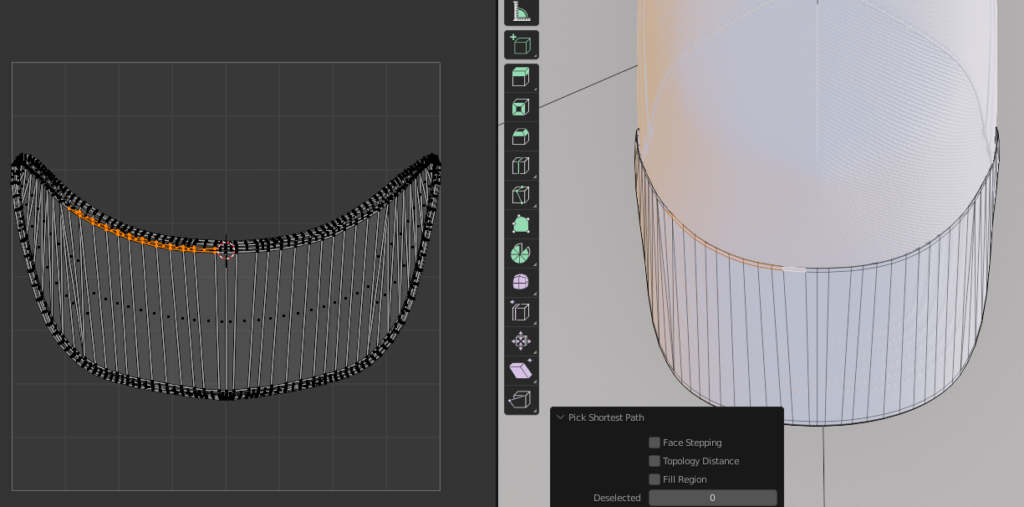
Sections of your model, once unwrapped, are referred to as “UV Shells” within the UV editor, just like the vertices/mesh of the 3D model in the 3D preview can be selected and adjusted, these likewise are adjustable after the UV mapping operation has been triggered. In order to view these shells, you simply select the sections of mesh you wish to adjust like before. See below where we’ve selected the glass component of the 3d model, and the UV version of it is now available in the UV editor. If you cannot find your unwrapped shells, just select the piece they originated from, or press “alt+H” to unhide them if you’ve unintentionally hidden them.

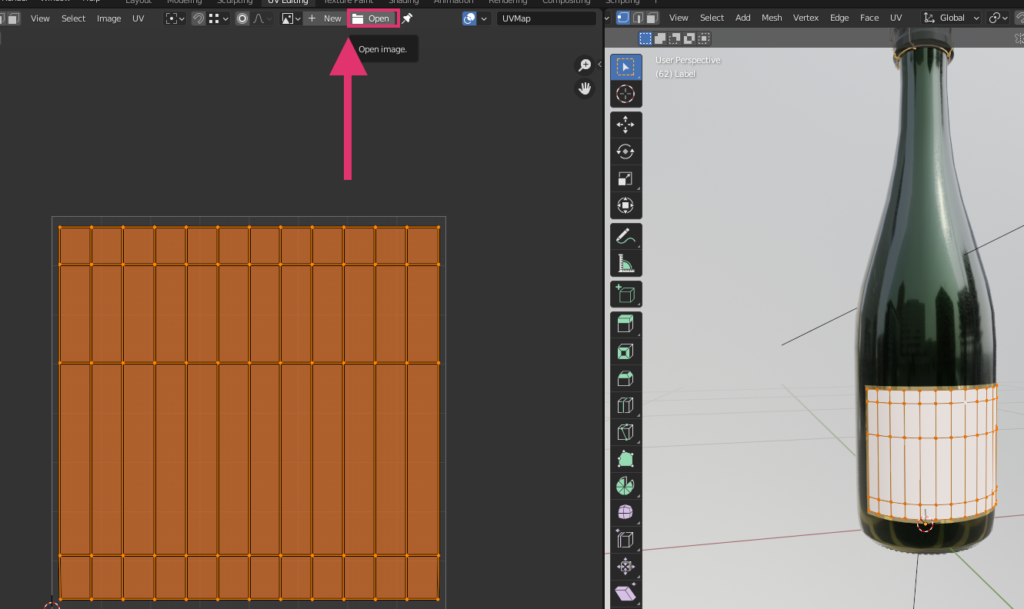
With our label unwrapped, we now start adjusting it. First, let’s open the design/print file or layout that we want to unwrap our label too. Do this via the open image button in the UV Editor.
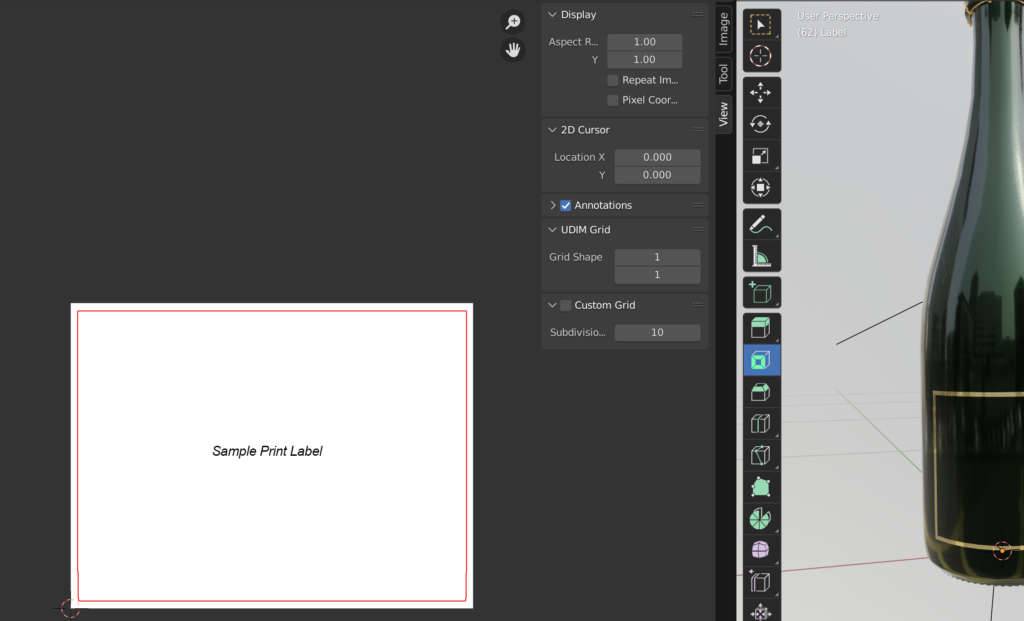
Now we can see our label file in Blender and we can start adjusting. In our example, we are using a label that uses “bleed” or overprint (Usually defined by a bordering red or pink line in most design files), so we’ll be adjusting our UV map so that the 3D model cuts that extra bleed space out and doesn’t show it (exactly how the real-world label would be cut at the same point)
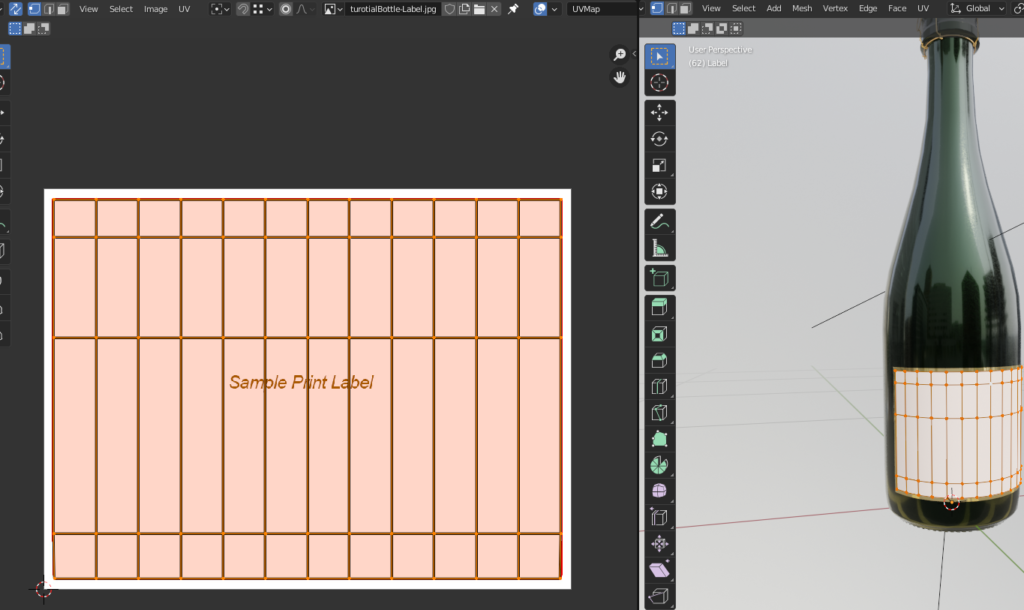
Now, with your mesh selected in edit mode, select all the vertices in the UV editing space and use the ‘S’, ‘G’, and ‘R’ keys to scale, grab, and rotate your UV shell as necessary. In our case, we just scale it’s height and width until it fits in our bleed lines. Since the physical 3D model’s label was created knowing the correct dimensions of the final label, this won’t result in any warping. Make sure to know your dimensions before unwrapping.
Exporting the model with UV’s
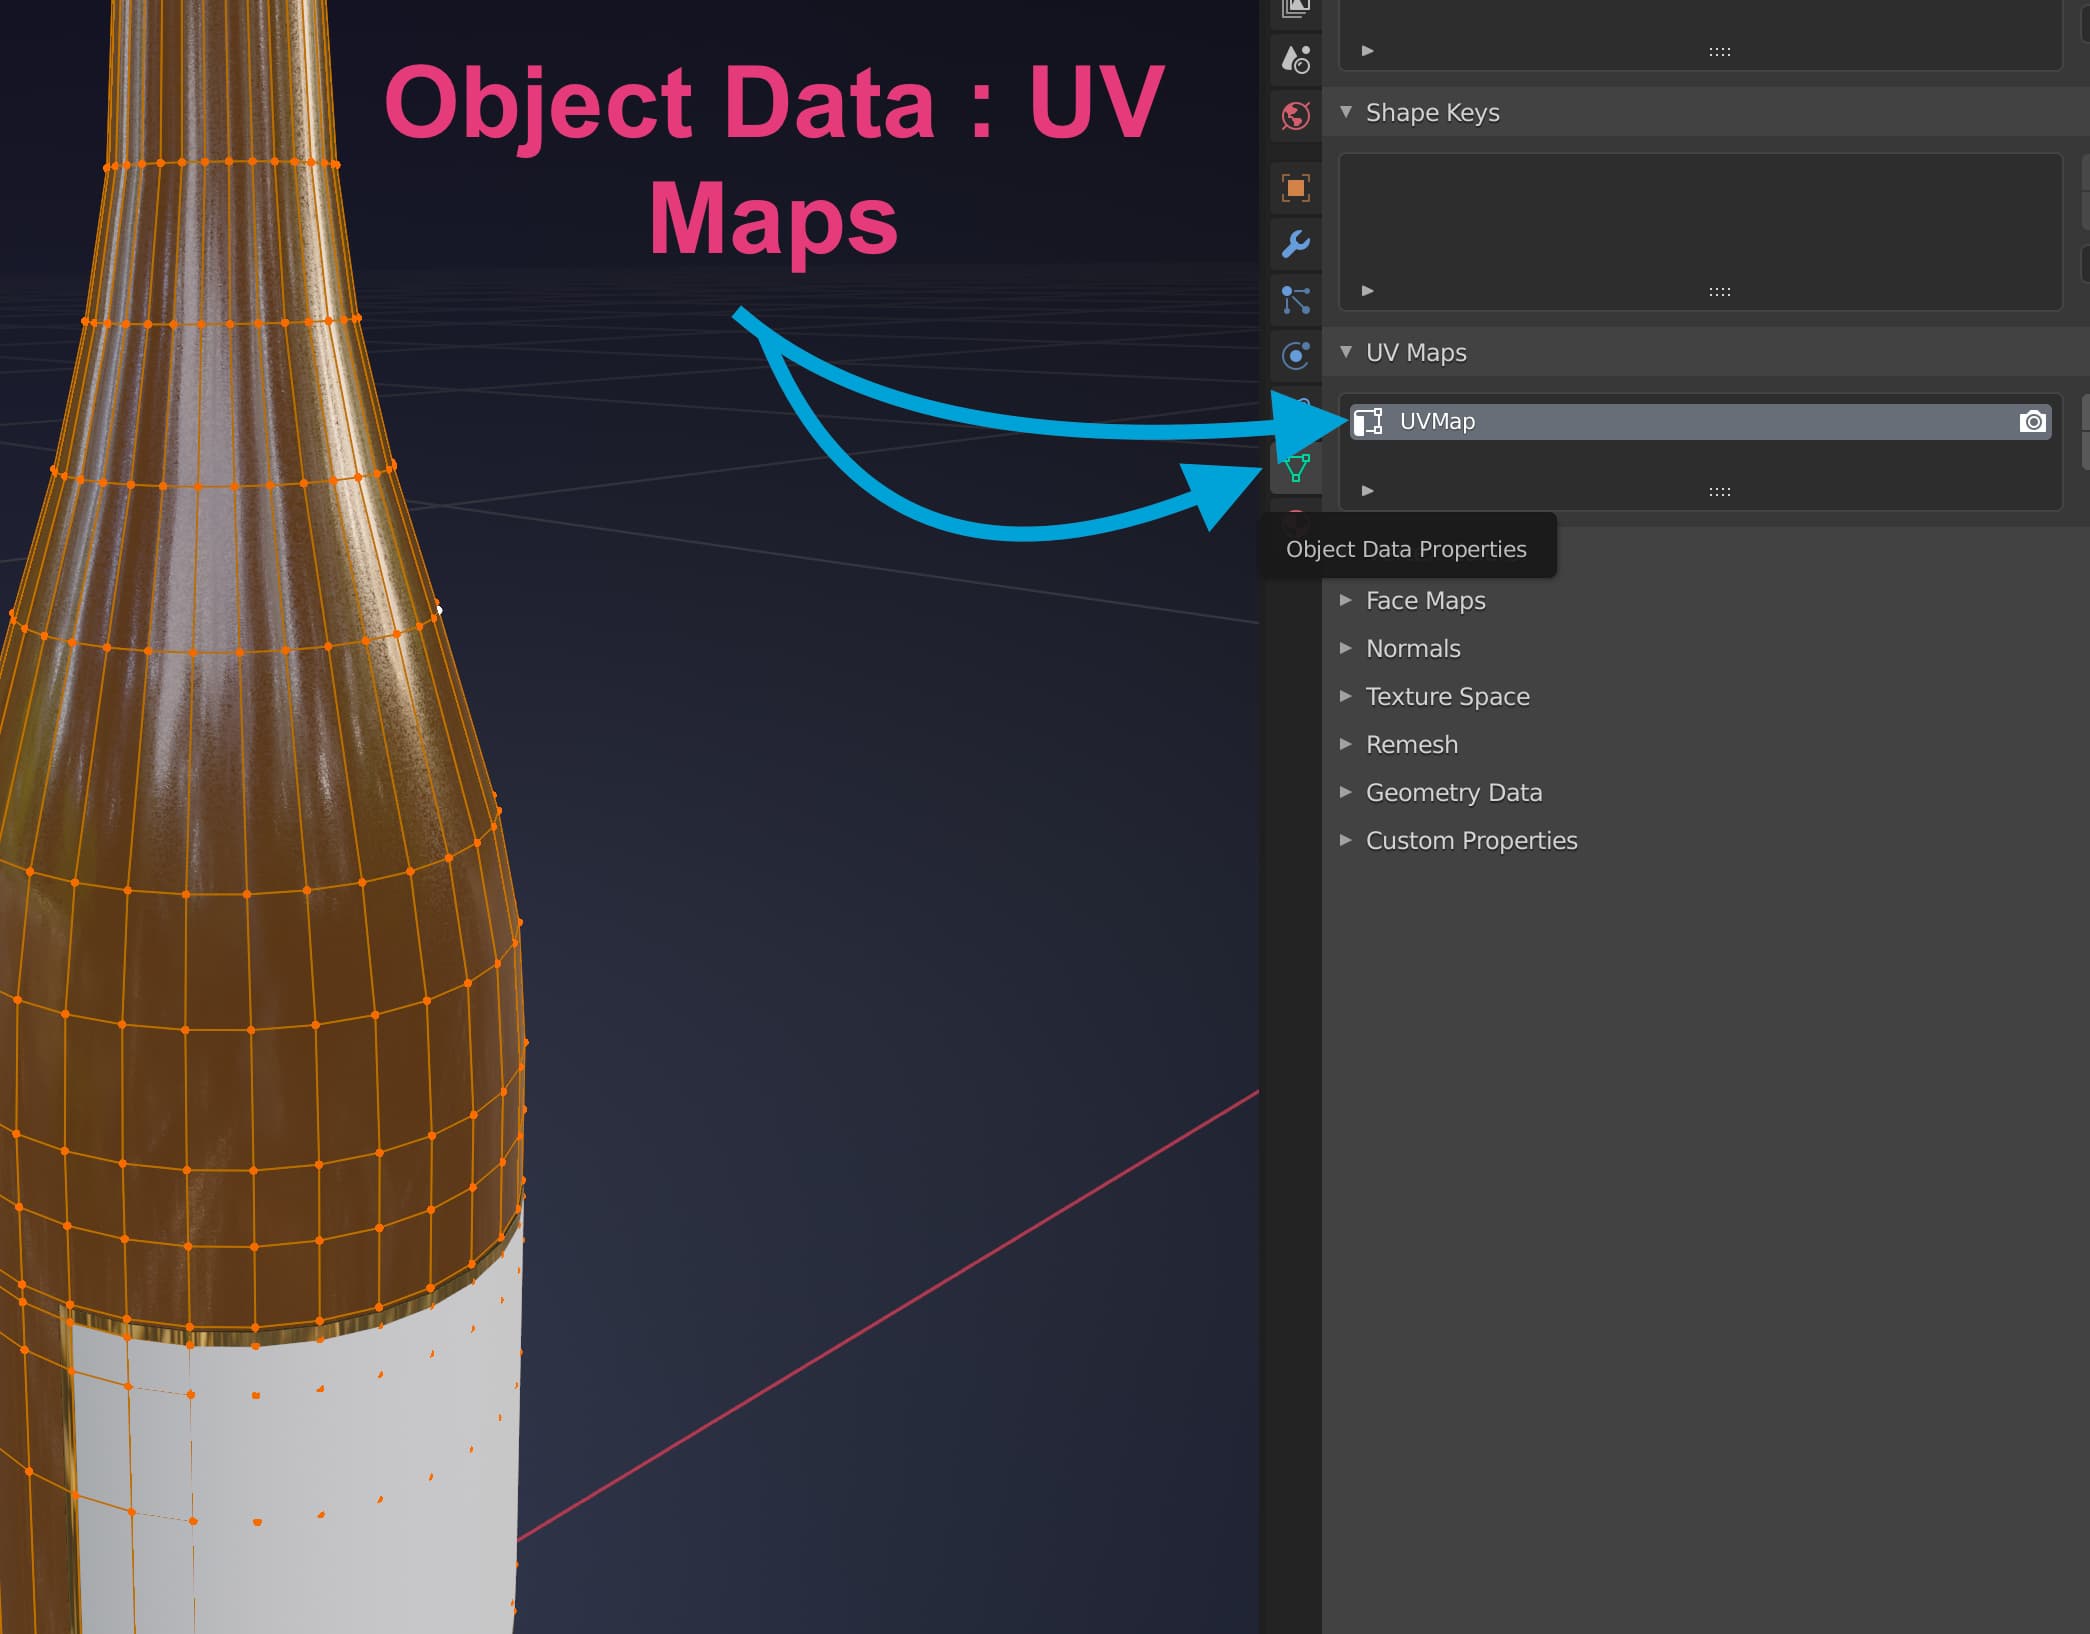
Before exporting, ensure that your 3D model only has one UV map attached to it, or, if you are working with multiple, set the correct one at the top of the list. Multiple UV maps are useful for baking textures you’ve already created into different layouts or shapes if designs are ever changed, but for the web, we only want to use one for less confusion. Check this via Object data in the properties panel.
Now, navigate to File>Export, and export your GLB file.
With all the steps completed, you can now upload your 3D model to the Spiff hub, test it against a product or test product with a workflow to see it working.