You are able to set up any design you like in Spiff from any Photoshop or Illustrator design. No matter how many colors, text steps or photo uploads you need. We can do it!
Example
This example will show you how to set up a simple design from a PSD (Photoshop) file.
- Open your PSD file
- Turn off the visibility on any layers you don’t want to export
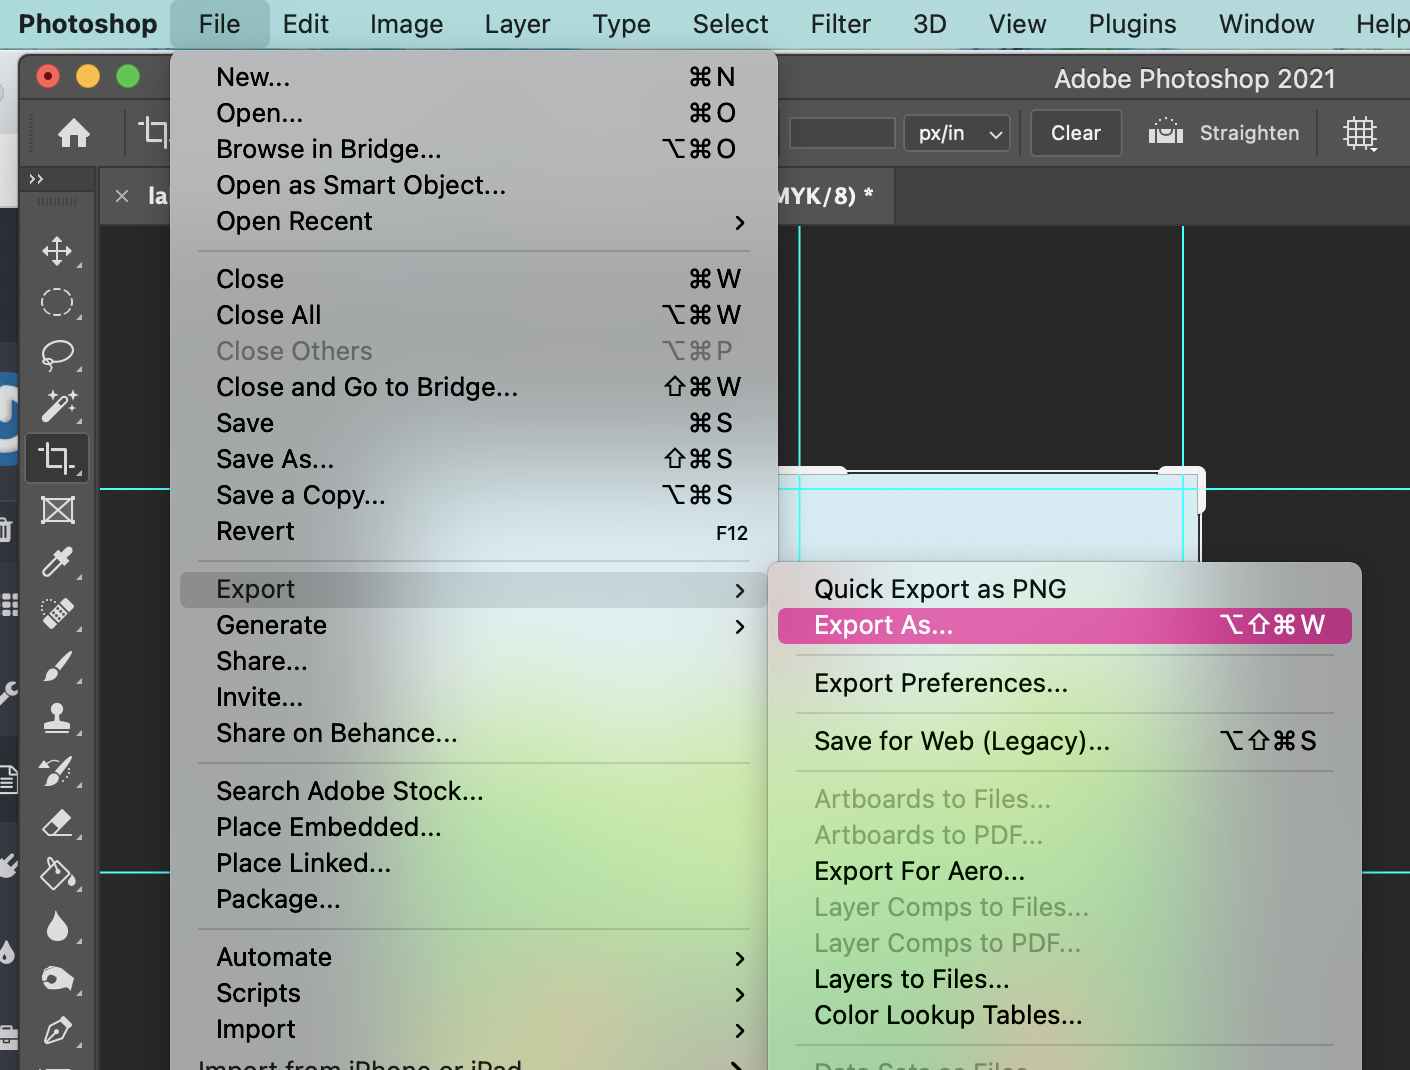
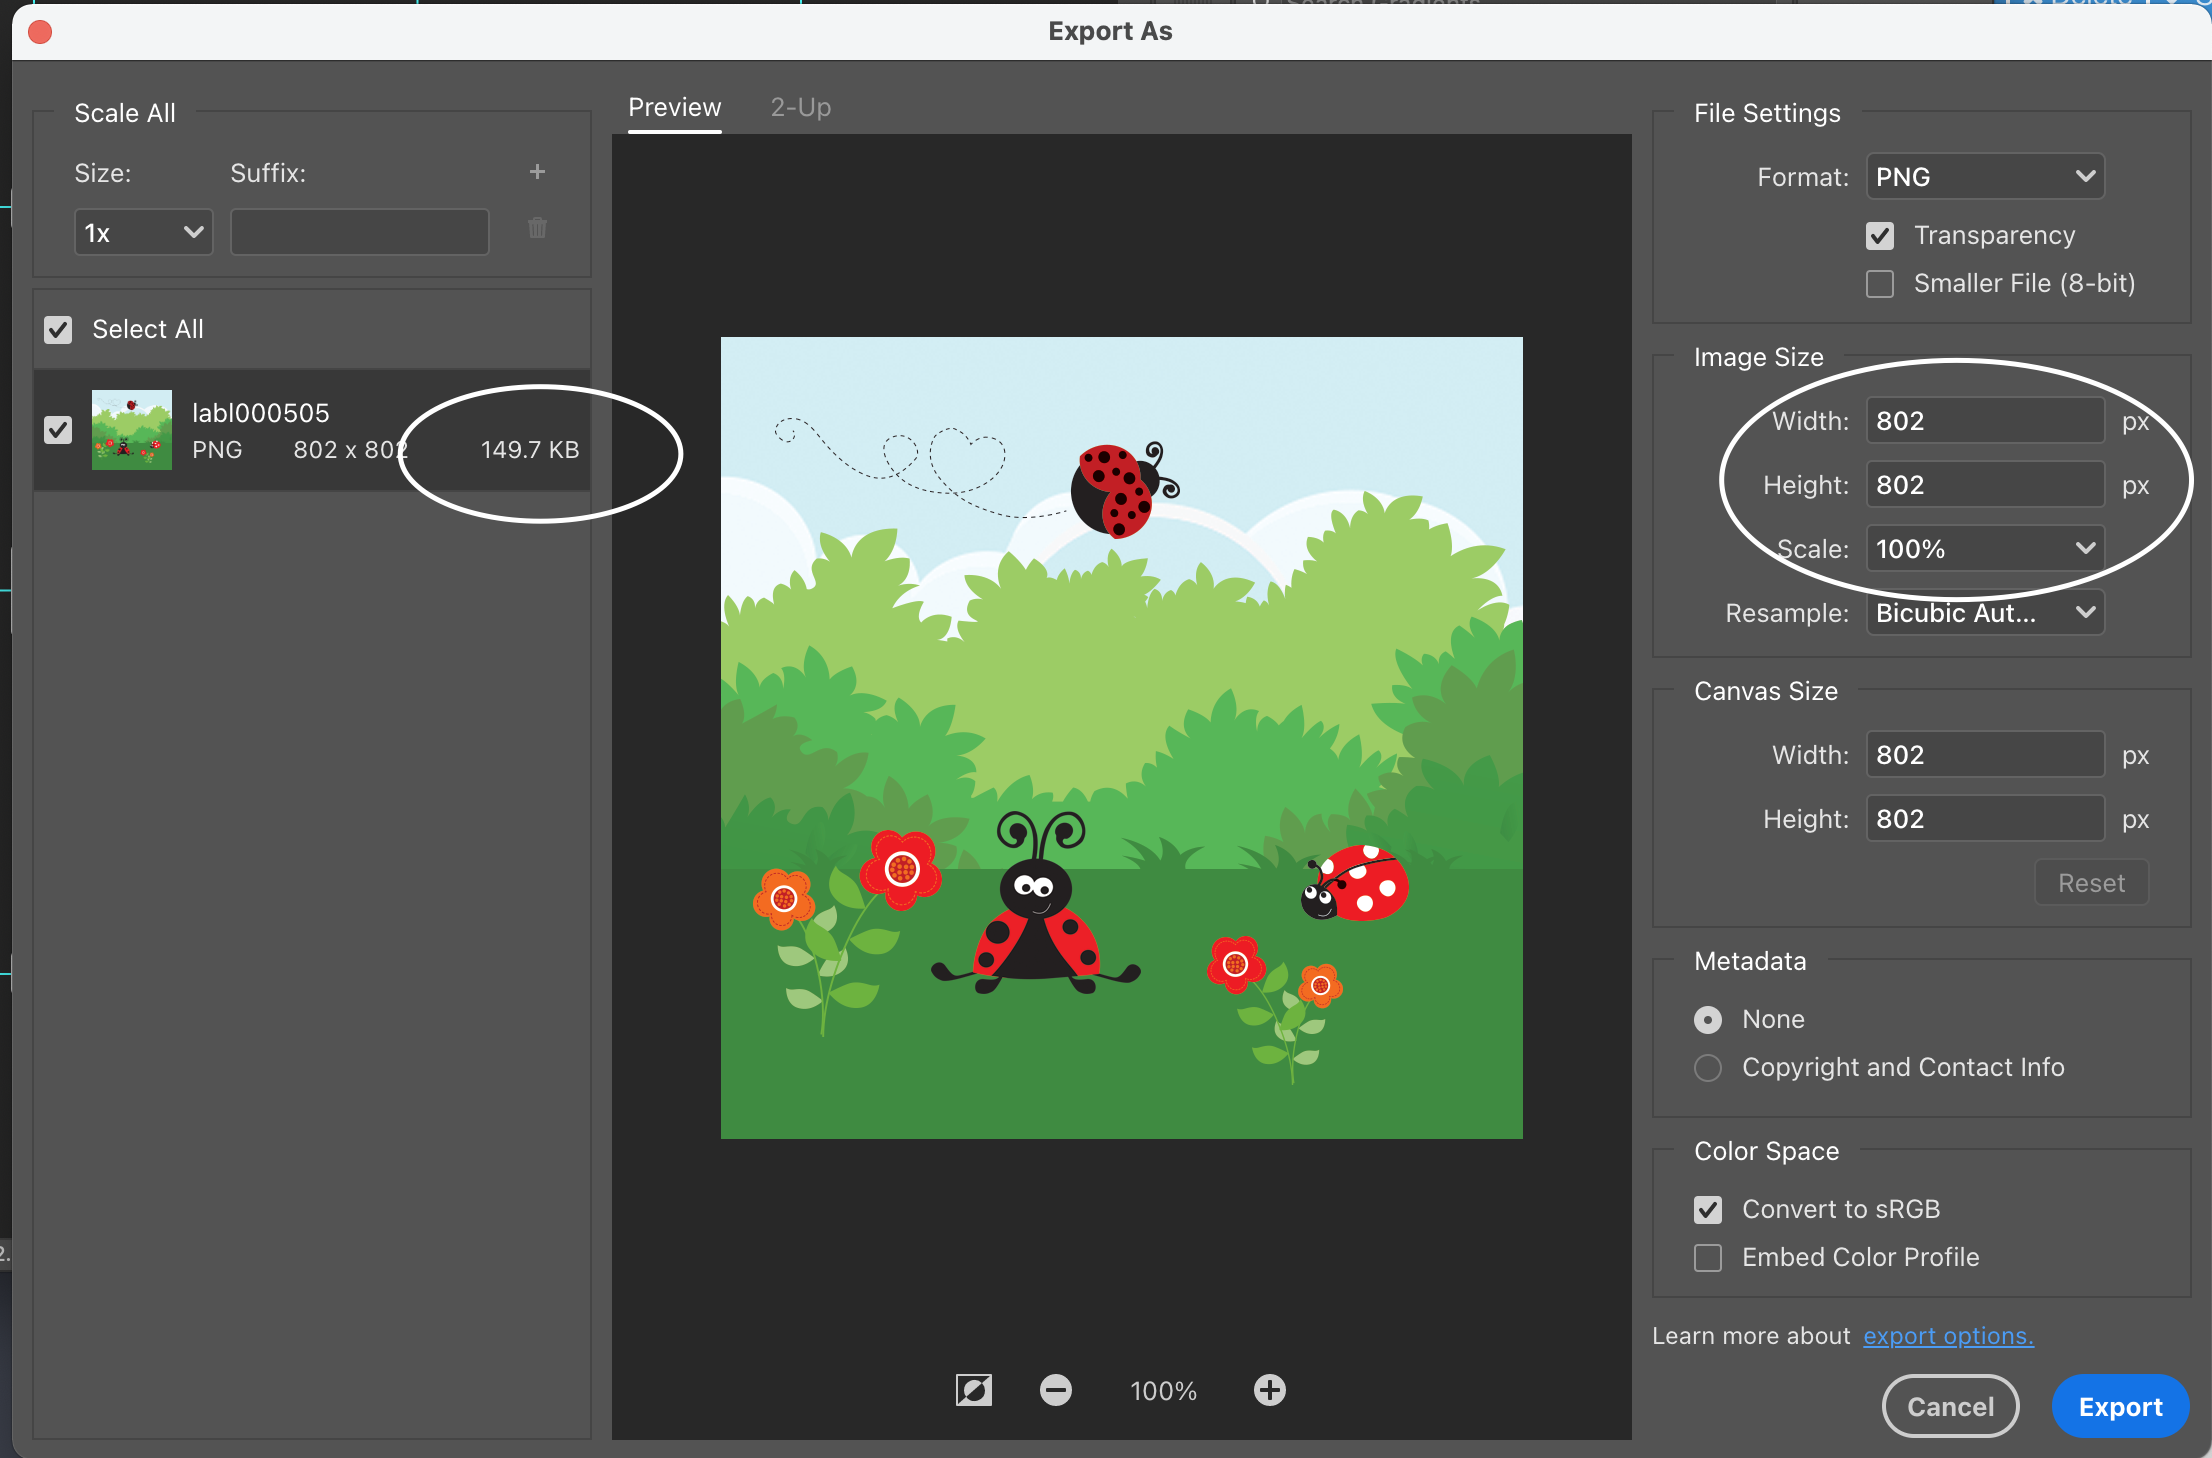
- Go to File > Export As > and export your design
- Make sure your PNG/JPG is not too large. Try to keep everything under 1MB otherwise things can load slowly.
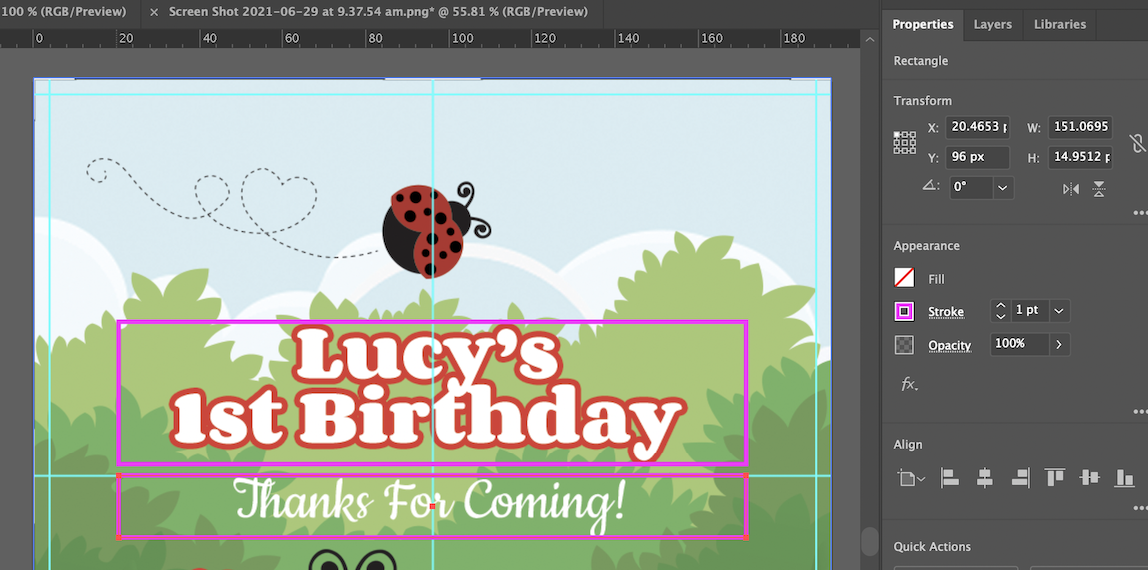
- Open your newly exported PNG/JPG in Illustrator and ensure it is set to the print size. When you have the Properties tab open, ensure your anchor point is set to the top left and the X/Y coordinates are set to 0, 0. This needs to be on 0, 0 because our editor reads from the top left point.
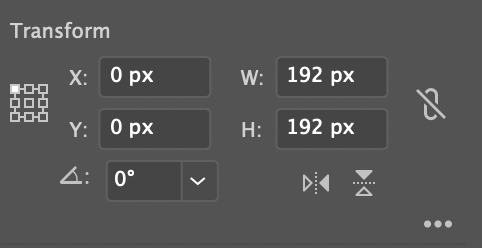
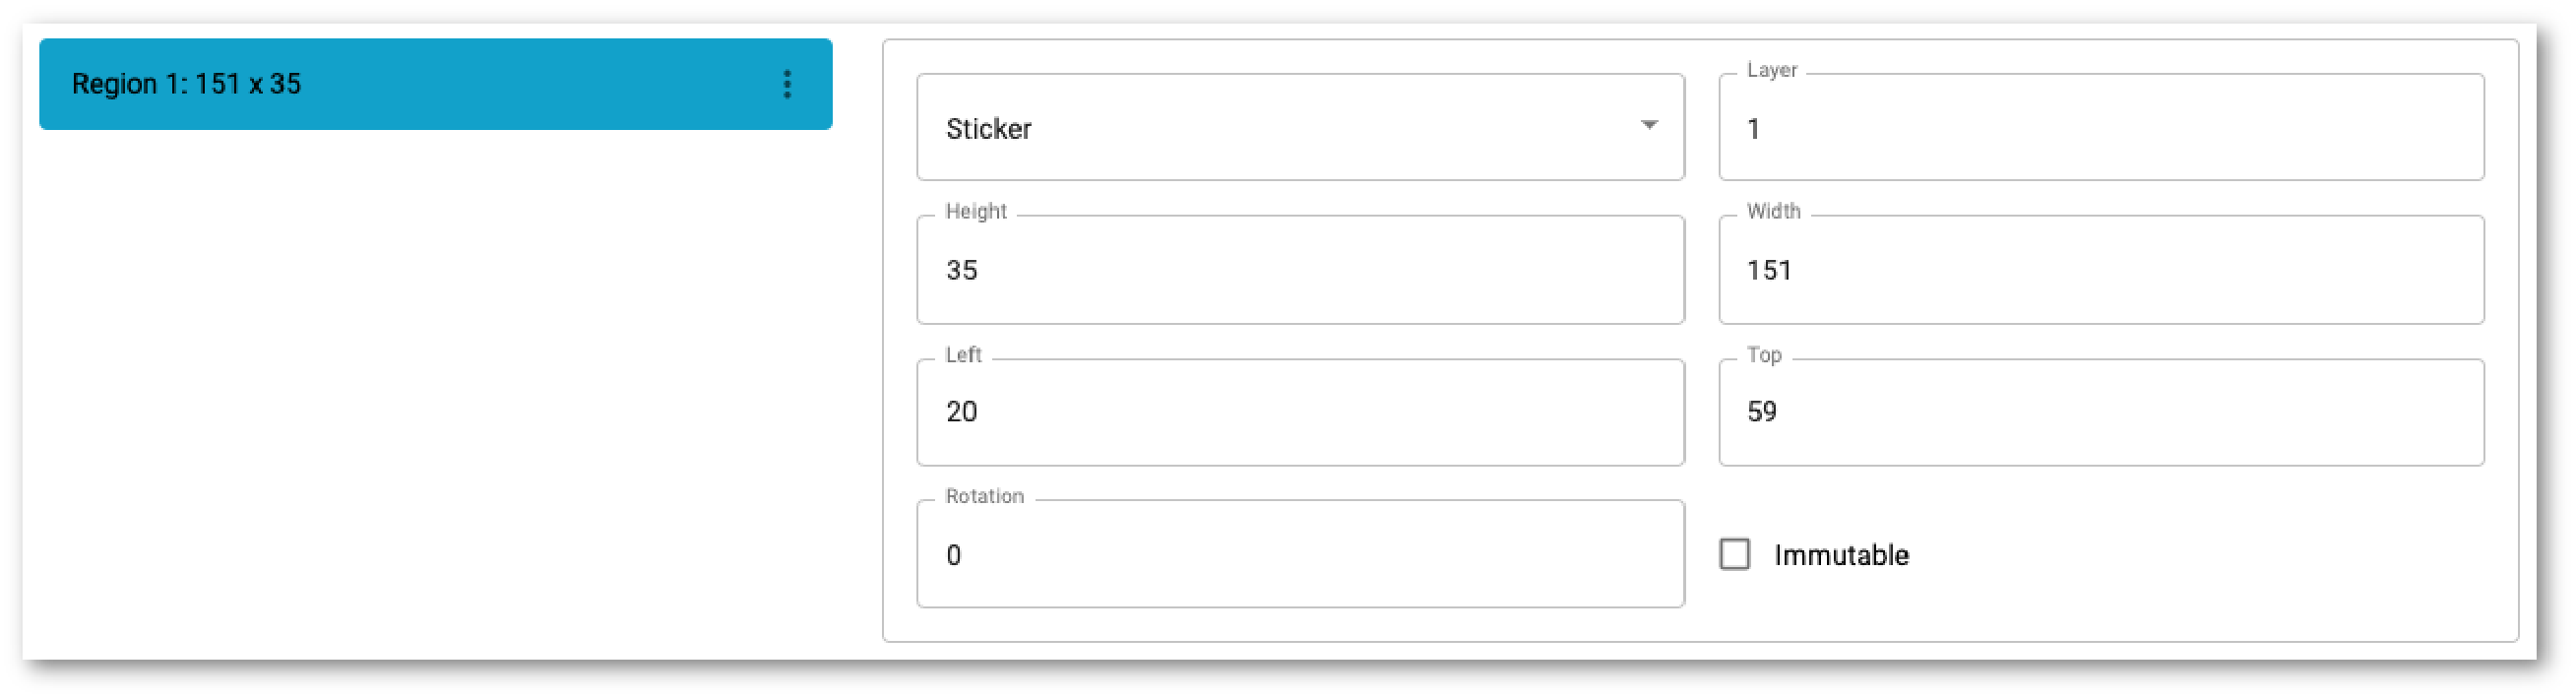
- Now you have your design in Illustrator you can draw a box around the areas you want to add text. This will be the regions of the text step. Select one of the boxes you have drawn and in the Properties tab you can see the measurements for the Region. Make sure these measurements are in pixels.

Before Creating a workflow
Whilst you can create a workflow without options and assets to begin with it is advisable to have them ready and uploaded to be used in the relevant steps.
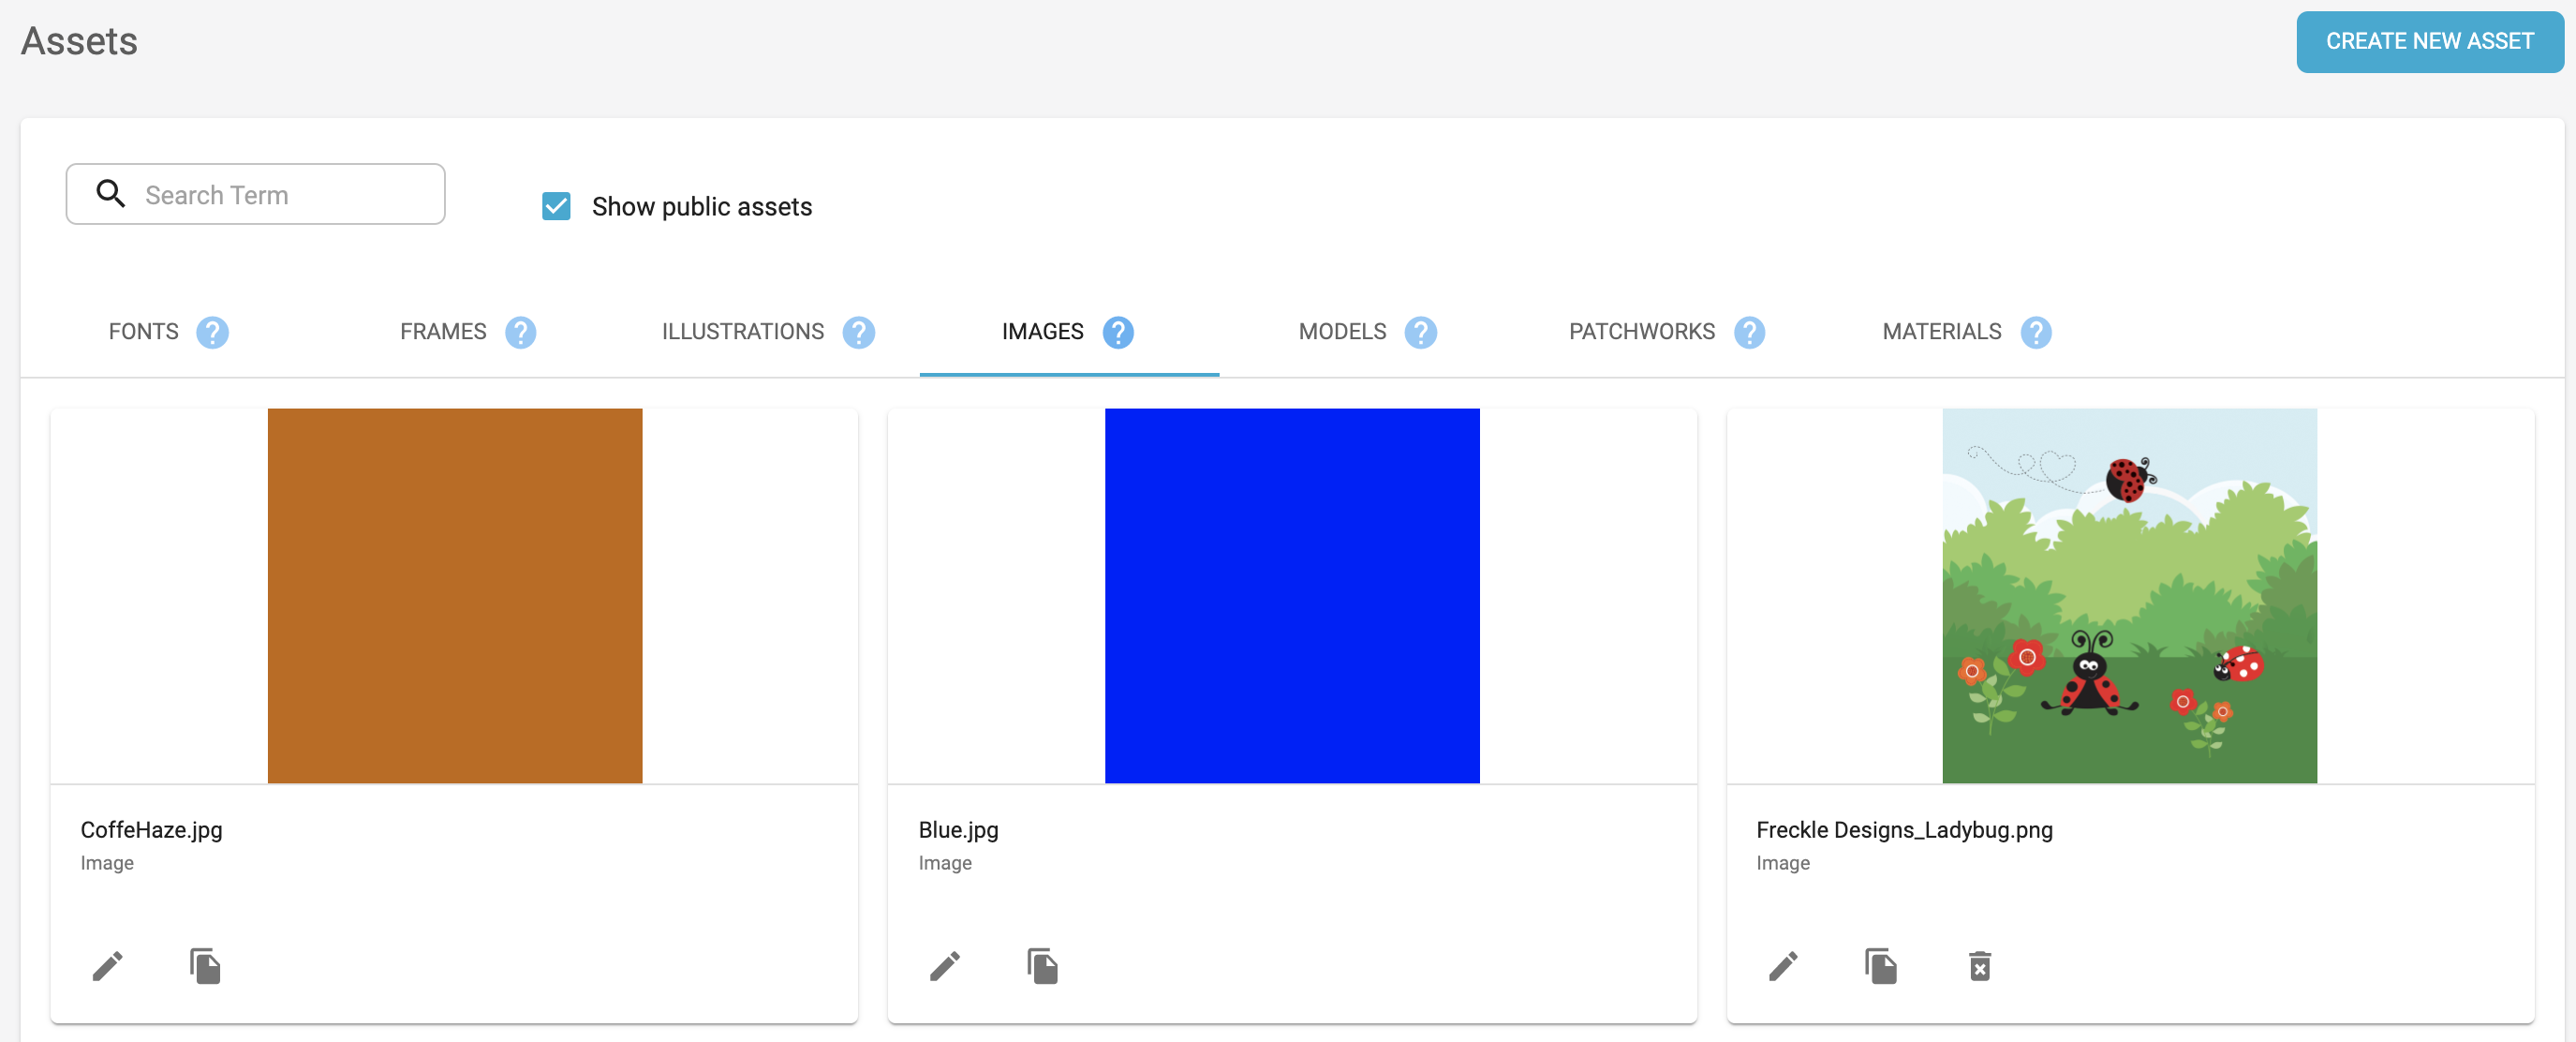
Uploading assets
Now, go to Spiff Assets and upload your png/jpg you exported from PSD into the Images tab
Click on the relevant asset type you wish to upload. click on the little blue question marks for explanations of what each asset type represents tab
Click on the Create Product tab
Find your asset on your desktop and click open (make sure you name your assets properly so that you can search for them easily later e.g. alien_face.svg will be searchable by alien and face) tab
Your asset should now appear with an image in the assets folder
Create an option list
This is only required where you want to display a list of options for your consumers to choose from. Eg. Choose from these Fonts, Colours or Illustrations
- Click on the options tab in spiff
- Click on create option in the top right corner of that page
- Name your Option (Eg. T-shirt Illustrations)
- Select your option type. (for the example above you would select illustrations)
- Start adding your variants/assets. When you click on the upload asset button it will refer to the assets you uploaded (and the public assets we give you by default)
- Select your asset and name it accordingly. This is the name that will appear in the consumers order summary so it needs to be user friendly.
- Select a default asset if you would like one of the variants to automatically appear on the model when the consumer reaches that step. If you don’t select a default asset the user will need to make a selection before any asset appears on the model.
- Save Option
Create a workflow
Workflows are the steps you take your consumers through in their customisation journey and is the glue that brings the experience together.
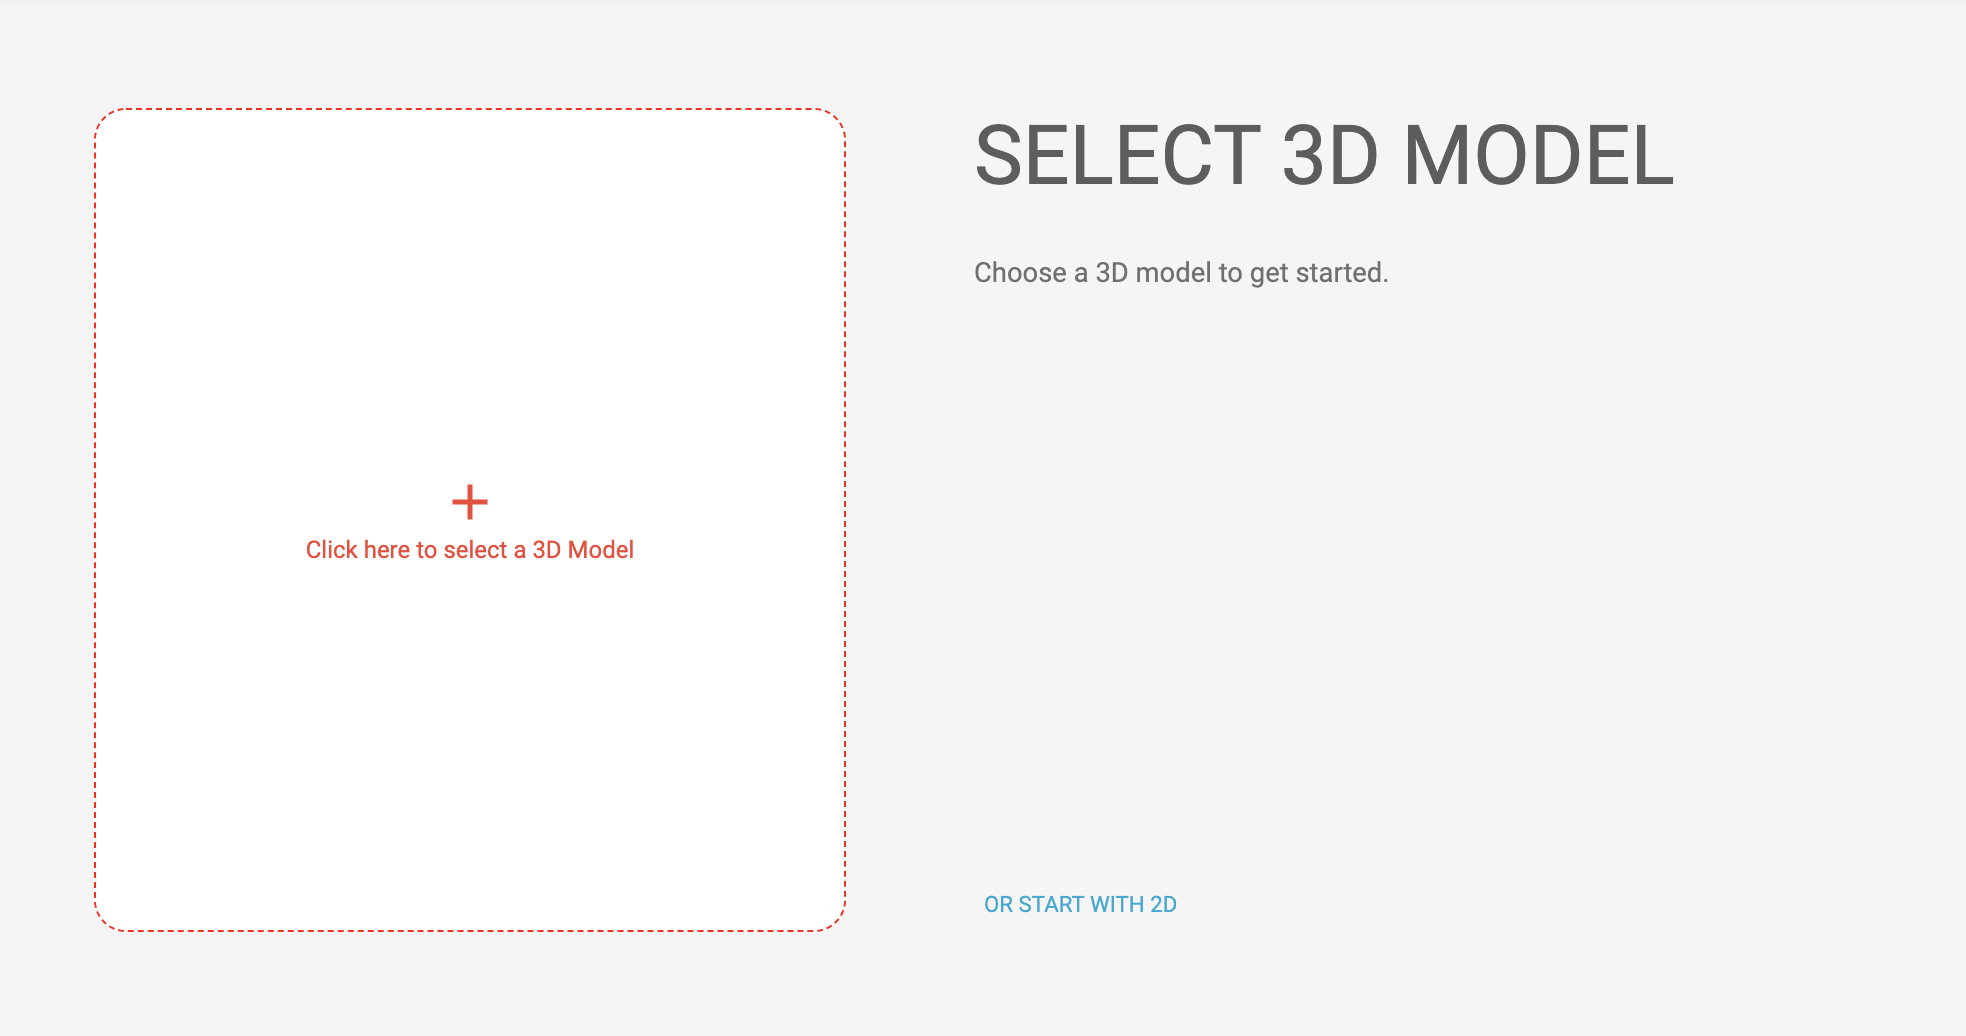
- Now go to Workflows in the Content tab and create your workflow.
- Click create new workflow
- Select the model you want to use.
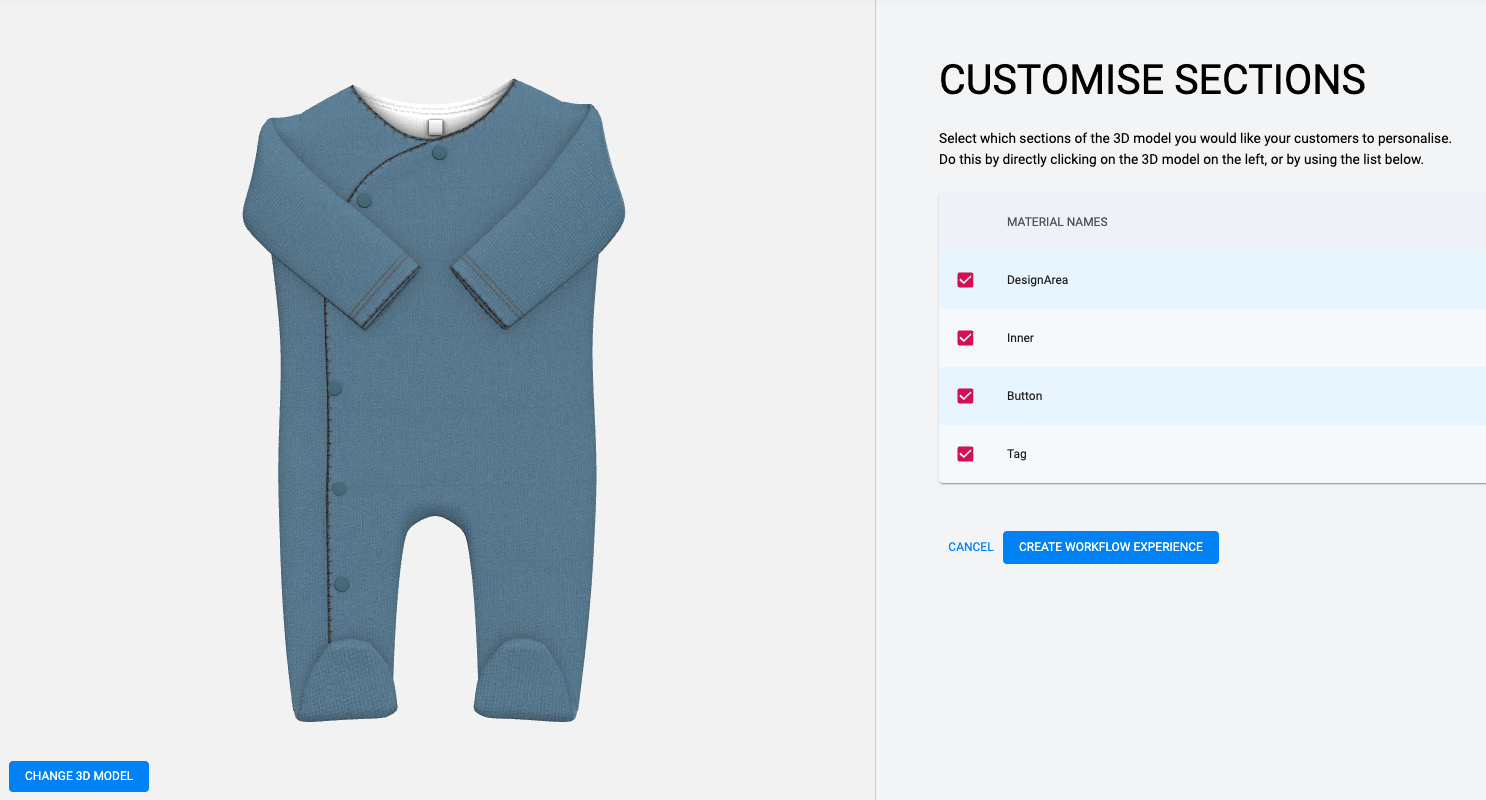
Check each option that you want to be able to make customisable – Click create workflow experience
Name your workflow
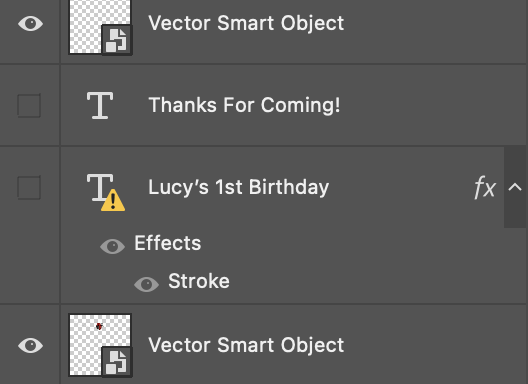
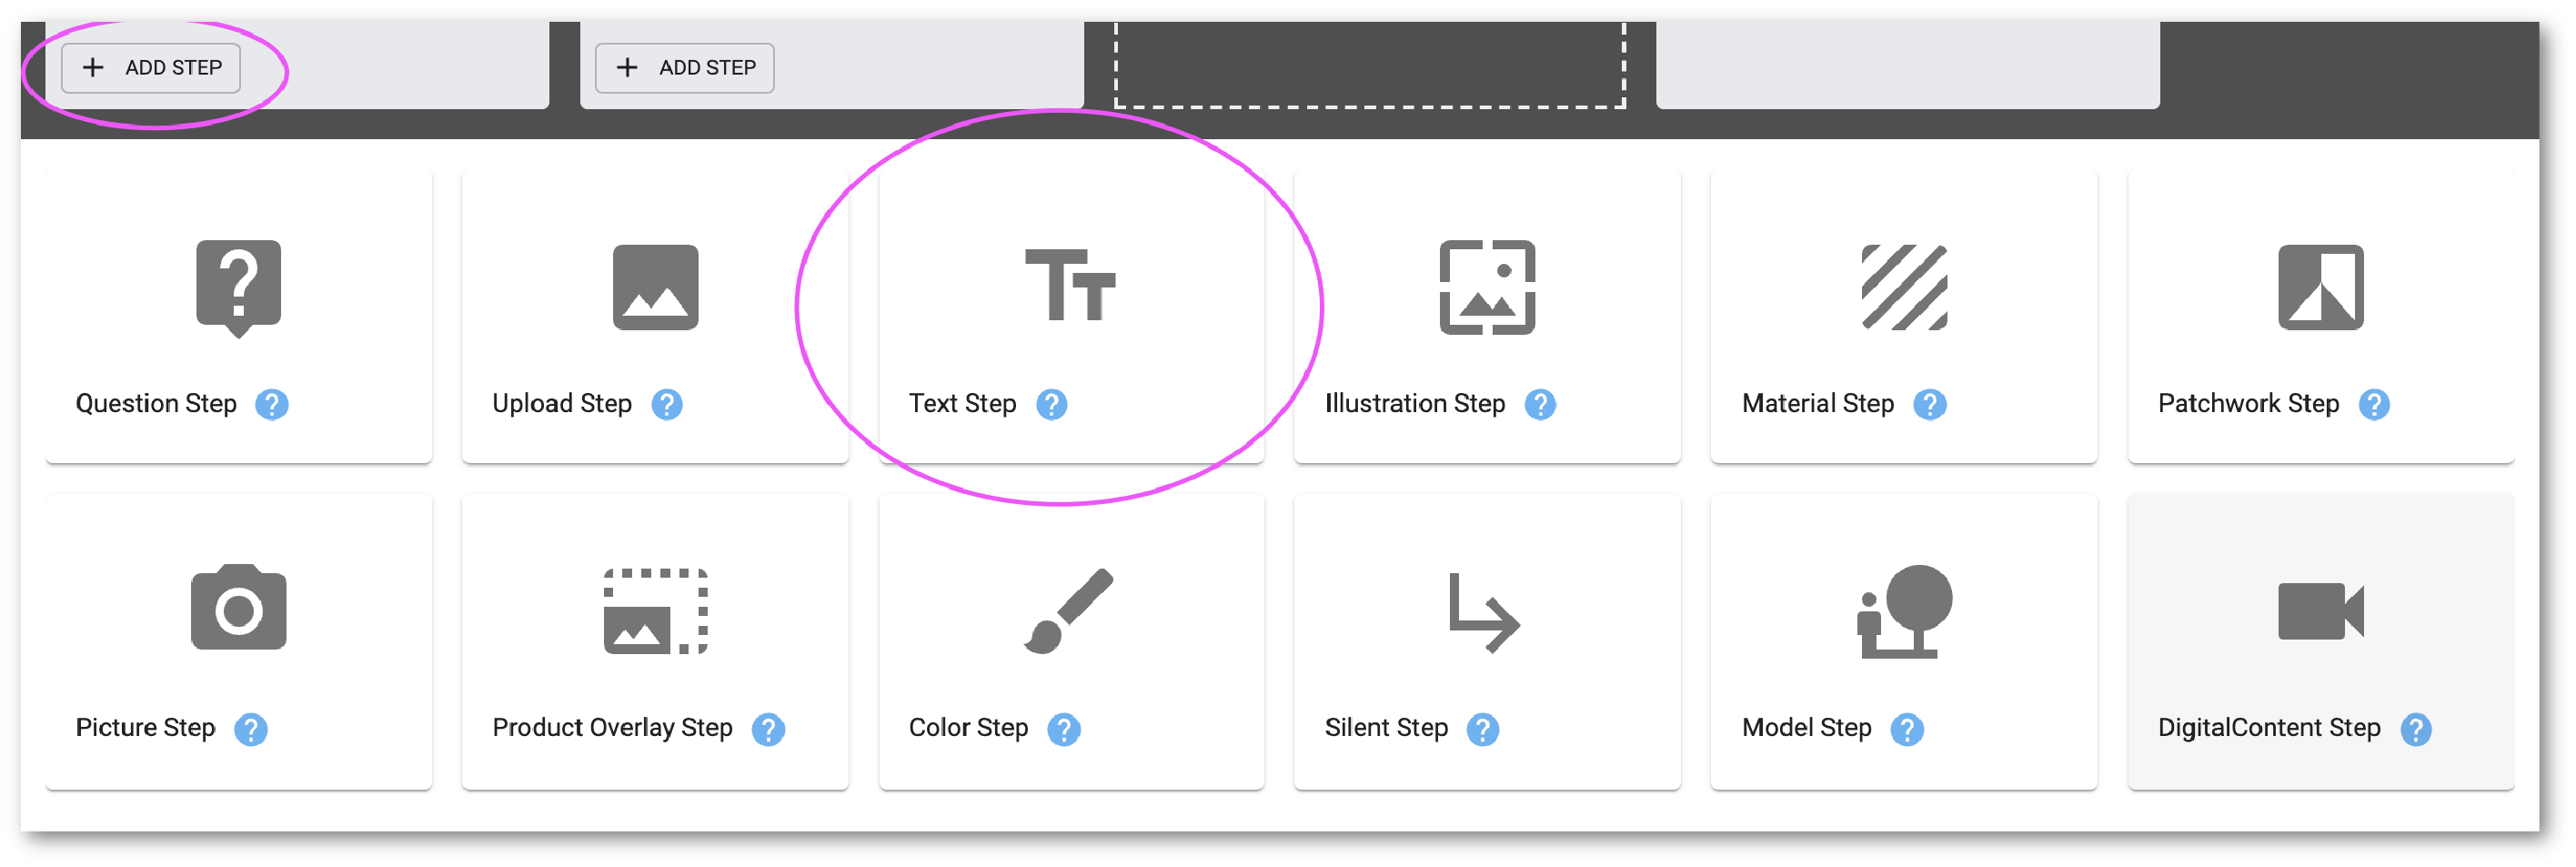
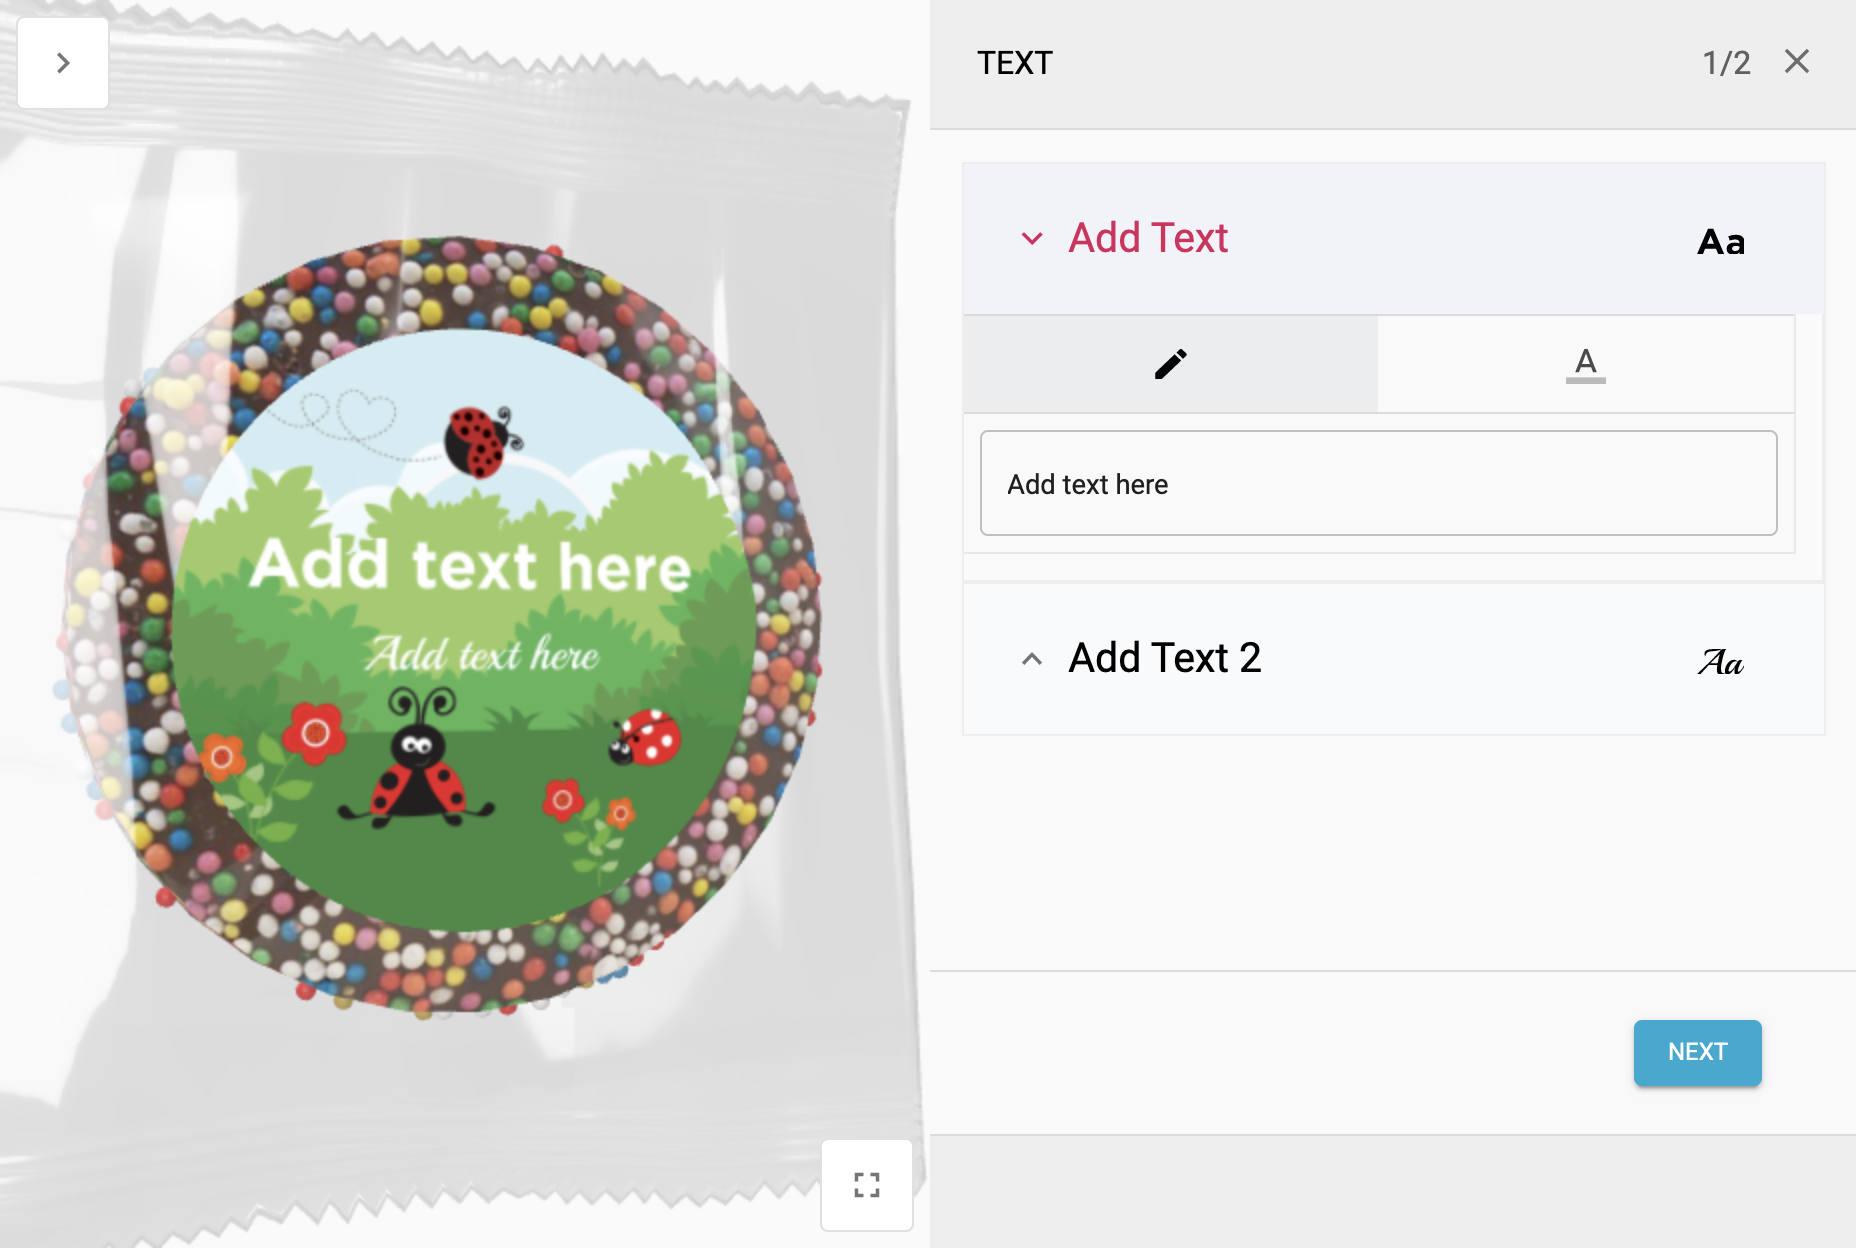
A pre-populated step will be automatically added to the workflow, before you can save the workflow you will need to fix the warning messages that will appear, Add your first step (See little blue question marks next to each step type for help on each step capabilities)
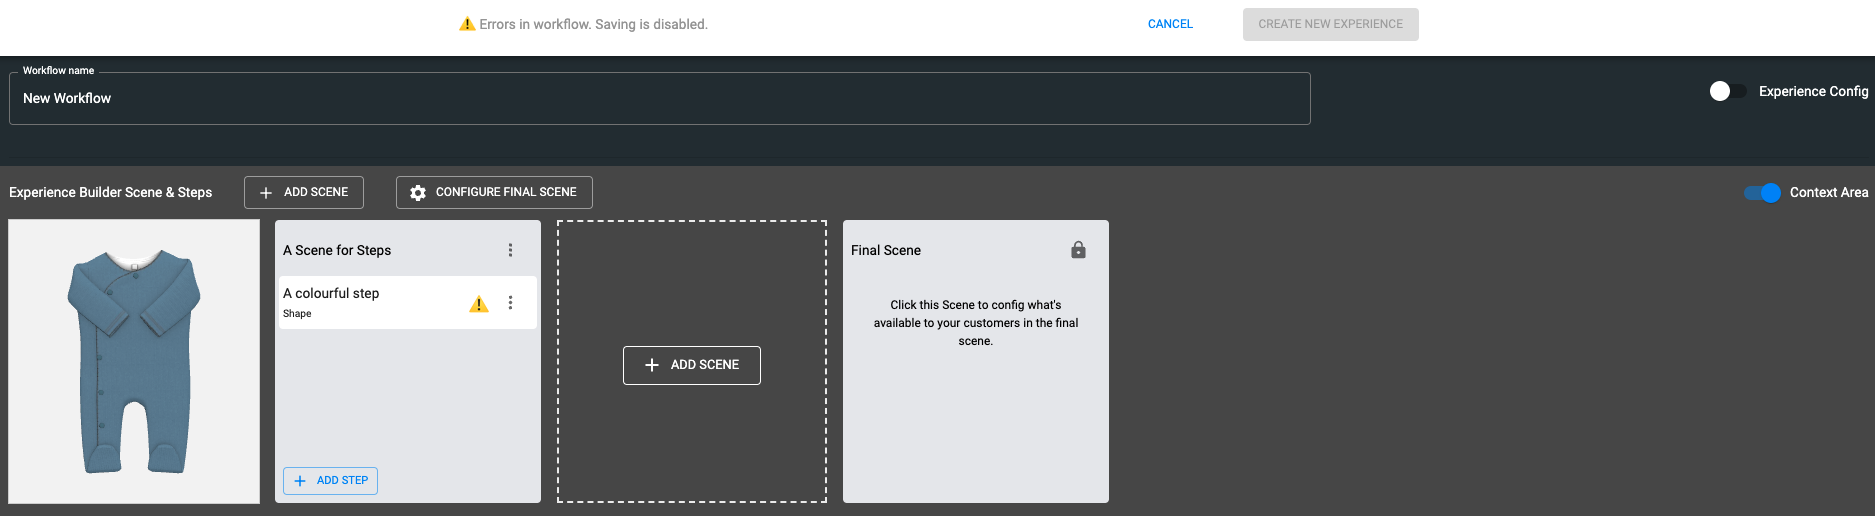
Click on A colourful step and it will show you where in the workflow the warnings are appearing in, Options and Regions as below image. – All steps require you to add a Step Title and Step Help Text
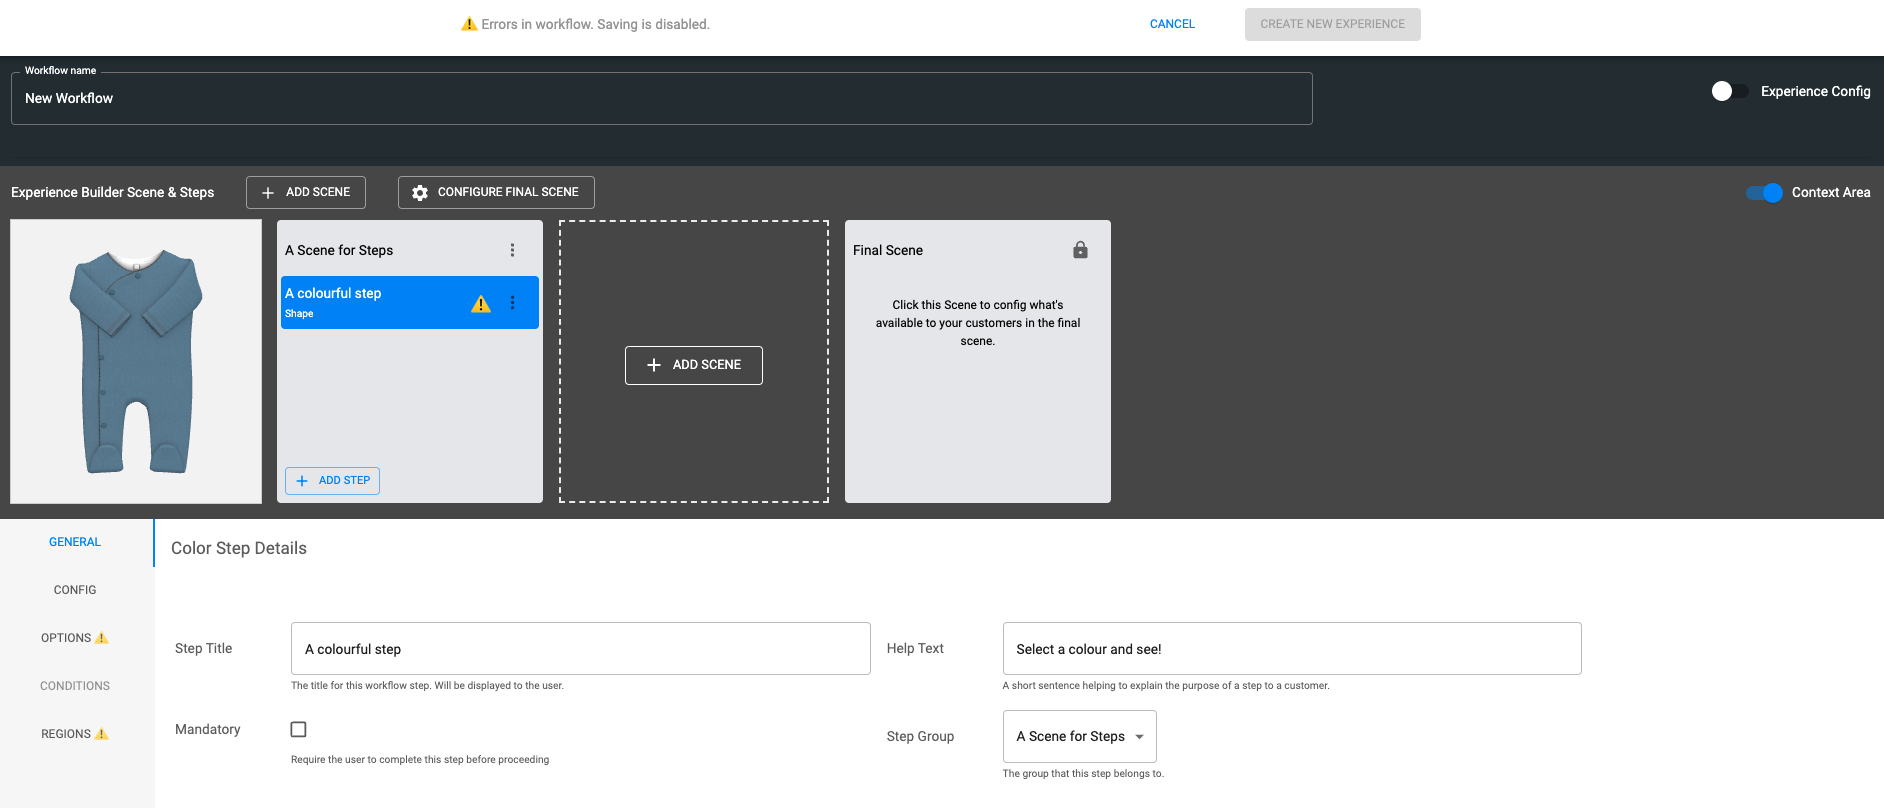
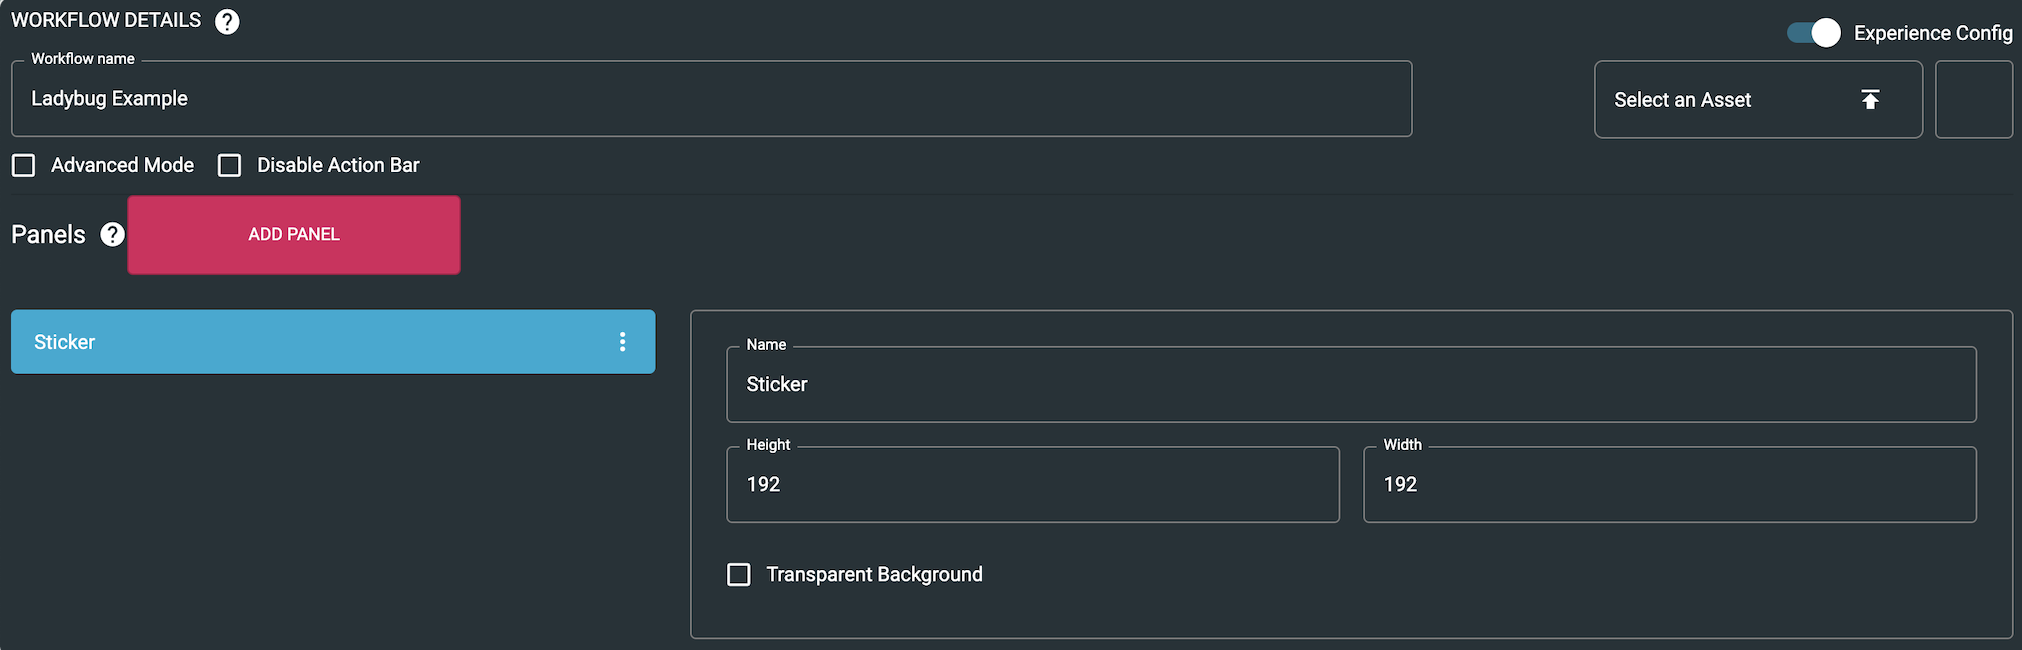
Once you have added an option and entered the region you will be able to save the workflow and you will then be able to enter in the workflow details, and panel size under experience config top right hand corner. You will need to change in each panel the default size of 512px x 512px to the size in the model.
- You can either keep the colour step if it will be required and make any changes that you wish to that step or you can delete that entirely and start creating another step i.e. A Silent Illustration step to put your jpg/png on. Select your asset and put in your regions and keep your layer low as possible because you want this image to sit behind the text. 0 works best
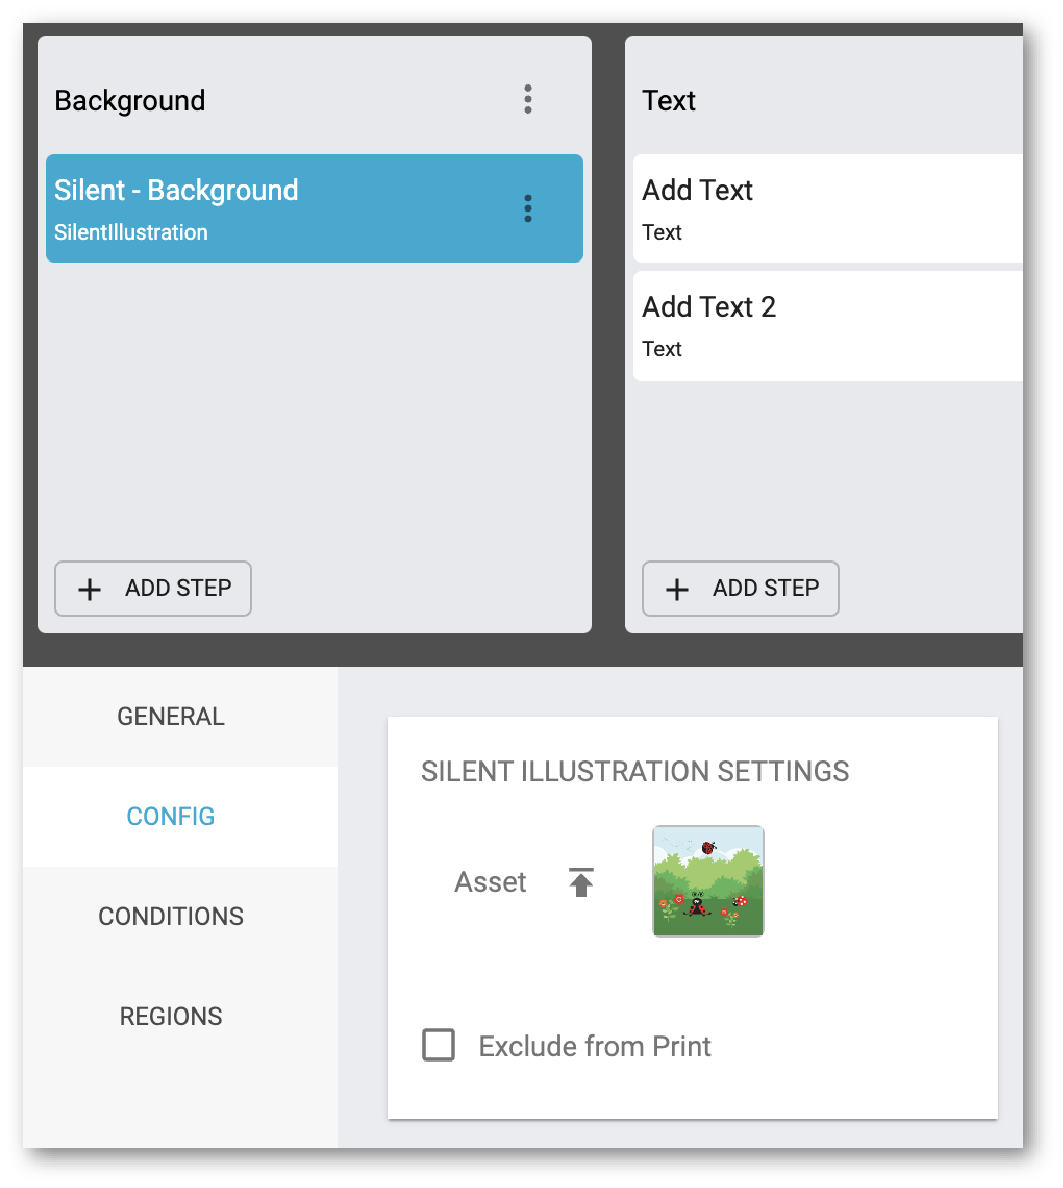
Now it’s time to add your text. Do this by adding a Text step. Fill in your desired information and in the bottom tab enter in your regions from Illustrator. We round up the pixels to make the process cleaner. Make sure the layer is higher then what you set your Silent Illustration to. In your Options tab you can choose as many fonts as you like to be used.
Do the same with your second text step.
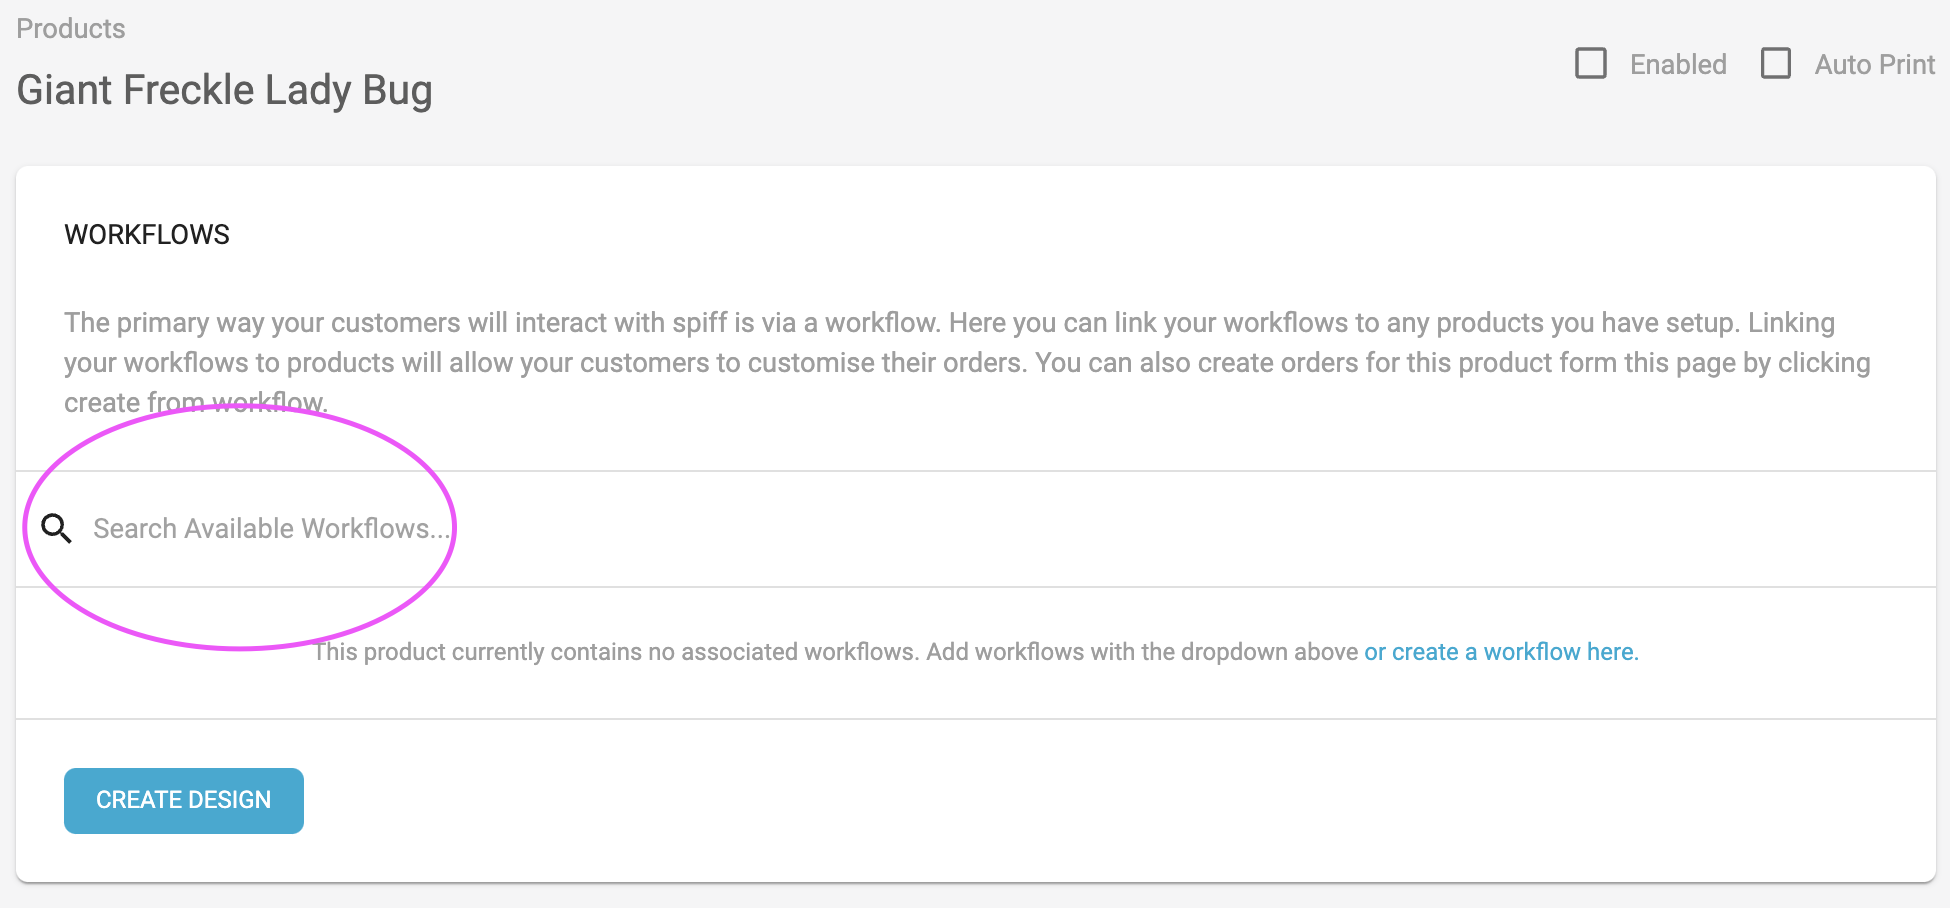
This should be a basic set up of your workflow. You can now go to the product you created, attach your workflow. This is really easy you just need to search for the name of your workflow, select it and save.
You can now test out your magic!
Remember
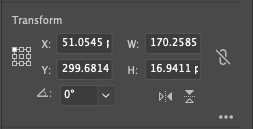
- Get all your regions from Illustrator in pixels
- In Illustrator your x and y need to be on 0, 0,
- Once you have selected the area of the region it will display as below image which shows you the X, W, Y, H
Creating Step Groups
- Step groups are the ability to display more than one step on the same page for the consumer experience
- In the workflow details section of a workflow
- Click create Step Group
- Name the Step Group
- Once complete go to the relevant steps and you will see a new drop down box that will allow you to link a step to the step group
- You will see a chip appear in the step group with the name of the step you added.
- Steps will play in order that they appear and can be moved around by selecting the step and moving it to your preferred position in the workflow.
- Click Save Workflow
Complete Product Setup
Troubleshooting
- If you can’t see something you have put into the workflow, check your layers. Often you have put it behind something and it is hiding. To check this go to regions and make sure the layer is not the same as the previous layer.
- If you have multiple Options on a Text step, make sure you have one set as a default.