This is where you will find tools and settings to adjust the image effects and the overall look of the 3D preview.
Simple Settings
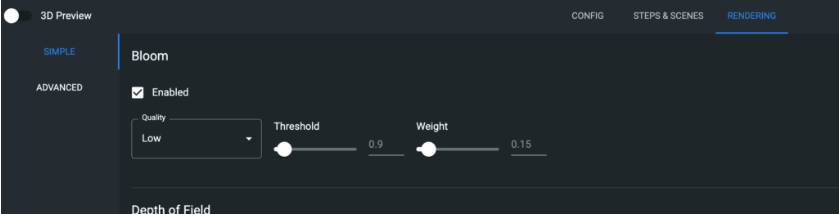
Bloom

Bloom is used to add fringes or feathers of light around the borders of brightly lit areas in the scene, the effect reproduces the real-world image artifact effect scene on real cameras.
Depth Of Field
Depth of Field controls the focus of the camera, using distances and focal lengths to make the surroundings or product more or less blurry.
Grain

Grain is an effect similar to noise, seen in films or image software. This will add a grainy filter above the 3D preview and can be static or animated, control the intensity through the checkbox.
Image Adjustments
Here we have contrast and exposure control, as well as Tone Mapping. Tone mapping is a technique used in image processing and computer graphics to map one set of colors to another to approximate the appearance of a high-dynamic range (HDR) image.
Sharpen
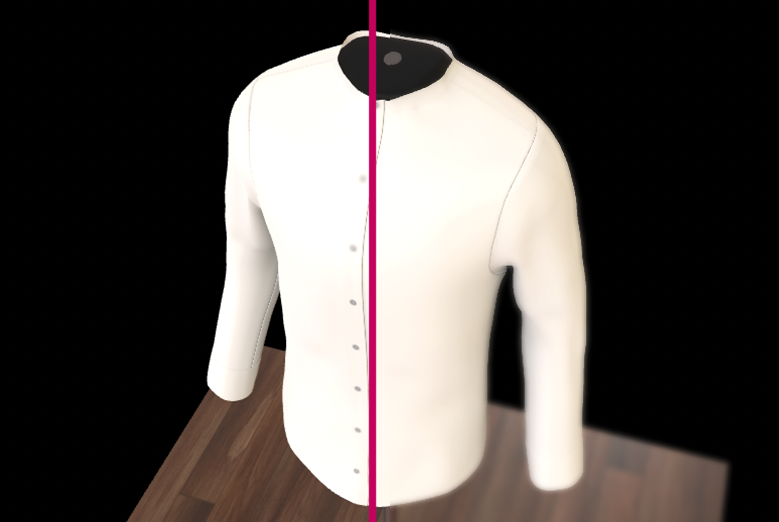
Sharpen is applied to highlight edges more strongly within the preview, though this does not fair well with antialiasing. We recommend using this on large models without important small details that need to be seen from really far away.
Vignette
In the real world, a vignette is caused by longer camera lenses, presenting an effect where the edges of the photo or video are black or darkened; and fade off into black. This setting mimics those artifacts and further assists with photorealism in the experience
Advanced Settings
Antialiasing
Antialiasing will fix the jagged edges seen around models caused by the pixels that are rendered, this setting will mask these jagged edges. Set the samples and Quality, but bear in mind performance will be affected.
Chromatic Aberration
Chromatic aberration is an effect also seen in cameras, this effect is caused by red, blue and green lightwaves failing to be captured at the same point or in the same way, causing a ghosting effect, usually around the edges of these three colours. This effect is not widely used but fits well with specific scenes and products, more retro esq.
Colour Curves
Color curves are used to fine-tune the color/hue of the preview, bumping up particular colors, shadows, highlights etc. Giving you more control over the look of the scene. This can be helpful in cases where a particular illumination/environment suits your product well but the color may be off – this can resolve that.