Install Setup Instructions
For Neto customers, components of the setup will need to be created by the spiff3D integrations team.
Installation Process
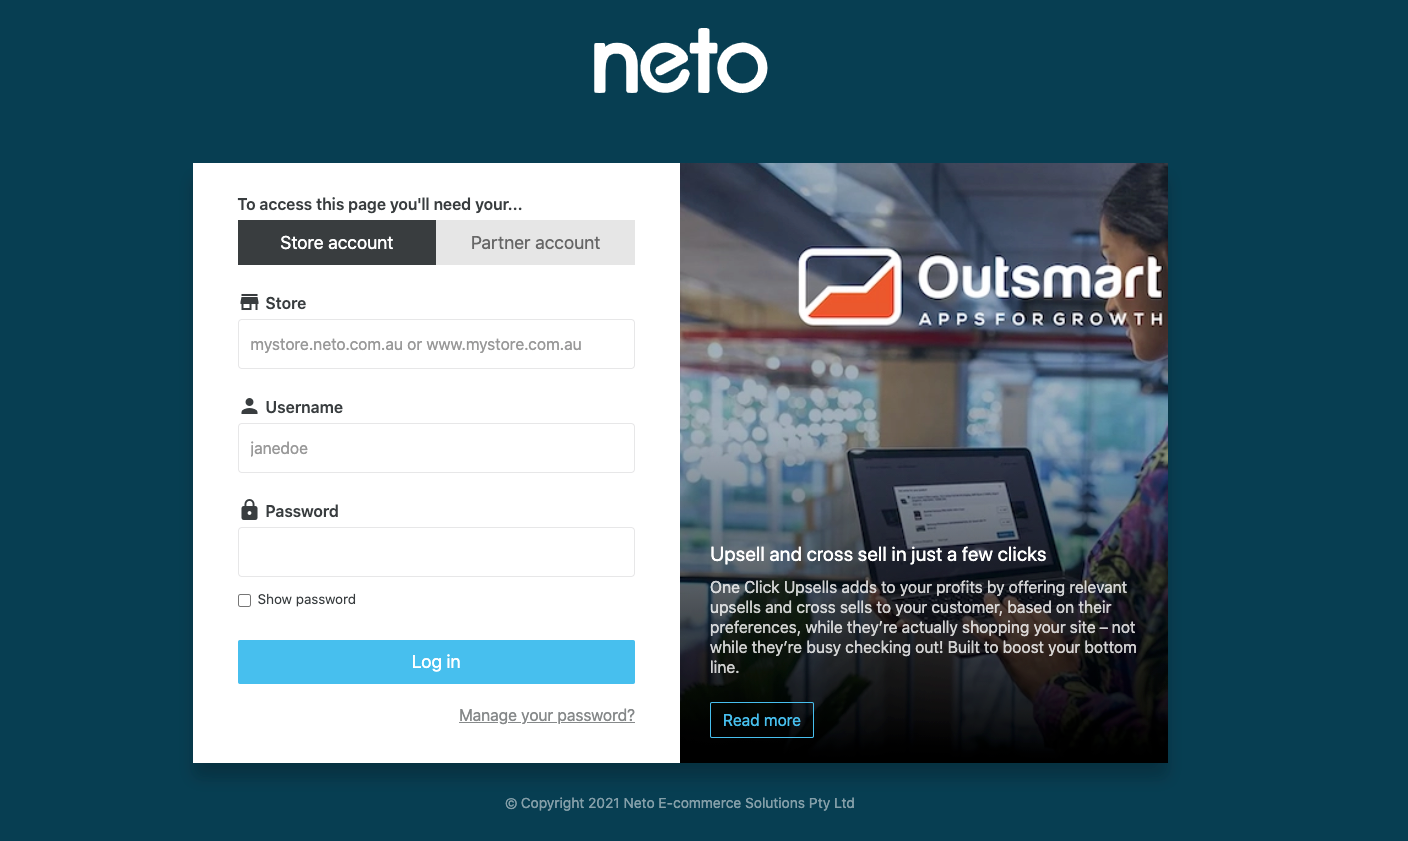
The merchant will install the spiff plugin app from the Neto add-on store which will redirect them to a page asking them to sign into their store account for verification. Image reference below.
Once the user enters their details they will then be redirected to the Spiff hub front page with a new integration and partner. Image reference below.

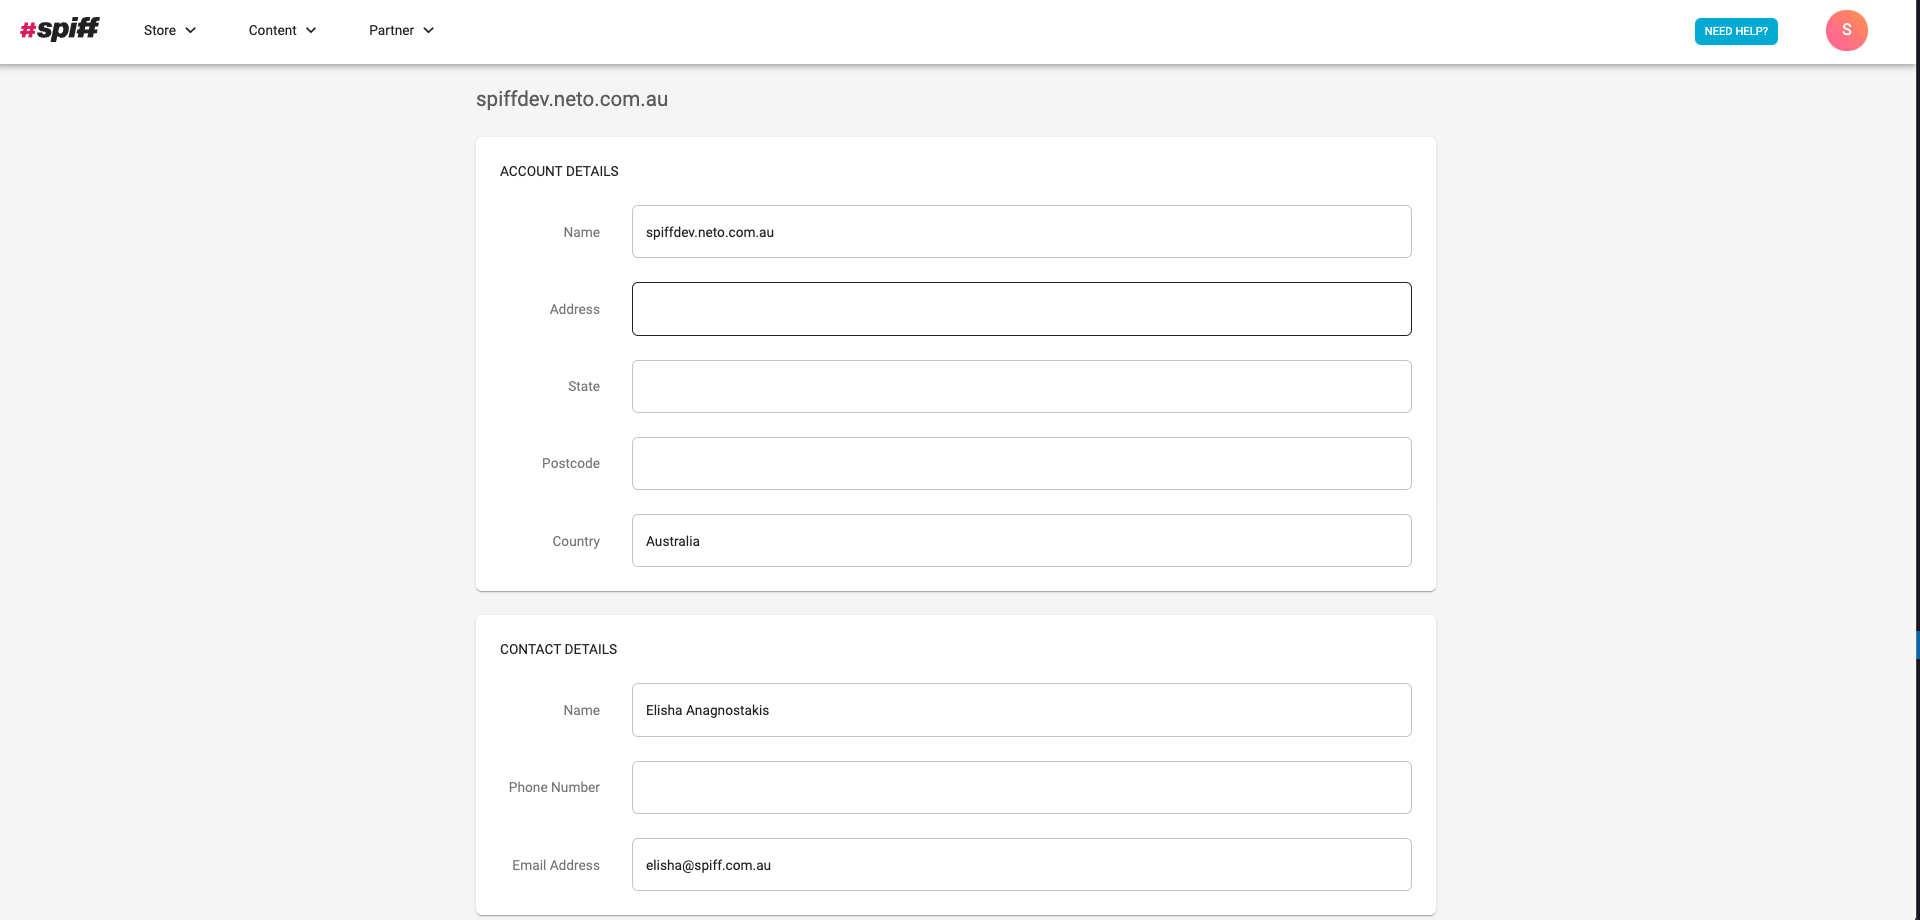
You can now explore the hub as you wish! To edit your account details simply head to Partner → My Account and you will be greeted with an array of options. Image reference below.
Setting Up The Webhook
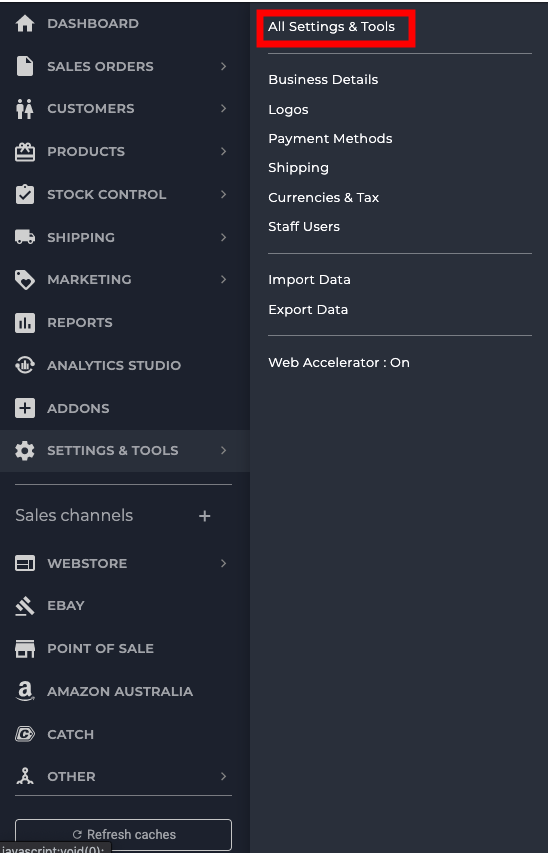
To make sure your Neto store is connected to the Spiff webhook you need to navigate back to your Neto store. Once in the store on your left side panel navigate to All Settings & Tools. Image reference below.
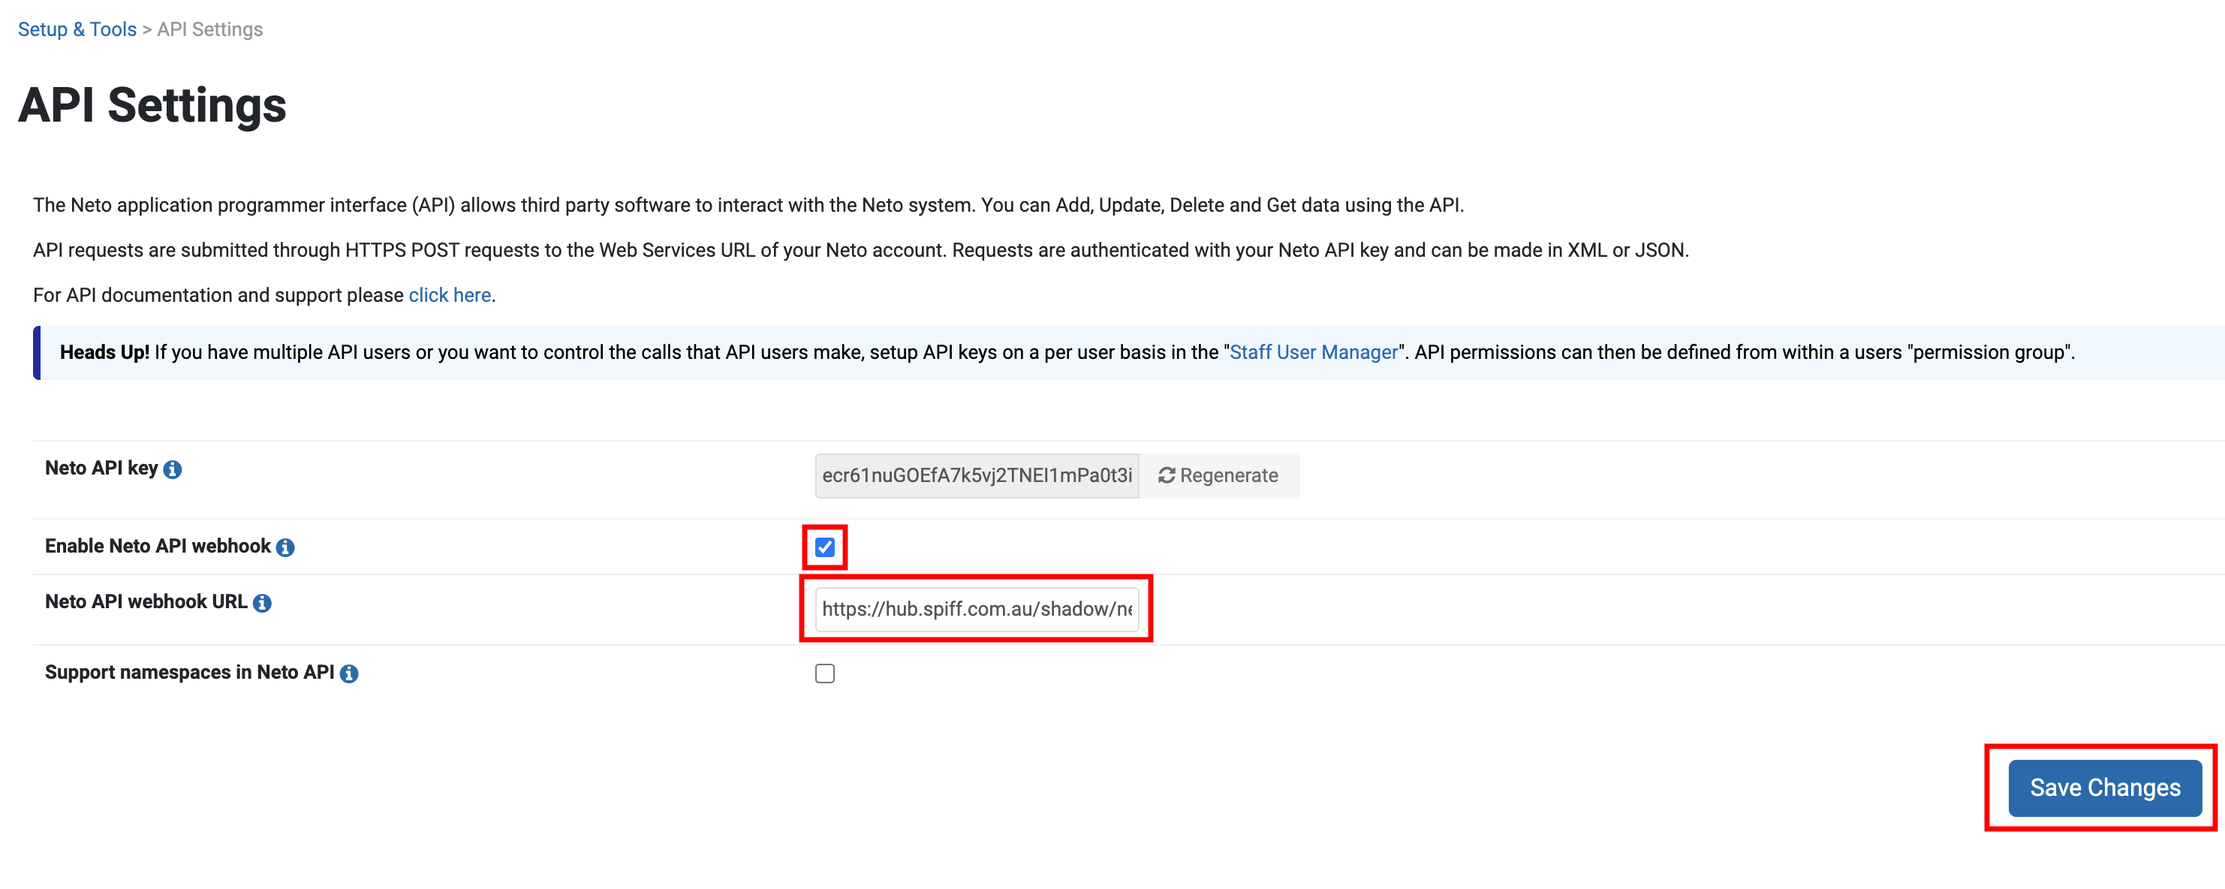
You will be greeted with a search bar where you will enter API Settings. Click on it and that will redirect you to a page where we can enable the webhook and enter a custom url that will notify Spiff when an order has been placed. Image reference below.

You then need to toggle the Enable Neto API Webhook option and you then need to add in the custom webhook url into the Neto API webhook URL. That custom webhook url will be https://hub.spiff.com.au/neto/webhook/{integrationId}. The integration id value is a unique value for your store. This value is to ensure that Spiff understands what store has hit the url on our side so that we can process the order correctly. After you have added in all details remember to press Save changes. Image reference below.
Setting Up Design Product
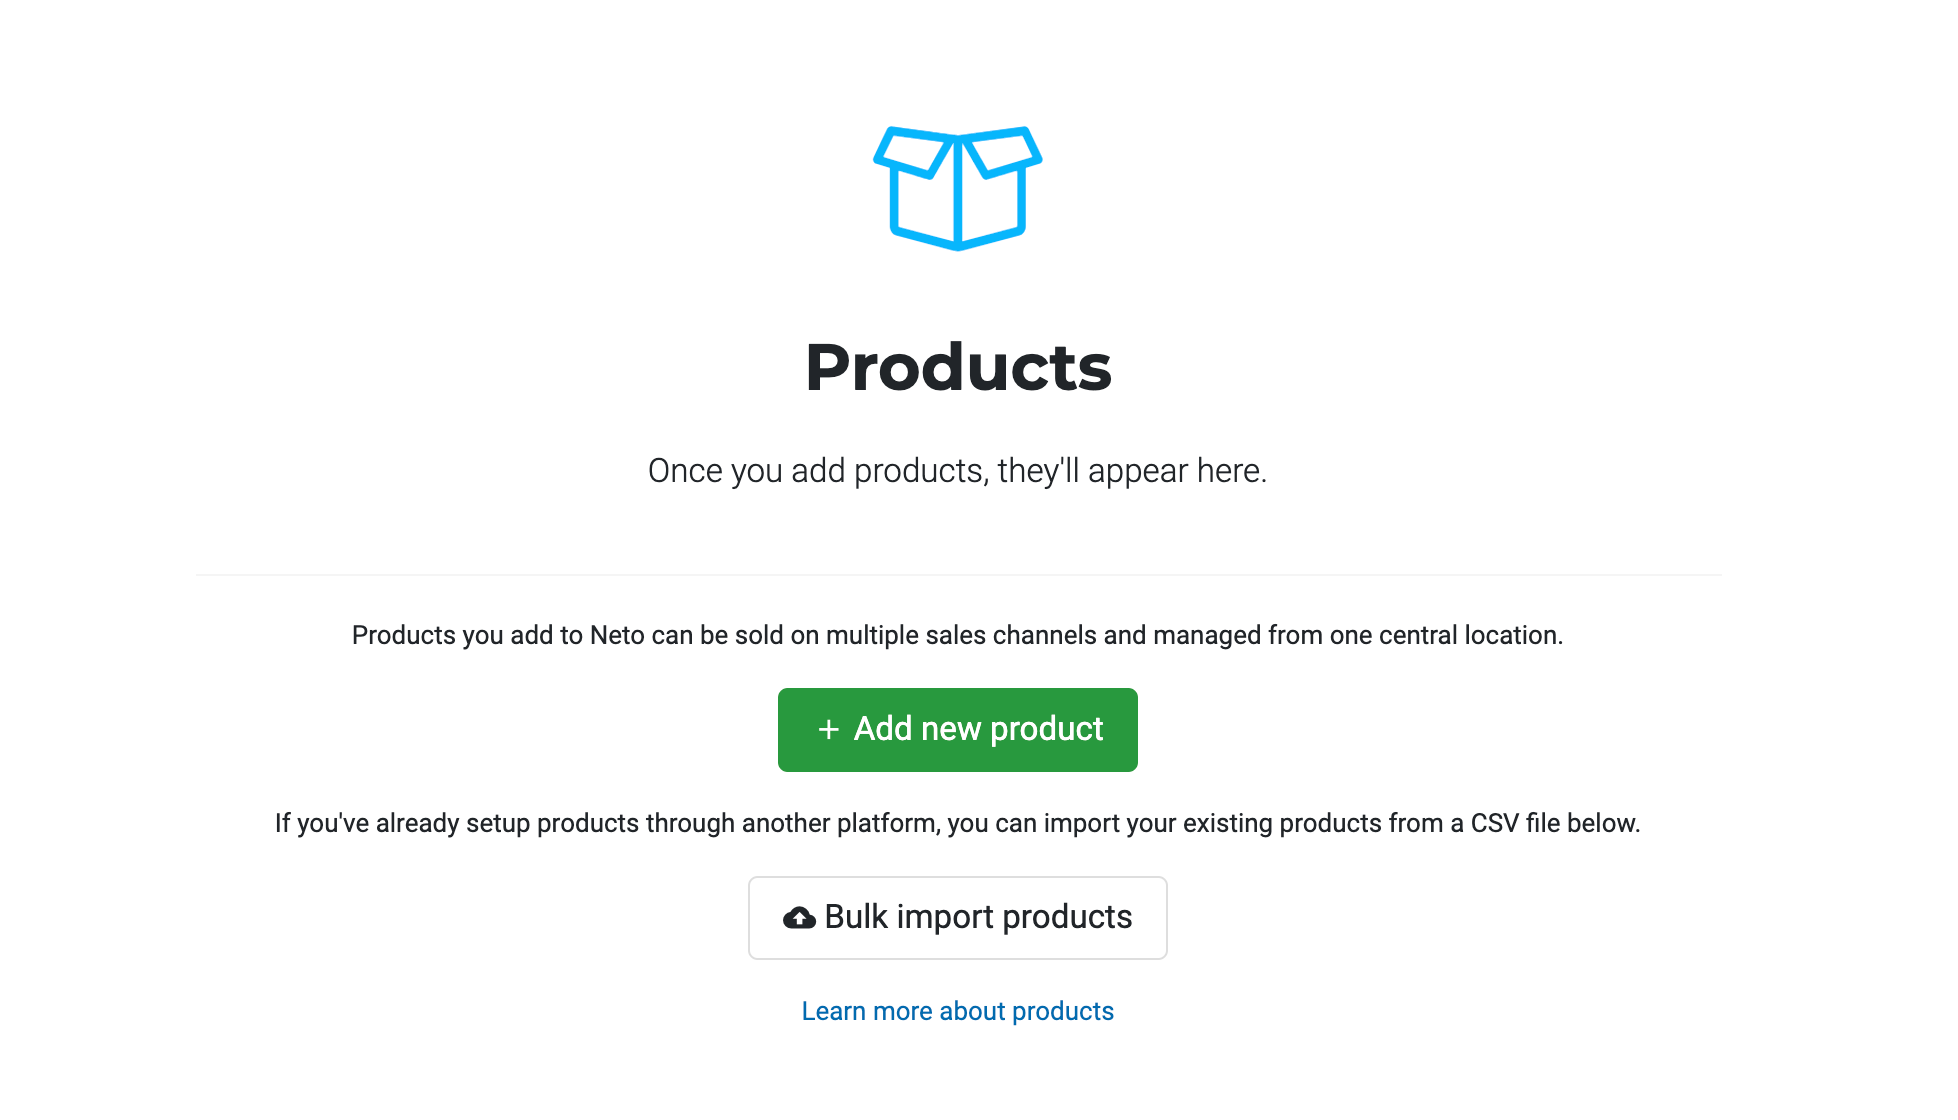
To set up a design product on Neto we first need to create a parent container product that will hold all the different variants your customers will create. The parent products will be displayed on your store in which customers will use to initialise the workflow experience. To do this we need to navigate to the Products section inside the Neto c-panel.
If its your first time adding a new product you want to click that big green button in the middle of the screen to begin the process of adding a parent container for your design products. Image reference below.
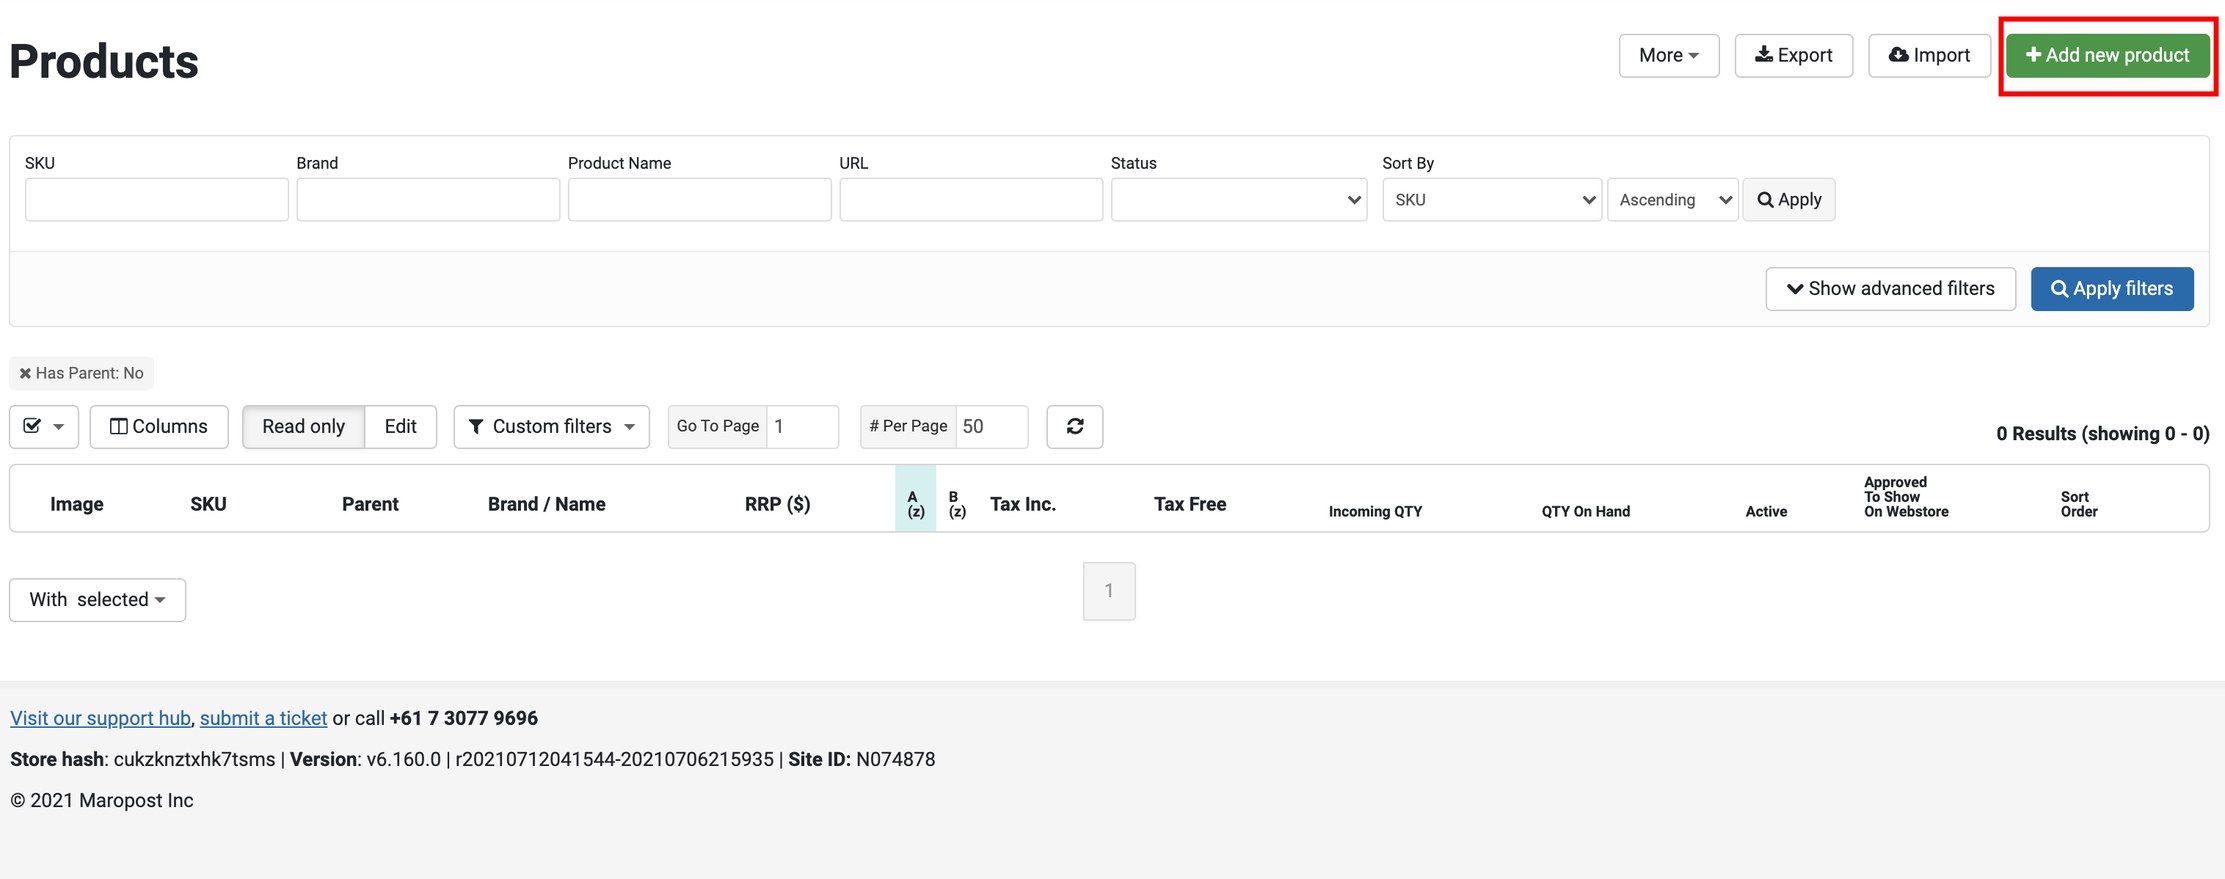
Otherwise if you have products already created in your store you want to then click the Add new product button on the top right hand side of the page to start creating our parent container product. Image reference below.
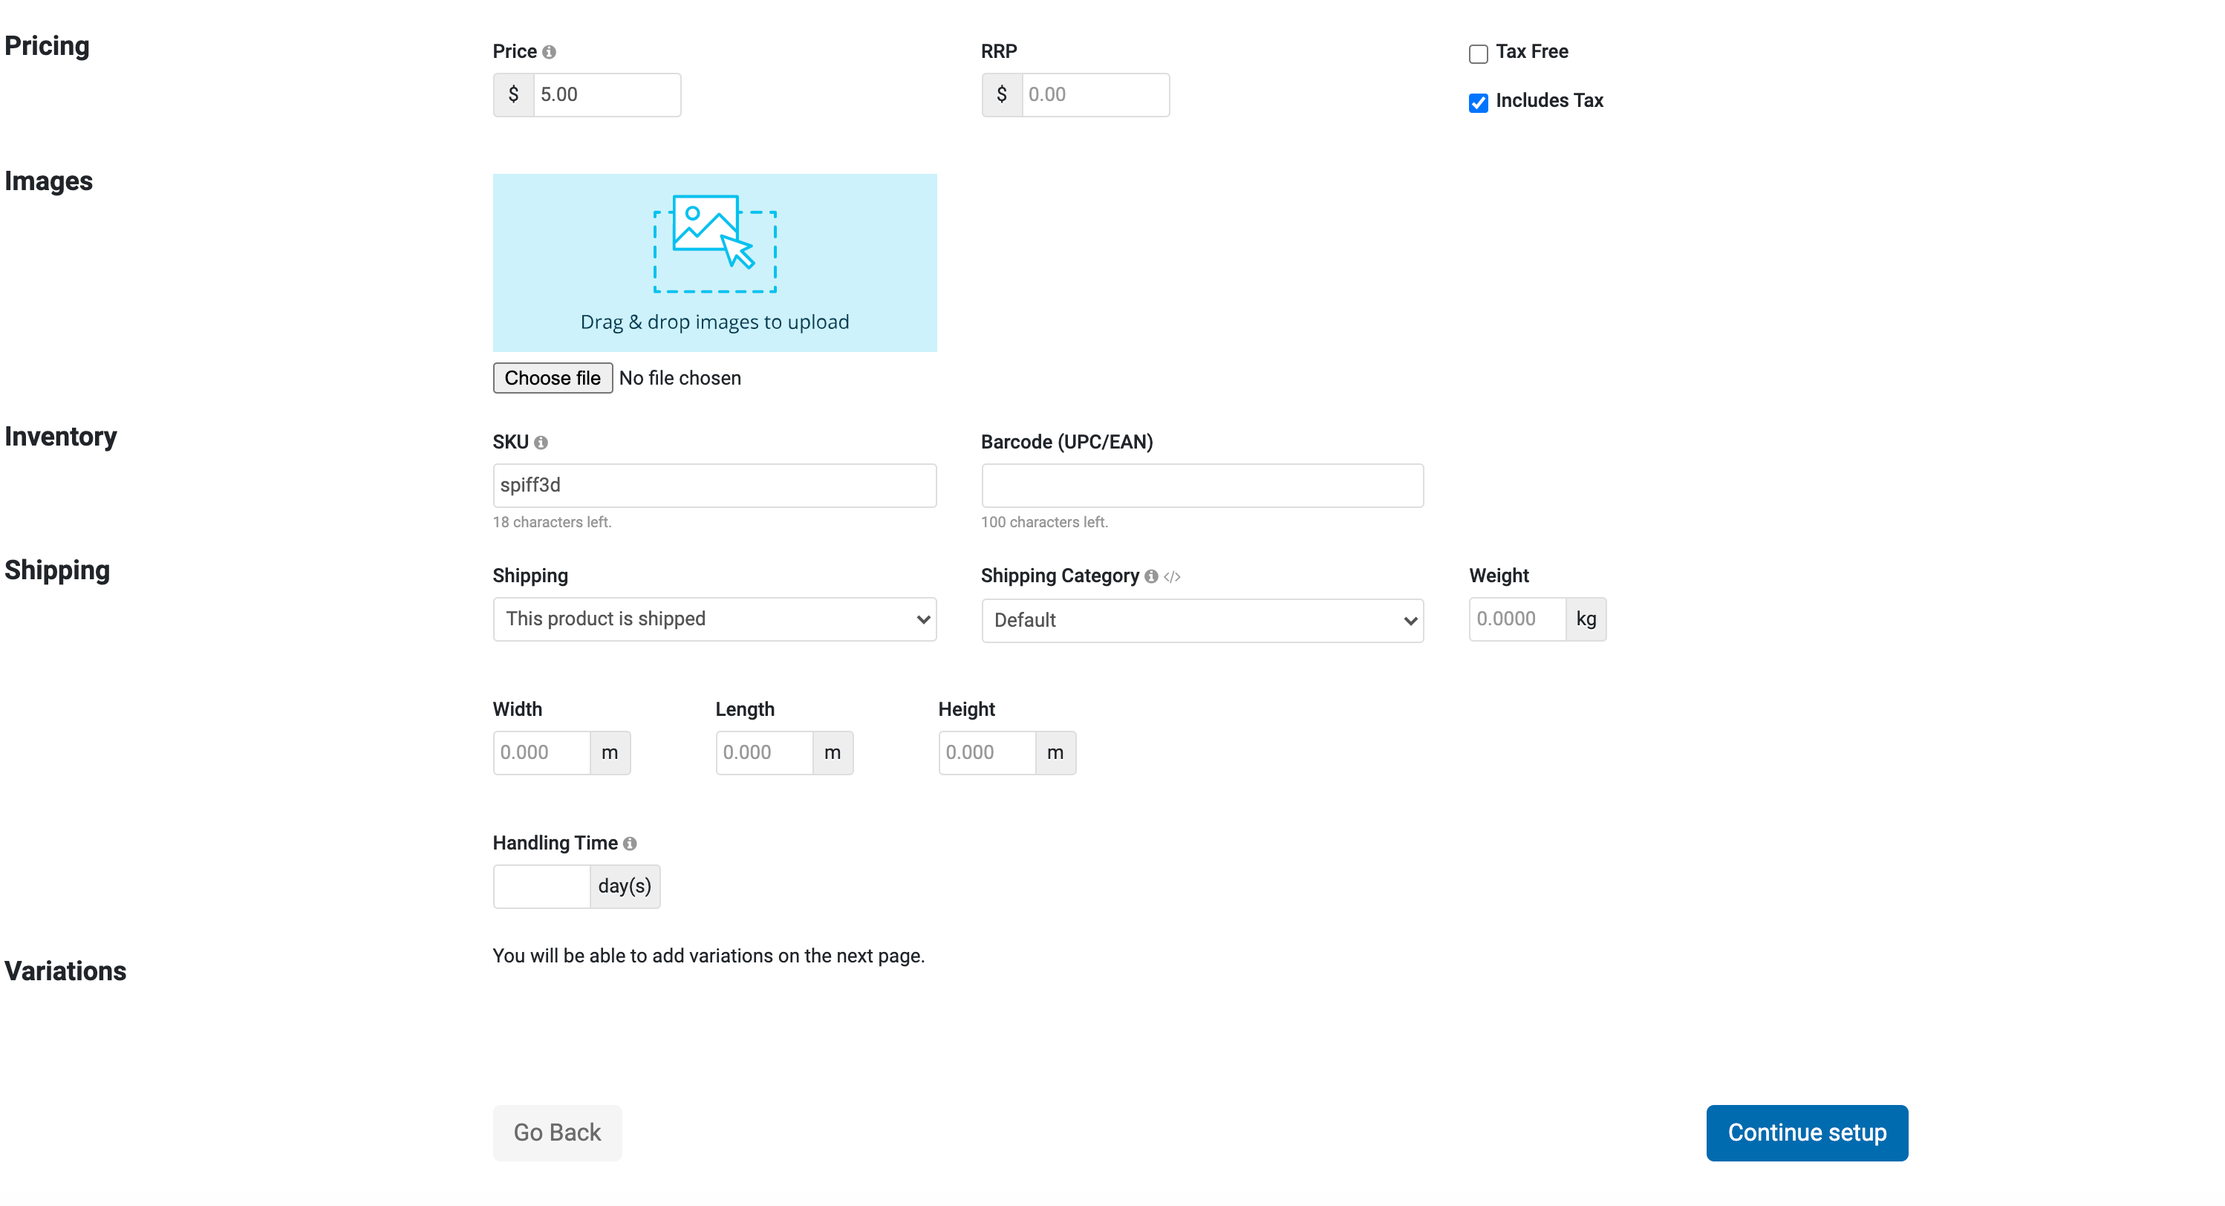
Configuring The Parent Product Container
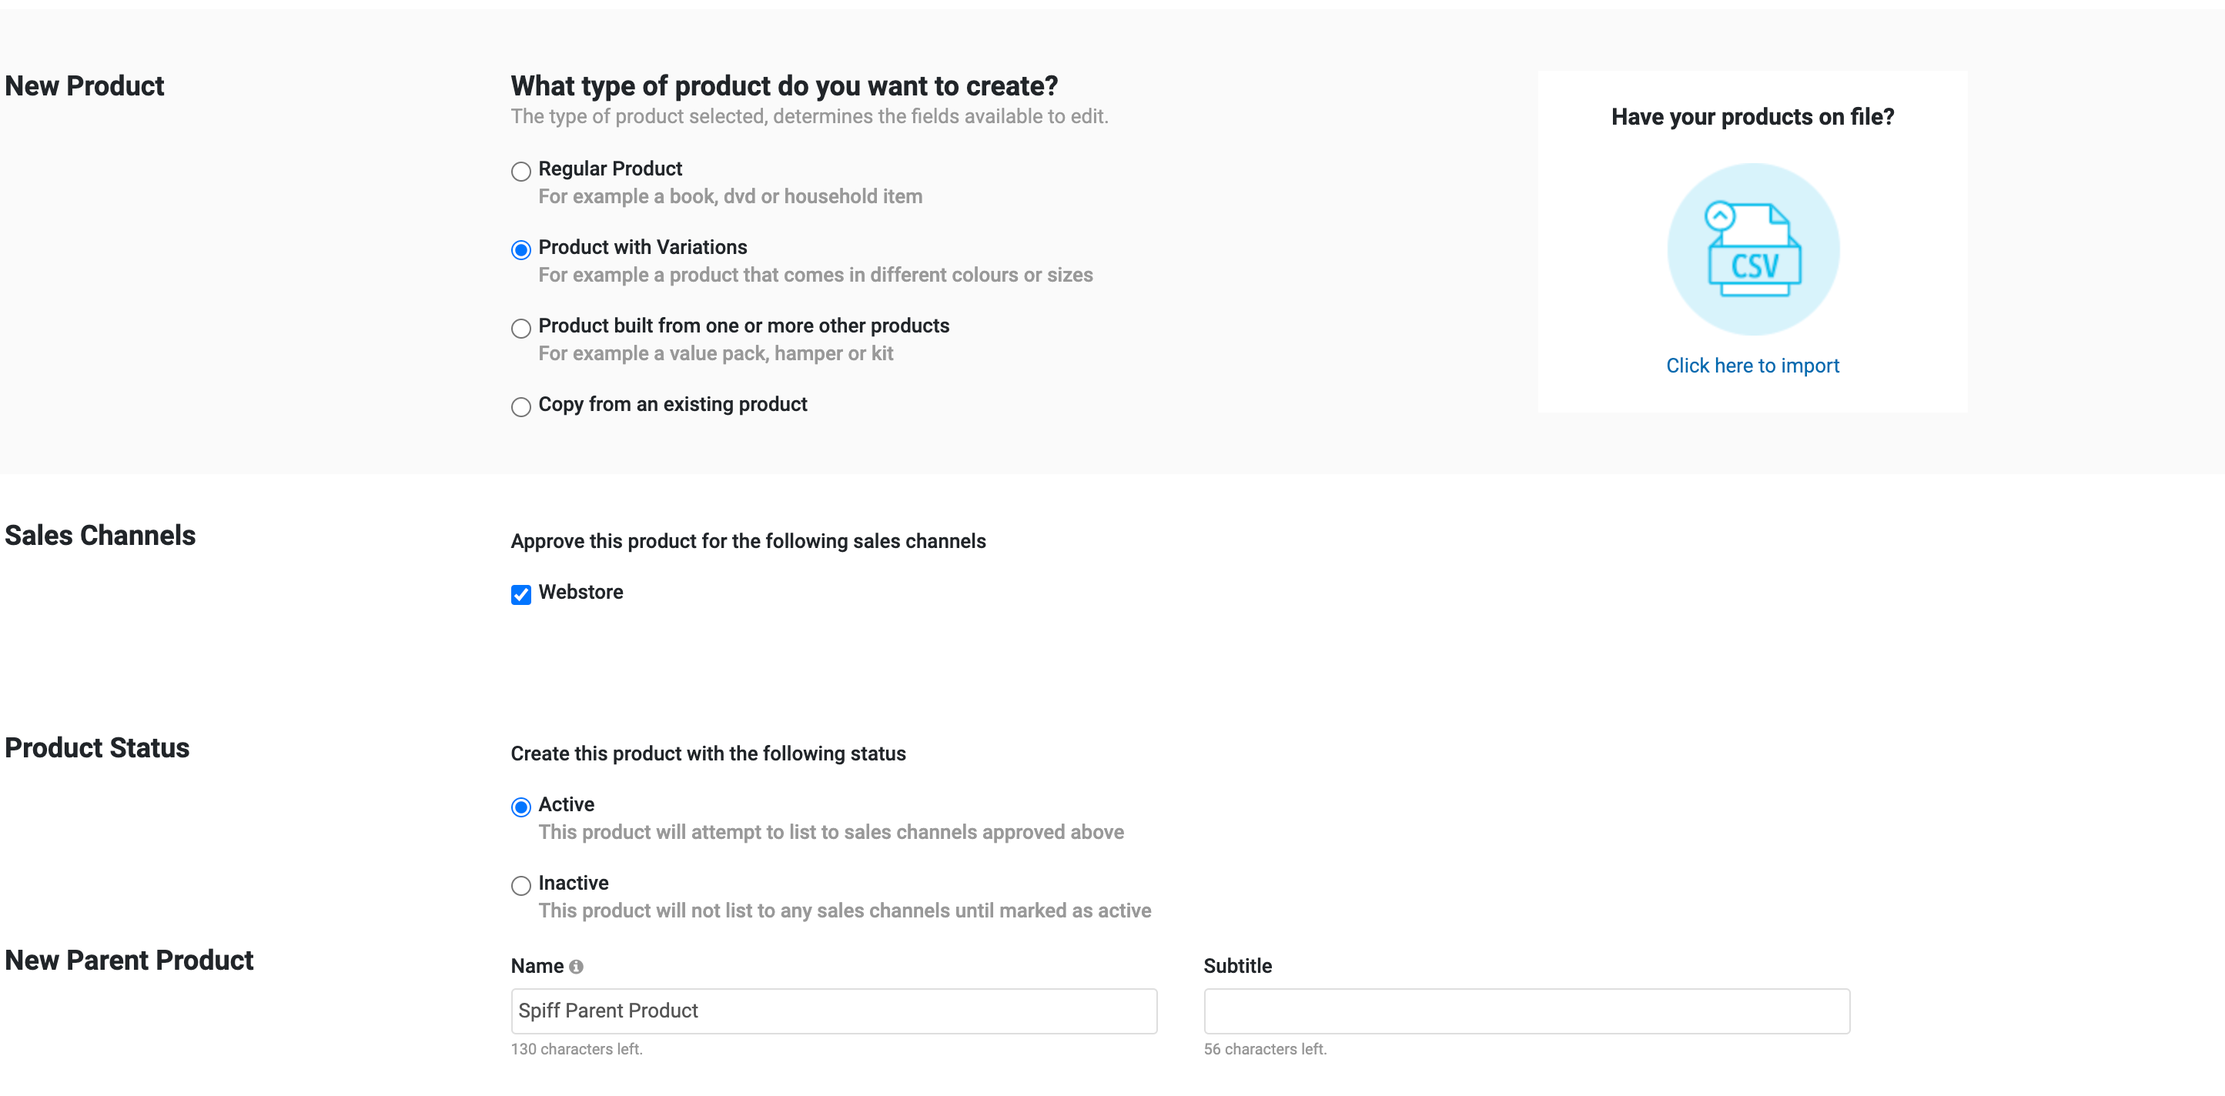
- You want to then toggle Product with Variations under New Product section
- Toggle Webstore under Sales Channels
- Toggle Active under Product status
- Add a name for your product under New Parent Product (eg. Shoe, t-shirt)
- Add a price for your product (This price must be the same price of the spiff product created in hub under Base price) under Pricing
- Add a Image(s) for the product under Images
- Add a SKU for your product under Inventory (eg. spiff3d)
Any other details that need to be added feel free to do so. To set up the design products this is all the information we are gonna need. Proceed to click Continue setup button on the bottom right hand side of the page. Image reference below.
Setting Up Custom Script
At this point we have successfully created a new parent product but how do we get the spiff button to render on our page so we can click on it and initialise the experience? To do this we need to add some custom code in our Neto Custom Script section. But before we proceed to add our custom code we need to navigate to the Webstore Templates section in our Neto c-panel via the Settings & Tools.
Upon clicking into this section we are greeted with the stores template code. We specifically want to edit the product templates. Navigate to Web Themes → storefront → templates → products → includes → buying_options.template.html. If successful you should see this page down below.
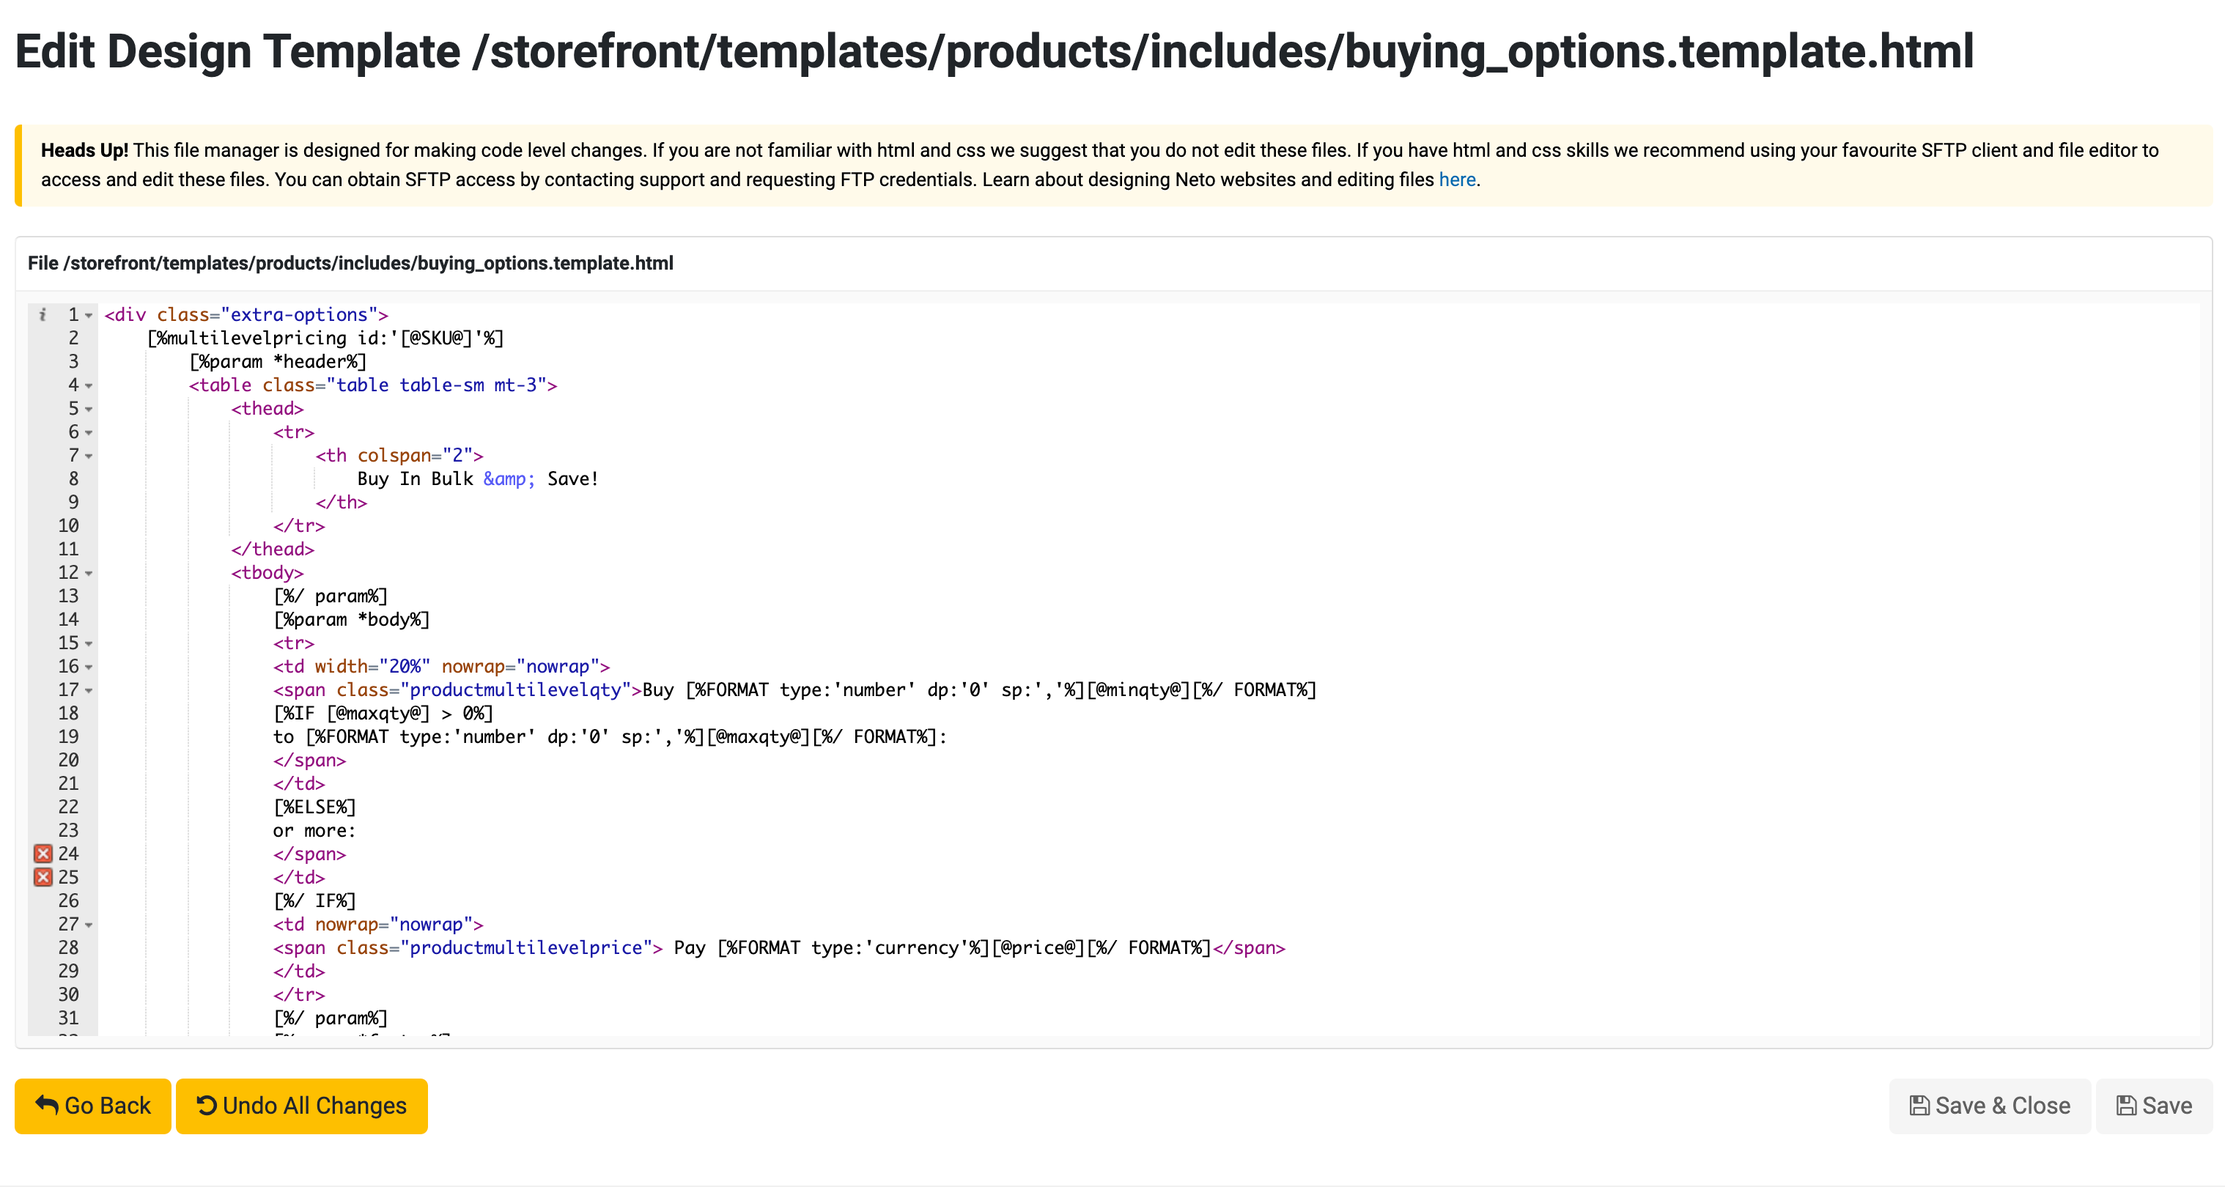
Press onto any line in the code so we can start editing. If you are on a Mac press Command + F and if you are on Windows press Ctrl + F to bring up a search bar in the top right hand side of the code. Enter into the search bar add to cart to direct you to the correct area of the code we want to edit. Image reference below.
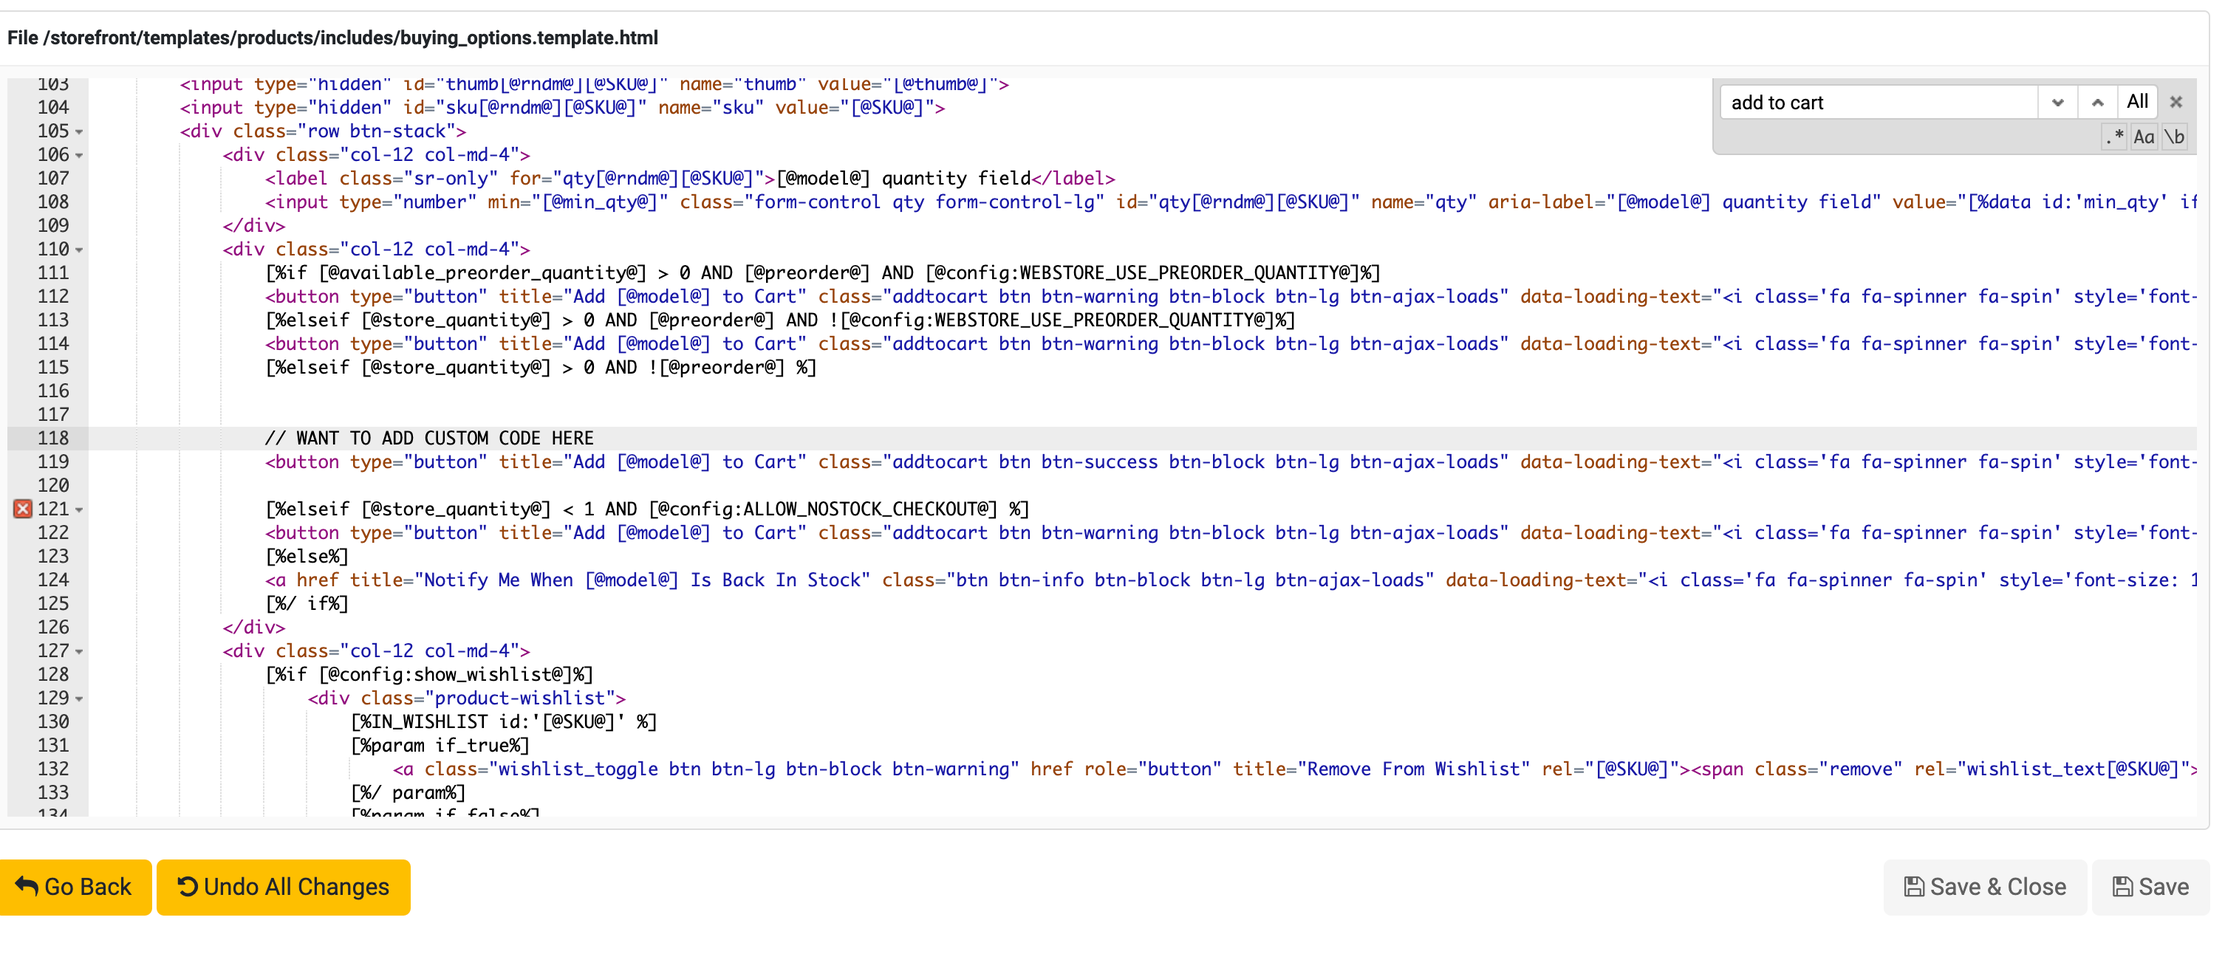
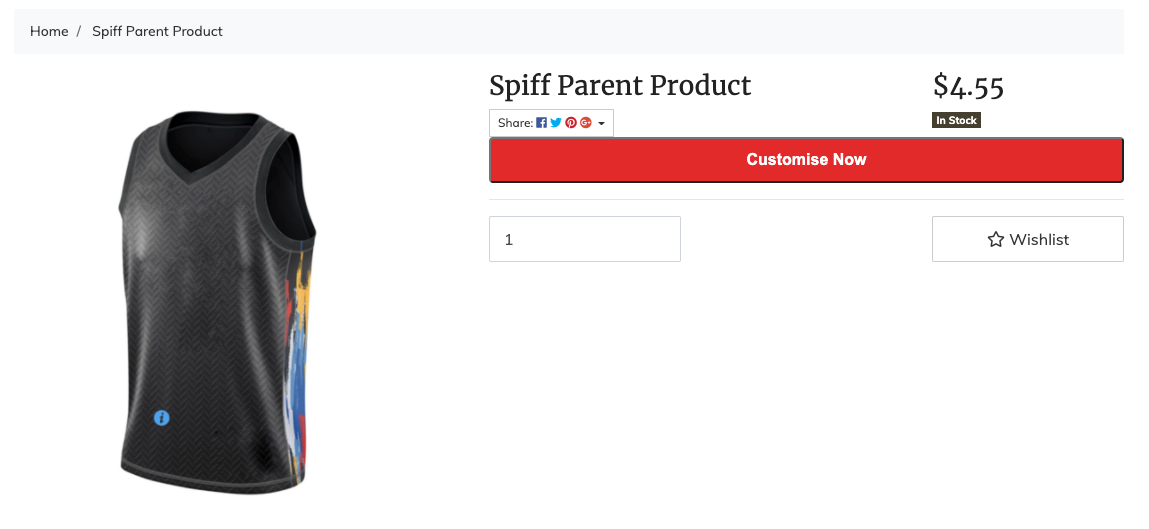
Add the block of code below to create a space where we can place our spiff button via the custom script.
<div id='spiff-product'></div>We then want to add the next block of code into the add to cart button tag so we can hide the cart button once our spiff button renders. (If this functionality is unwanted then feel free to skip this step)
data-spiff-hide data-product-id="[@SKU@]"Your code should look something like this:

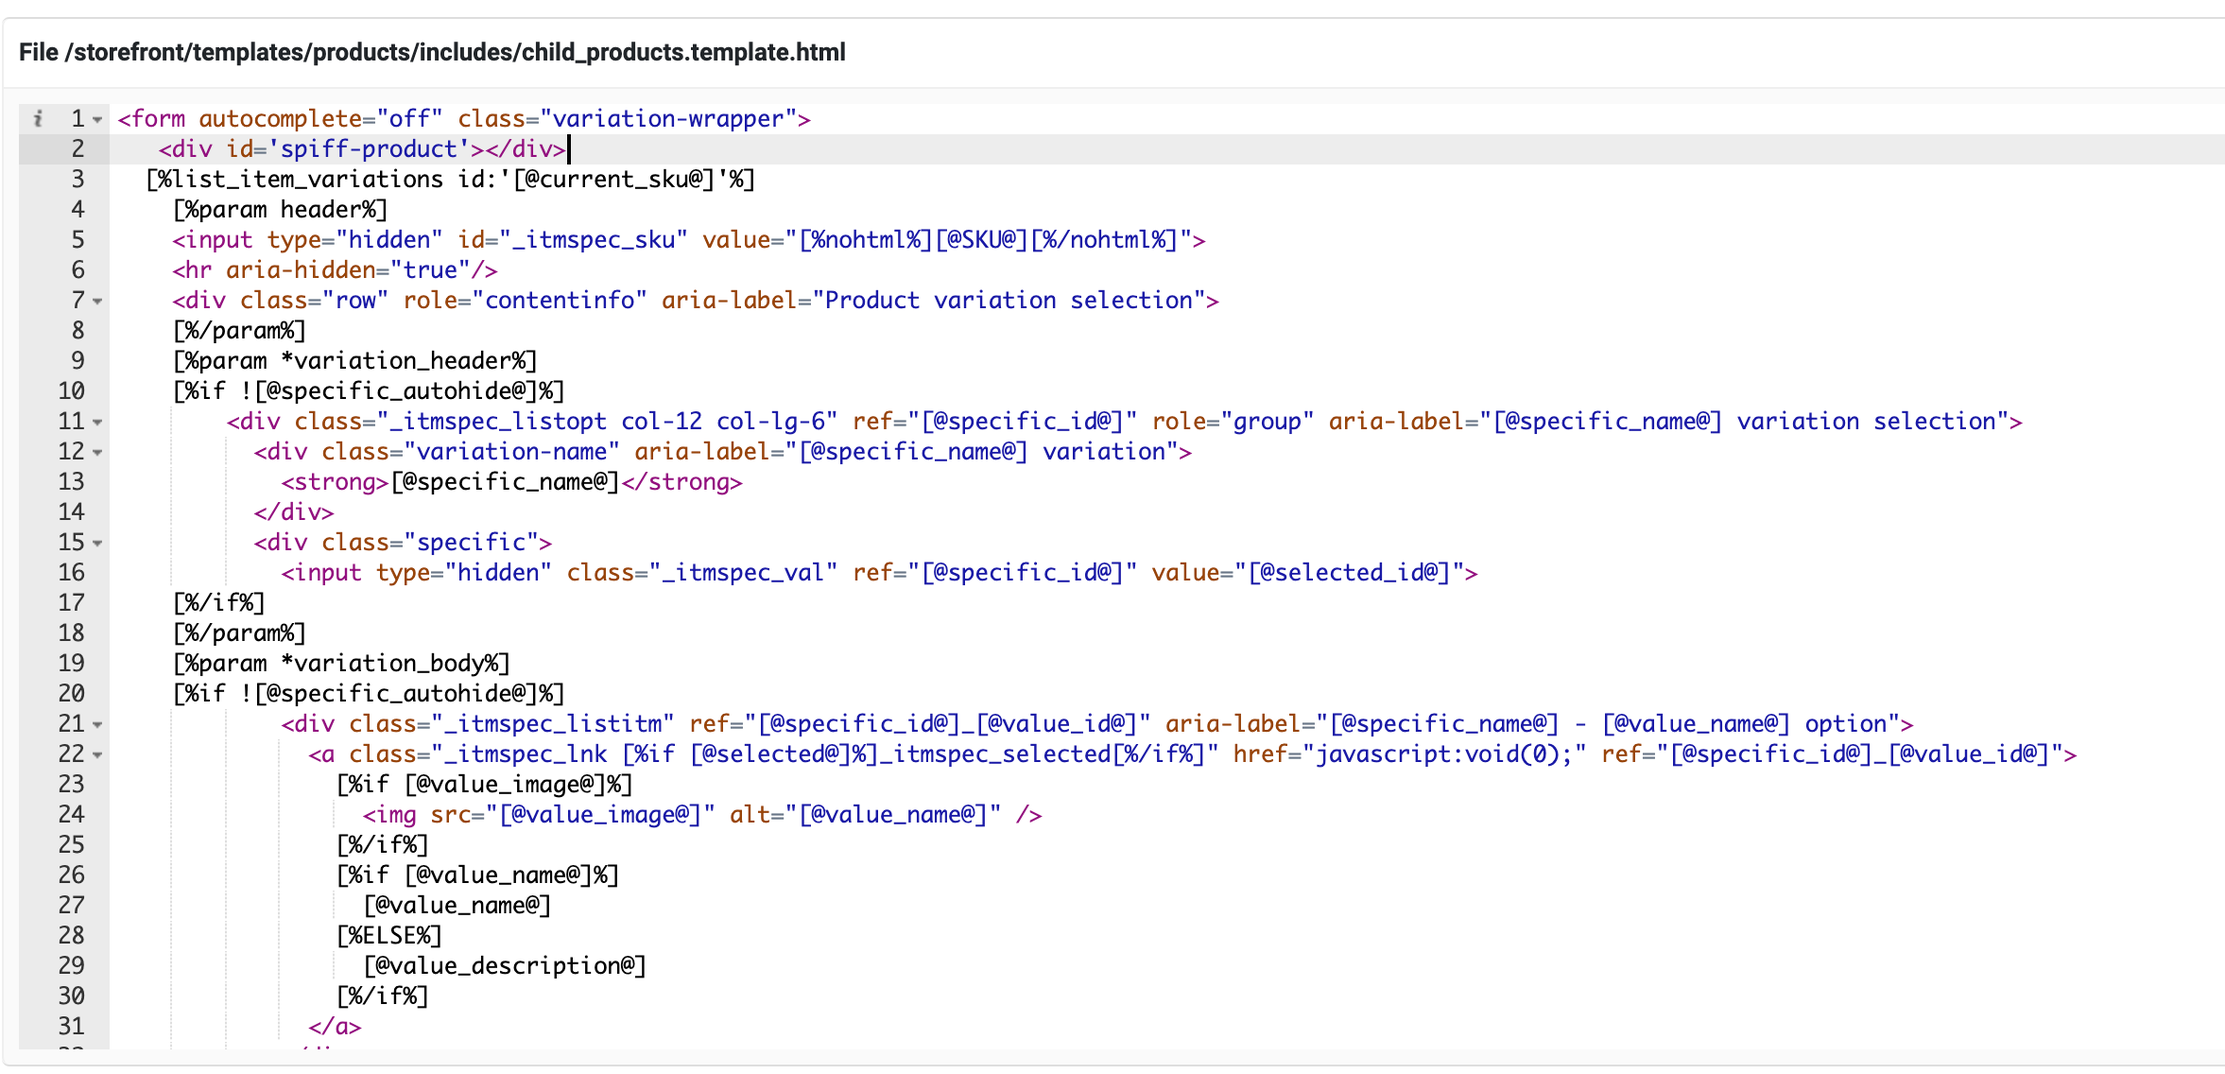
Once we have finished editing this template we want to save and navigate back to the template page we were on before. This time navigate to Web Themes → storefront → templates → products → includes → child_products.template.html. If successful you should see this page down below.
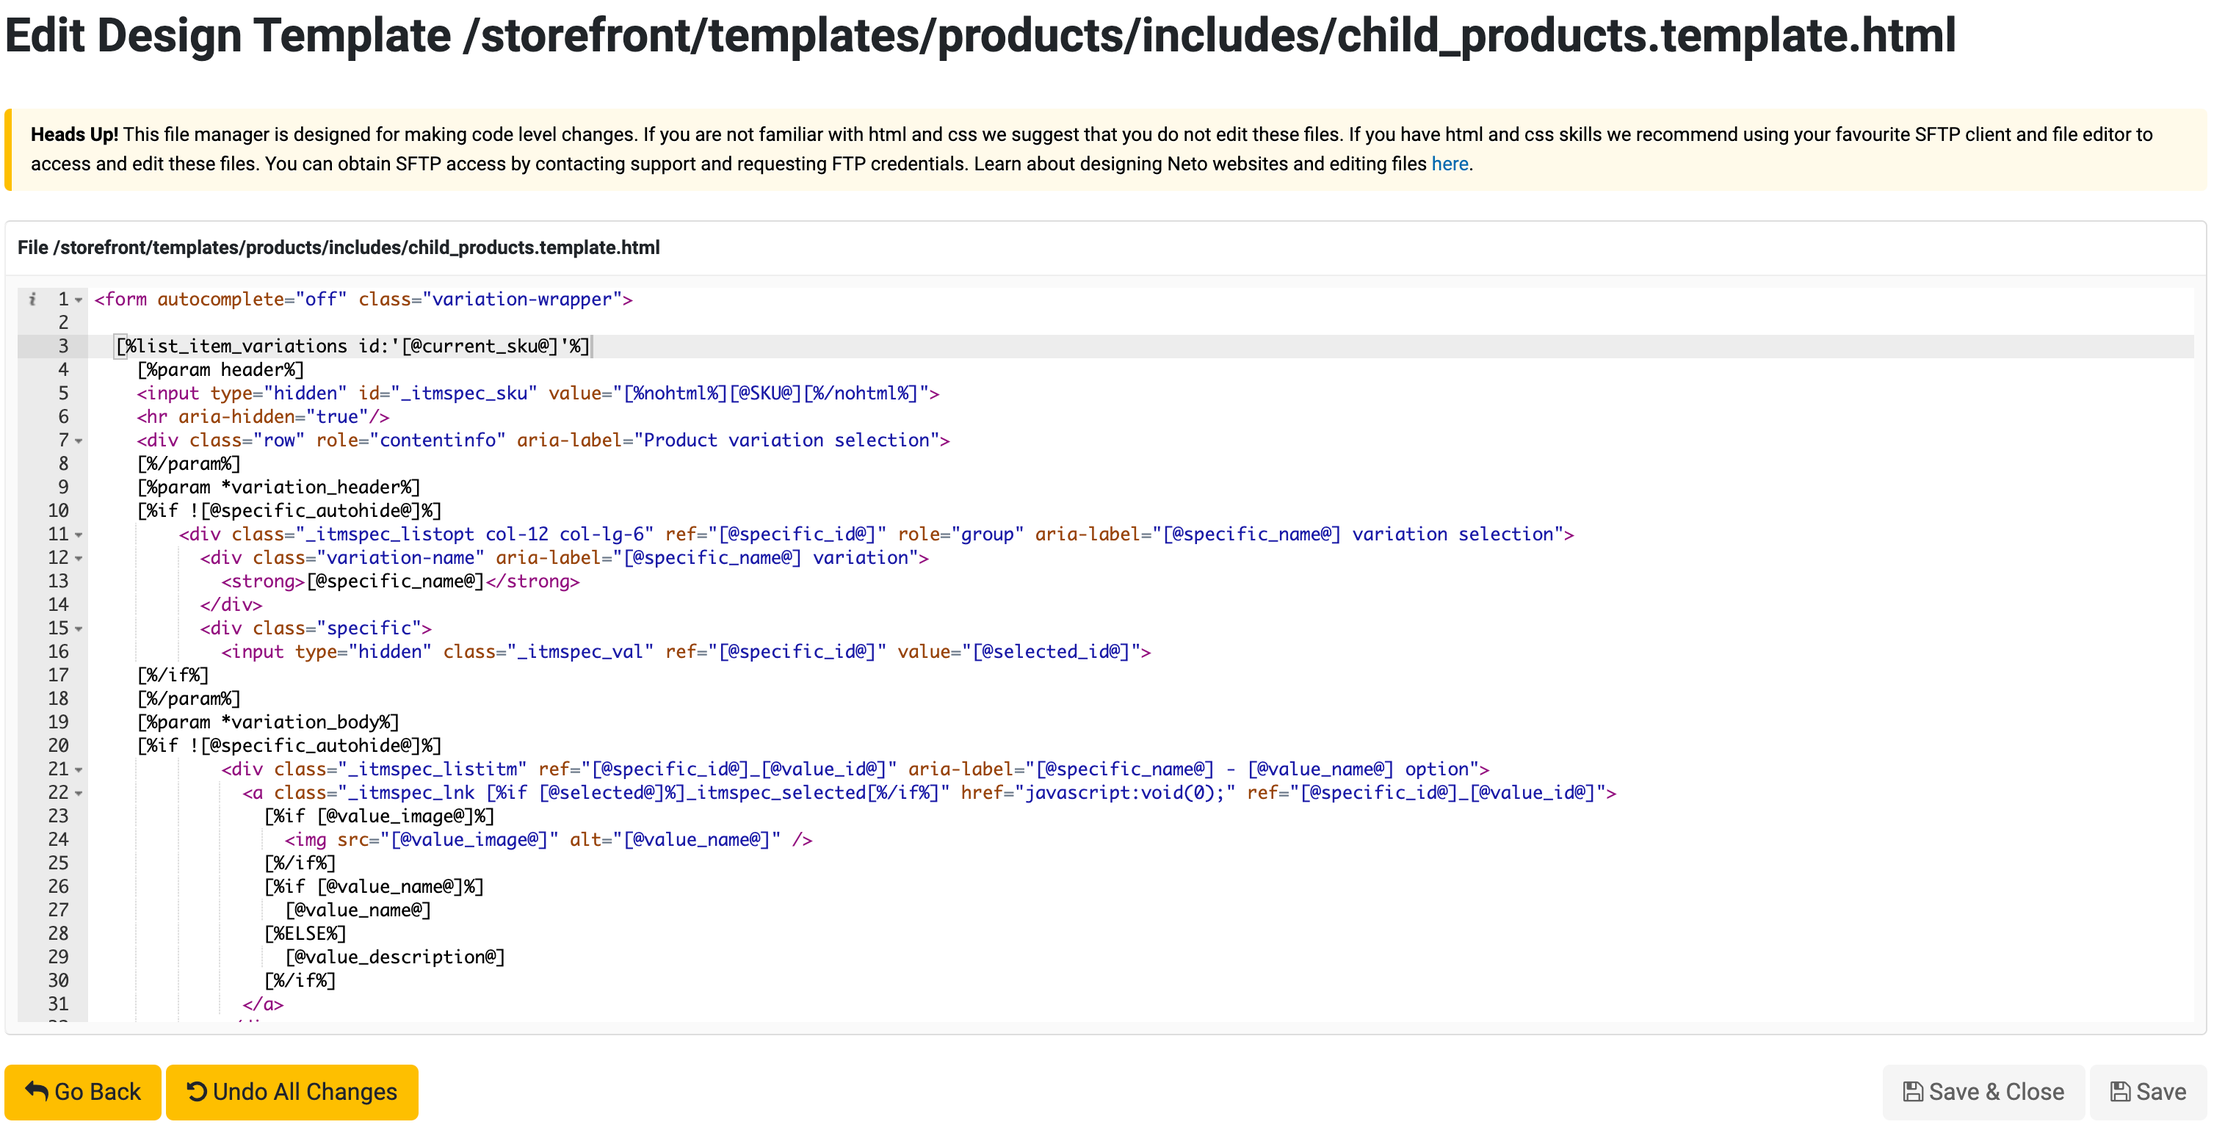
You want to then add this block of code on line 2.
<div id='spiff-product'></div>Remember to save and quit once you have edited the code.
Your code should look something like this.
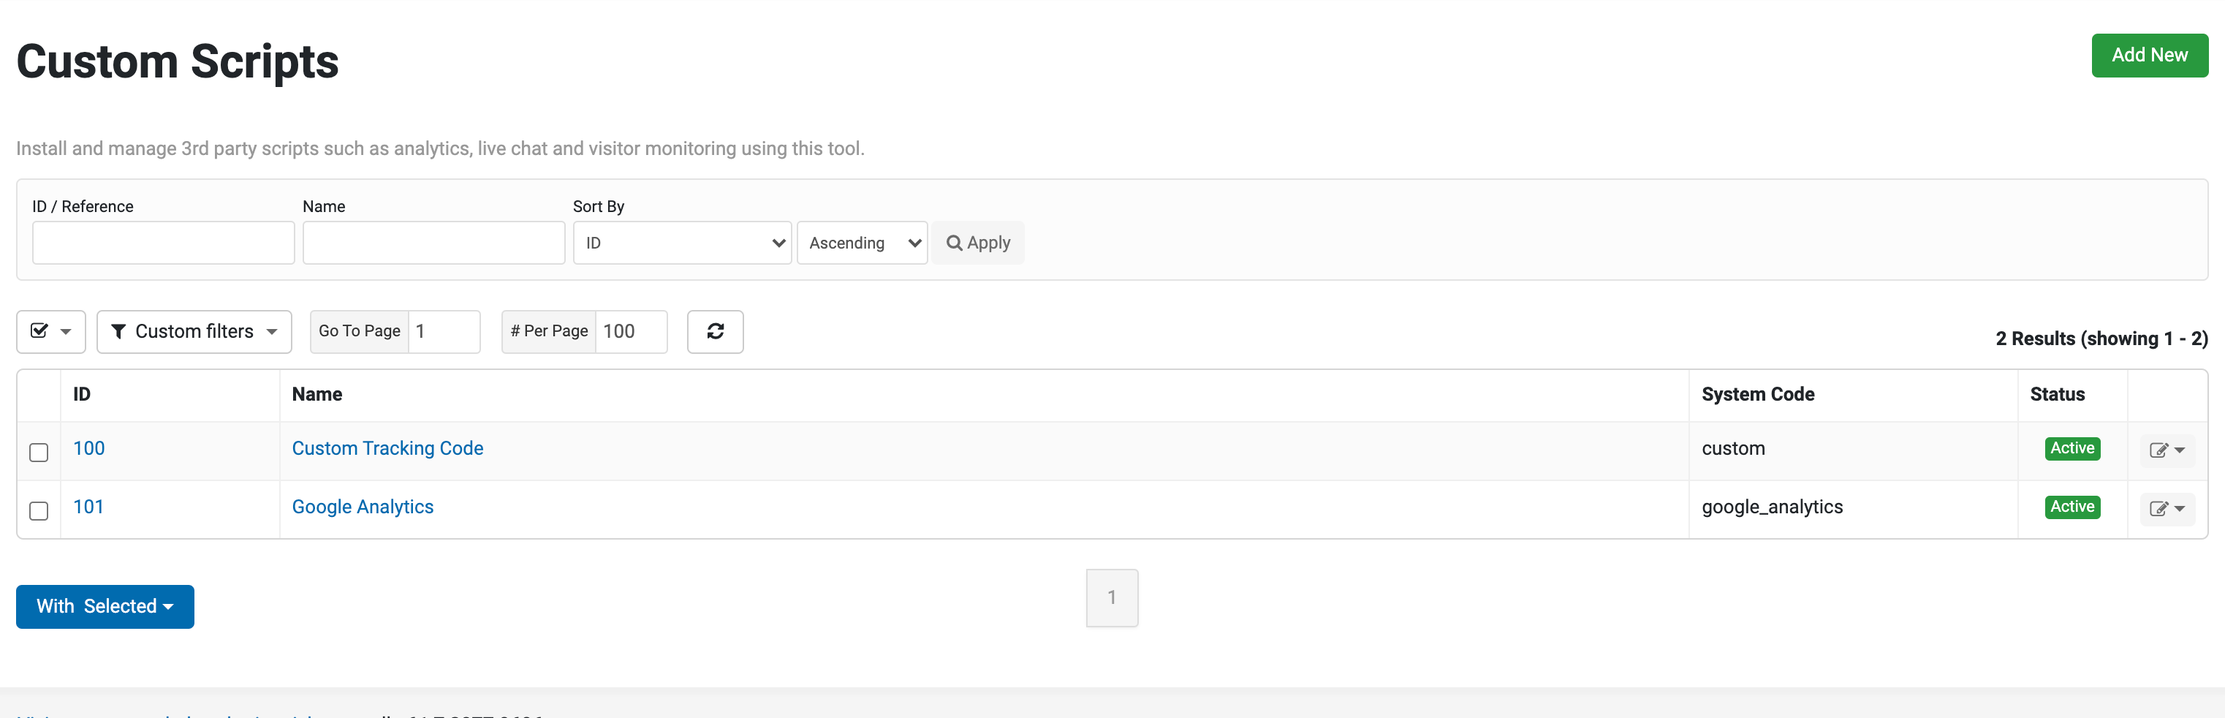
We have finished editing the template files. Now we need to navigate to the Custom Scripts section via Settings & Tools from the left side bar. Then search for Custom Scripts and click onto it. If successful you should see the page below.
Steps To Add Custom Code
- Press on the Add New button to add a new custom script into our store.
- Name the custom script something like Spiff-Button-Design-Product.
- At the bottom of the page press on Product page (under description)
- Add this block of code in the field and press Save in the bottom right hand side of the page (Follow instructions by Neto to save the script and always double check to see if your changes have been saved)
<script type="text/javascript" async src="https://assets.spiff.com.au/api.js"></script>

<script>
var pageSessionId;
var openDisplayProductWorkflowForProduct[@SKU@];

window.addEventListener('SpiffApiReady', function() {
    console.log("I have entered!");
    const product = new window.Spiff.Product({
       integrationId: '[@config:host_name@]',
       productId: '[@sku@]'
    });

const hideElements = () => {
           const elements = document.querySelectorAll('[data-spiff-hide]');
           elements.forEach(el => {
               const externalProductId = el.getAttribute('data-product-id');
               if (externalProductId === '[@sku@]') {
                   el.style.display = 'none';
               }
           });
}

 product.on('ready', () => {
             hideElements();

               if (document.getElementById("spiff-product")) {
                document.getElementById("spiff-product").innerHTML = `
                <button
                    class='spiff-api-button btn btn-block btn-primary btn-loads'
                    id='spiff-product'
                    data-product-id='[@sku@]'
                    onclick="openDisplayProductWorkflowForProduct[@sku@](event)"
                    style="display: none;height:46px;margin-top:20px"
                >
                    Customise Now
               </button>
        `;
        }
        else {
             console.log("No spiff element found inside theme code!");
        }

             const buttons = document.querySelectorAll('.spiff-api-button[data-product-id="[@sku@]"]');

             if (pageSessionId === undefined){
                pageSessionId = window.Spiff.Analytics.createPageSession();
             }
             for (button of buttons) {
                 button.style.display = 'block';
             }
       });
       product.confirmActive();

openDisplayProductWorkflowForProduct[@sku@] = (event) => {
           event.target.disabled = true;
           event.preventDefault();
           event.stopPropagation();

           const spinnerSvg = document.createElementNS('http://www.w3.org/2000/svg', 'svg');
            spinnerSvg.setAttribute('height', event.target.clientHeight * 0.4);
            spinnerSvg.setAttribute('width', event.target.clientHeight * 0.4);
            spinnerSvg.setAttribute('viewBox', '0 0 66 66');
            spinnerSvg.animate([{transform: 'rotate(0deg)'},{transform: 'rotate(360deg)'}], {duration: 1000, iterations: Infinity});
            const spinnerCircle = document.createElementNS('http://www.w3.org/2000/svg', 'circle');
            spinnerCircle.setAttribute('cx', 33);
            spinnerCircle.setAttribute('cy', 33);
            spinnerCircle.setAttribute('fill', 'none');
            spinnerCircle.setAttribute('r', 30);
            spinnerCircle.setAttribute('stroke', 'black');
            spinnerCircle.setAttribute('stroke-width', 6);
            spinnerCircle.style = 'stroke-dasharray:45 180;';
            spinnerSvg.appendChild(spinnerCircle);
            event.target.appendChild(spinnerSvg);

           const transactionOptions = {
               presentmentCurrency: '[@config:defaultcurrency@]',
               product: product,
               shouldCreateDesignProduct: true,
               pageSessionId
           };
           const transaction = new window.Spiff.Transaction(transactionOptions);
           console.log(transaction);
           transaction.on('quit', () => {
               event.target.removeChild(spinnerSvg);
               event.target.disabled = false;
               console.log("The user exited before completing their design");
           });
           transaction.on('complete', async (result) => {
           document.getElementById("spiff-product").innerHTML = `
                    <input type="hidden" id="spiff_sku" value='${result.designProductId}' />
                     <input type="hidden" id="spiff_qty" value='1' />
              `;
             $.addCartItem('spiff_sku','spiff_qty');
             event.target.removeChild(spinnerSvg);
             event.target.disabled = false;
           });
           transaction.execute();
       };
});
</script>
Sync Spiff Product With Neto Product
The last step to this long journey is to now sync the spiff product created in Hub with your new parent container product. This syncing will allow the button to render on the correct page with the correct workflow it has been assigned.
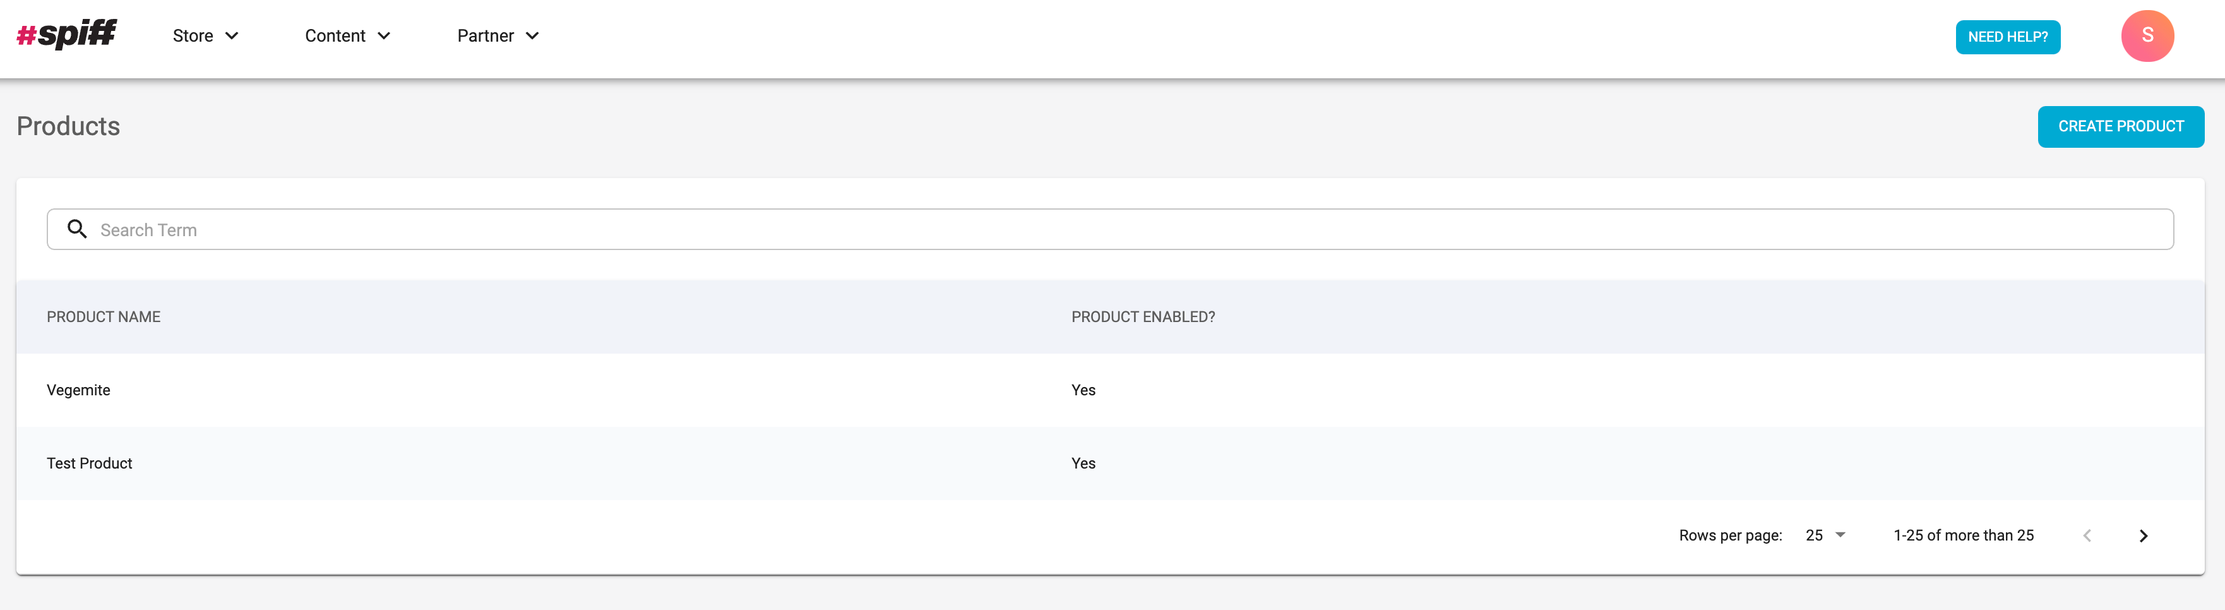
To do this we need to navigate back to hub by pressing on the Configure button on the Spiff add-on in the add-on store. Once in Hub navigate to Store → Products via the nav bar and you will either see a list of created products or no products. Image reference below.
Click on a product you wish to sync to Neto and scroll down to Product Integrations. Image reference below.
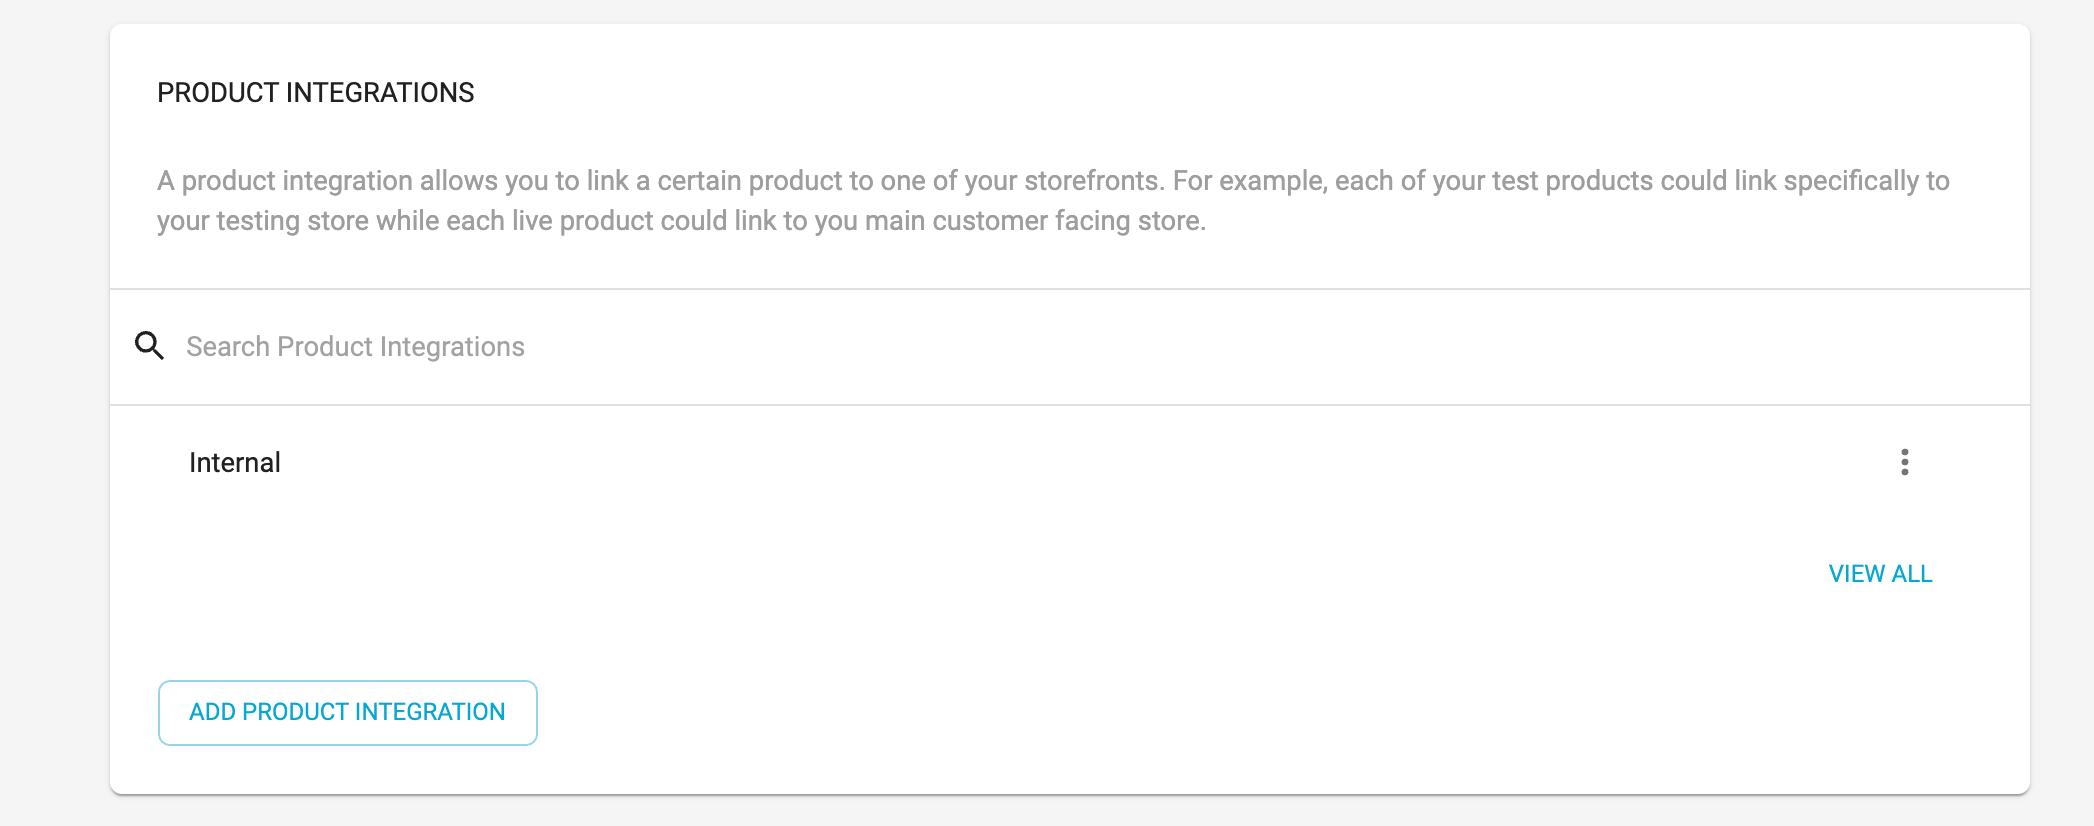
Add a product integration (which will be the new integration that has been created for you) and press on the 3 dots next to your integration to edit your External Product Id. This Id will be the SKU you have given to your parent container product in Neto. Press Save changes and you should now see your button rendered on the product page in Neto. Image reference below.